Update-Zeitpläne erstellen, bearbeiten, deaktivieren und löschen
Zuletzt aktualisiert am
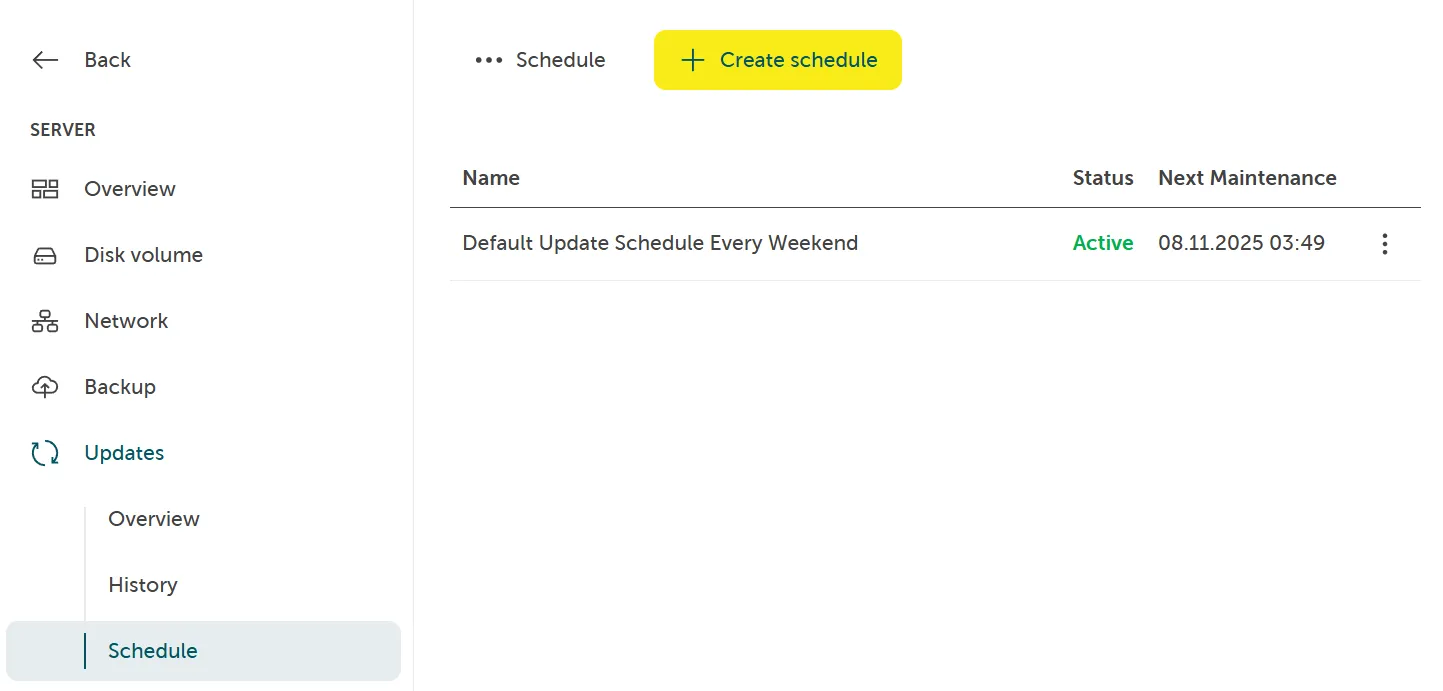
Aktuelle Update-Zeitpläne anzeigen
Abschnitt betitelt „Aktuelle Update-Zeitpläne anzeigen“Navigieren Sie zu Server > Updates > Zeitplan, um Ihre Update-Zeitpläne anzuzeigen. Wenn kein Update-Zeitplan vorhanden ist, führen Sie die unten aufgeführten Schritte aus, um einen zu erstellen.
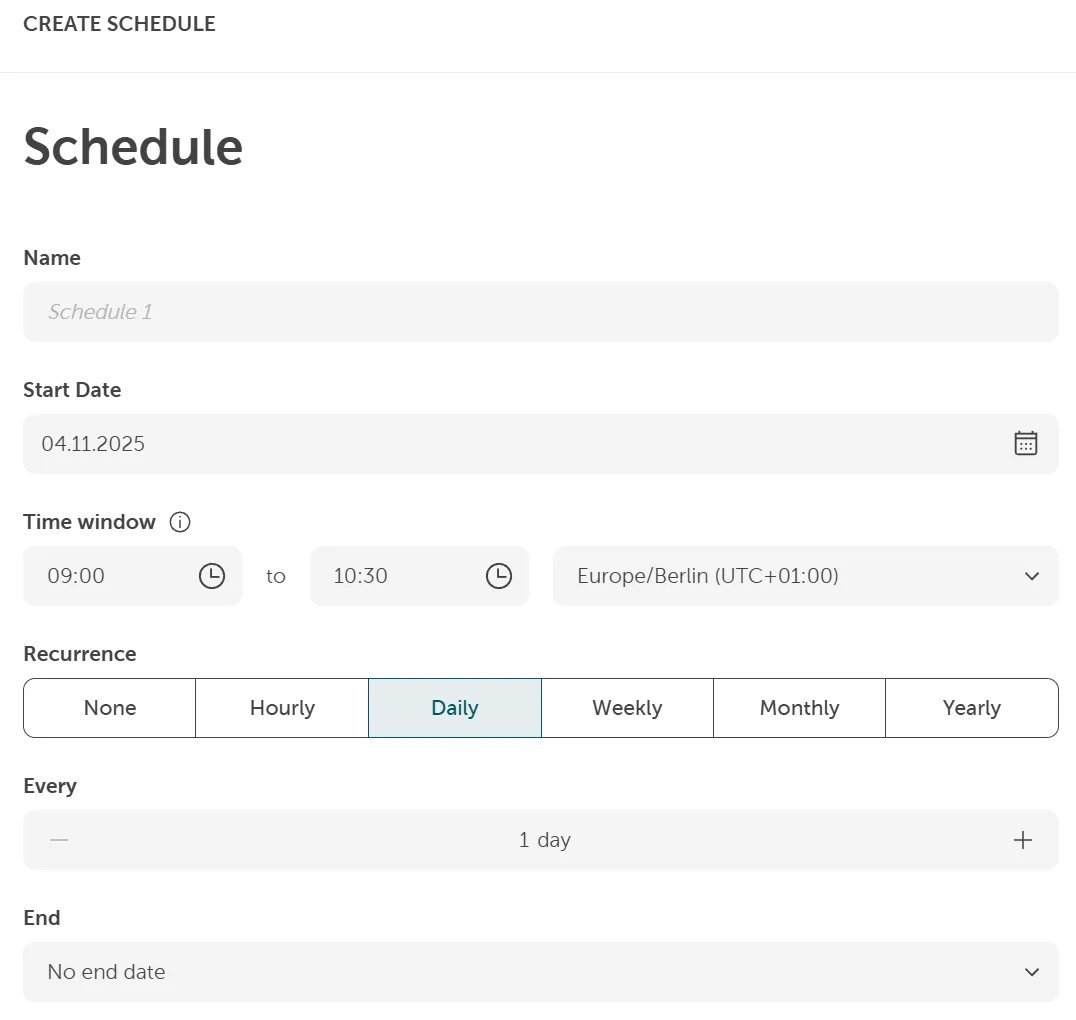
Update-Zeitplan erstellen
Abschnitt betitelt „Update-Zeitplan erstellen“Wenn Sie einen zusätzlichen benutzerdefinierten Zeitplan benötigen oder den Standard-Update-Zeitplan ändern möchten, können Sie einen erstellen, indem Sie die folgenden Schritte ausführen.
Sie können benutzerdefinierte Update-Zeitpläne mit einer spezifischen Startzeit und Wiederholungseinstellungen erstellen. Sie können stündliche, tägliche, wöchentliche, monatliche und jährliche Zeitpläne erstellen. Fortgeschrittene Zeitpläne wie an jedem letzten Wochentag im Monat sind ebenfalls möglich.
-
Navigieren Sie zu Server > Updates > Zeitplan.
-
Klicken Sie auf Zeitplan erstellen.
-
Geben Sie die folgenden Informationen ein:
- Name
- Startdatum
- Startzeit
- Wiederholung
- Name der Sicherung
- Aufbewahrungszeitraum
- Disk-Volume auswählen
-
Klicken Sie auf Kostenpflichtig bestellen
Update-Zeitplan bearbeiten
Abschnitt betitelt „Update-Zeitplan bearbeiten“Um einen vorhandenen Zeitplan zu bearbeiten:
-
Navigieren Sie zu Server > Updates > Zeitplan. Wählen Sie den vorhandenen Zeitplan aus, indem Sie in der Liste auf diesen klicken.
-
Ein Popup zeigt die Daten des ausgewählten Zeitplans an. Ändern Sie die Daten und klicken Sie auf Speichern:

Update-Zeitplan deaktivieren
Abschnitt betitelt „Update-Zeitplan deaktivieren“Um einen Zeitplan vorübergehend zu deaktivieren:
-
Navigieren Sie zu Server > Updates > Zeitplan.
-
Öffnen Sie das Kontextmenü eines Zeitplans auf der rechten Seite und klicken Sie auf Deaktivieren:

Update-Zeitplan löschen
Abschnitt betitelt „Update-Zeitplan löschen“Um einen Zeitplan zu löschen:
-
Navigieren Sie zu Server > Updates > Zeitplan.
-
Wählen Sie den vorhandenen Zeitplan aus, indem Sie das Kontextmenü auf der rechten Seite öffnen.
-
Klicken Sie auf Löschen:
