Create an ALB
Last updated on
STACKIT Application Load Balancers (ALBs) can be created via the STACKIT Portal, STACKIT API, or the STACKIT Terraform Provider.
Preparation
Section titled “Preparation”Before you create an ALB, there are some considerations you should make. Use the list below to decide and collect the information you need before you start:
- Naming: Choose a DNS-compliant name (lowercase, hyphens, numbers).
- Visibility: Decide whether the ALB is public or private. For public access, determine if you will attach an existing Public IP or let STACKIT assign one automatically. For private access, expect an automatically assigned private IP.
- Network: Determine the STACKIT Network where the ALB will operate. All targets must be in the same network as the load balancer.
- Target pools and targets: For each listener, define a target pool with a target port and the backend targets that will receive traffic. Collect each target’s IP address (and optional display name). Ensure every target resides in the same network as the ALB.
- Health checks: Choose TCP or HTTP. For TCP, the ALB checks connectivity on the target port. For HTTP, configure the check path (e.g.
/health) and the list of OK status codes (e.g.200). Defaults are: interval 5 seconds, down after 3 failed checks, up after 1 successful check. Pick thresholds and interval as needed. - Ports, hosts and rules (listeners): For each listener, specify the external port, a host name (e.g.
stackit.cloudor*.stackit.cloud), and rules that route to a target pool. Each rule must define a path type (exact or prefix) and a path (e.g./foo). - Advanced listener settings:
- WebSocket: Enable only if your app needs WebSocket. Confirm the backend supports HTTP Upgrade and long-lived connections.
- HTTP headers: Pick header names and exact values that are reliably set by your app or gateway (e.g.
User-Agent: Mozilla/5.0). Avoid user-controlled headers. - Cookie persistence: Use when session affinity is required. Choose a cookie name and TTL (in seconds). Ensure clients accept the cookie.
- Query parameters: Route only on parameters that are consistently present. Define name and exact value to match (e.g.
name=admin).
- Security posture: If exposing admin or sensitive ports publicly, plan ACL rules (i.e. permitted source IP ranges).
Optionally, you can get an overview of the impending costs by using the STACKIT Pricing Calculator to estimate expenses based on your planned ALB configuration. When using the Portal, costs will be calculated and displayed dynamically in the UI during the creation process.
Process
Section titled “Process”Follow the steps below to create an ALB using your preferred method.
Visit the STACKIT Portal, select your desired project and follow these steps:
- In the sidebar under Networking, click on Application Load Balancer.
- Click the Create Application Load Balancer button.
- Fill in the required fields with the information you prepared earlier.
- Click the Order fee-based button to create the ALB.
Done! Your STACKIT Application Load Balancer is being created and will be ready to use shortly.
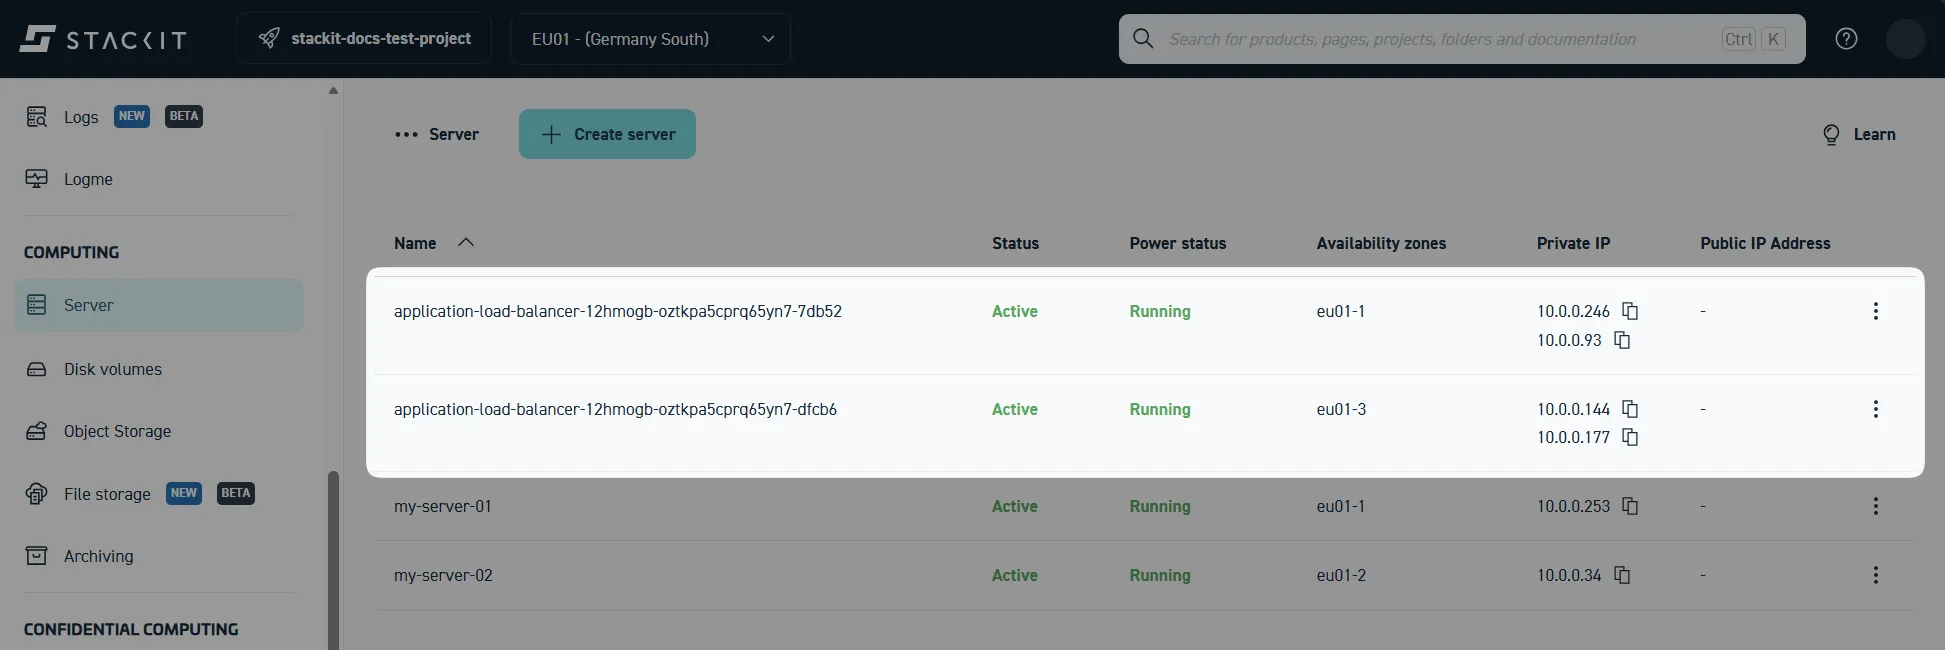
As a result, new instances will appear under Computing > Server, as demonstrated below. These instances represent the load balancer nodes that handle incoming traffic and distribute it to your defined targets:
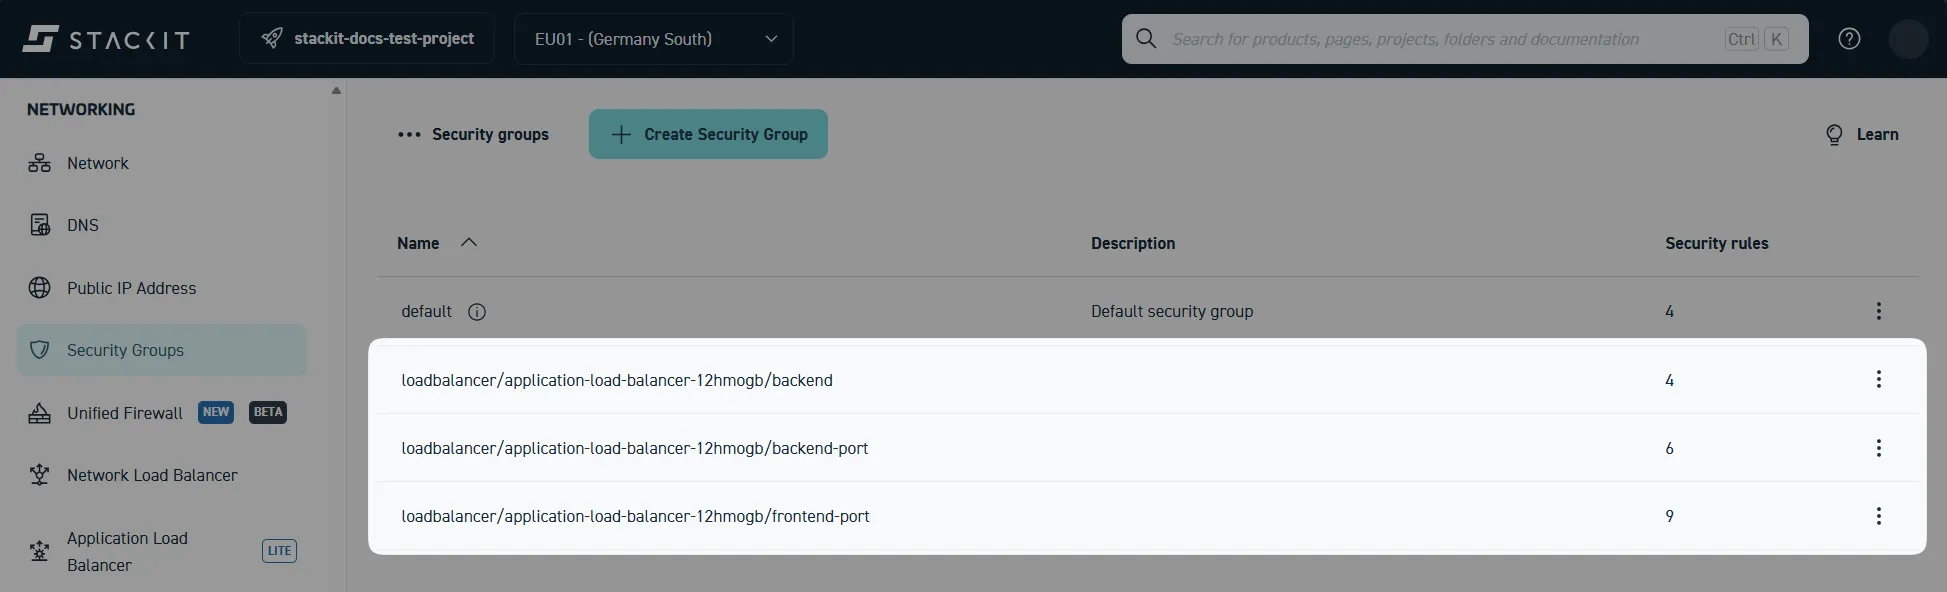
You may also find newly created security groups associated with your ALB under Networking > Security Groups. This will not be the case if you disabled the target security group assignment during ALB creation:
Prerequisites
Section titled “Prerequisites”In order to create a STACKIT Application Load Balancer via API, you need to acquire a temporary Bearer token for authentication under a Service Account.
- Read “Access services with a service account” to learn how to create a Service Account and generate a Bearer token.
- Read the STACKIT CLI Authentication Guide to learn more about possible CLI and environment setups that enable you to acquire Bearer tokens.
- Please refer to STACKIT Application Load Balancer API documentation to learn more about the available API endpoints, parameters and the structure of request/response bodies.
To validate this request functionality with real data, you can use UI-based API clients like Postman or Thunder Client, or command-line tools like cURL.
While direct API requests are useful for testing or creating resources programmatically via imperative scripts (e.g. Python or Go), for managing production infrastructure, it is highly recommended to use the STACKIT Terraform Provider. Terraform allows for declarative resource definition (Infrastructure as Code), handling the underlying API interactions—like the one detailed below—automatically in the background.
Request details
Section titled “Request details”Method: POST
Endpoint URL:
https://alb.api.stackit.cloud/v2/projects/{projectId}/regions/{region}/load-balancersHeaders:
Content-Type: application/jsonAuthorization: Bearer <your_bearer_token>
Request body:
{ "name": "demo-alb", "externalAddress": "45.xxx.xxx.xxx", "options": { "ephemeralAddress": false, "privateNetworkOnly": false }, "networks": [ { "networkId": "a8815d0c-874b-4e47-xxxx-xxxxxxxxxxx", "role": "ROLE_LISTENERS_AND_TARGETS" } ], "disableTargetSecurityGroupAssignment": false, "planID": "p10" "listeners": [ { "port": 80, "protocol": "PROTOCOL_HTTP", "http": { "hosts": [ { "host": "app.stackit.cloud", "rules": [ { "pathPrefix": "/", "targetPool": "demo-alb-tp-80" } ] } ] } } ], "targetPools": [ { "name": "demo-alb-tp-80", "targetPort": 80, "targets": [ { "displayName": "webserver01", "ip": "10.xxx.xxx.xxx" }, { "displayName": "webserver02", "ip": "10.xxx.xxx.xxx" } ] } ]}The data structure above represents a minimal ALB configuration. For more advanced configurations—which build upon this minimal setup—please refer to the advanced API templates.
You can find a working, up-to-date example of how to use the latest version of the stackit_application_load_balancer resource in the STACKIT Terraform Provider documentation.
To illustrate the basic structure of the ALB resource, a standalone configuration example is provided below.
resource "stackit_application_load_balancer" "example-alb" { project_id = "<your-project-uuid>" region = "eu01" name = "example-load-balancer" plan_id = "p10" listeners = [{ name = "my-listener" port = 443 http = { hosts = [{ host = "*" rules = [{ target_pool = "my-target-pool" web_socket = true query_parameters = [{ name = "my-query-key" exact_match = "my-query-value" }] headers = [{ name = "my-header-key" exact_match = "my-header-value" }] path = { prefix = "/path" } cookie_persistence = { name = "my-cookie" ttl = "60s" } }] }] } https = { certificate_config = { certificate_ids = [ "<your-1st-certificate-id>", "<your-2nd-certificate-id>", ] } } protocol = "PROTOCOL_HTTPS" waf_config_name = "my-waf-config" } ] networks = [ { network_id = "<your-network-uuid>" role = "ROLE_LISTENERS_AND_TARGETS" } ] options = { acl = ["123.123.123.123/24", "12.12.12.12/24"] ephemeral_address = true private_network_only = false } target_pools = [ { name = "my-target-pool" active_health_check = { interval = "0.500s" interval_jitter = "0.010s" timeout = "1s" healthy_threshold = "5" unhealthy_threshold = "3" http_health_checks = { ok_status = ["200", "201"] path = "/healthy" } } target_port = 80 targets = [ { display_name = "my-target" ip = "<your-target-server-ipv4>" } ] tls_config = { enabled = true skip_certificate_validation = false custom_ca = chomp(file("path/to/PEM_formated_CA")) } } ]}