Create organizations and spaces
Last updated on
In this topic we want to take a look at how to create organizations and spaces. Organizations (in short: orgs) are the top level virtual elements of the Cloud Foundry organizational model. They hold multiple spaces, which are areas in which you can host your applications. You can create orgs and spaces via the STACKIT Portal.
Check out our internal documentation to learn more about the general concept of organisations, spaces and user-roles.
Instructions
Section titled “Instructions”-
Open your project in the STACKIT Portal.
… and select the project, in which you want to create your Cloud Foundry organization.
-
Navigate to the Cloud Foundry tab in the sidebar.
Here you can see the navigation element you need to press to get to the Portals Cloud Foundry Overview, where you can create and manage Organizations:

-
Press Create organization in the Cloud Foundry overview.
Here you can see the two buttons you can trigger to open the organization creation screen in the Portals Cloud Foundry Overview, when you do not yet have a organization in your project:
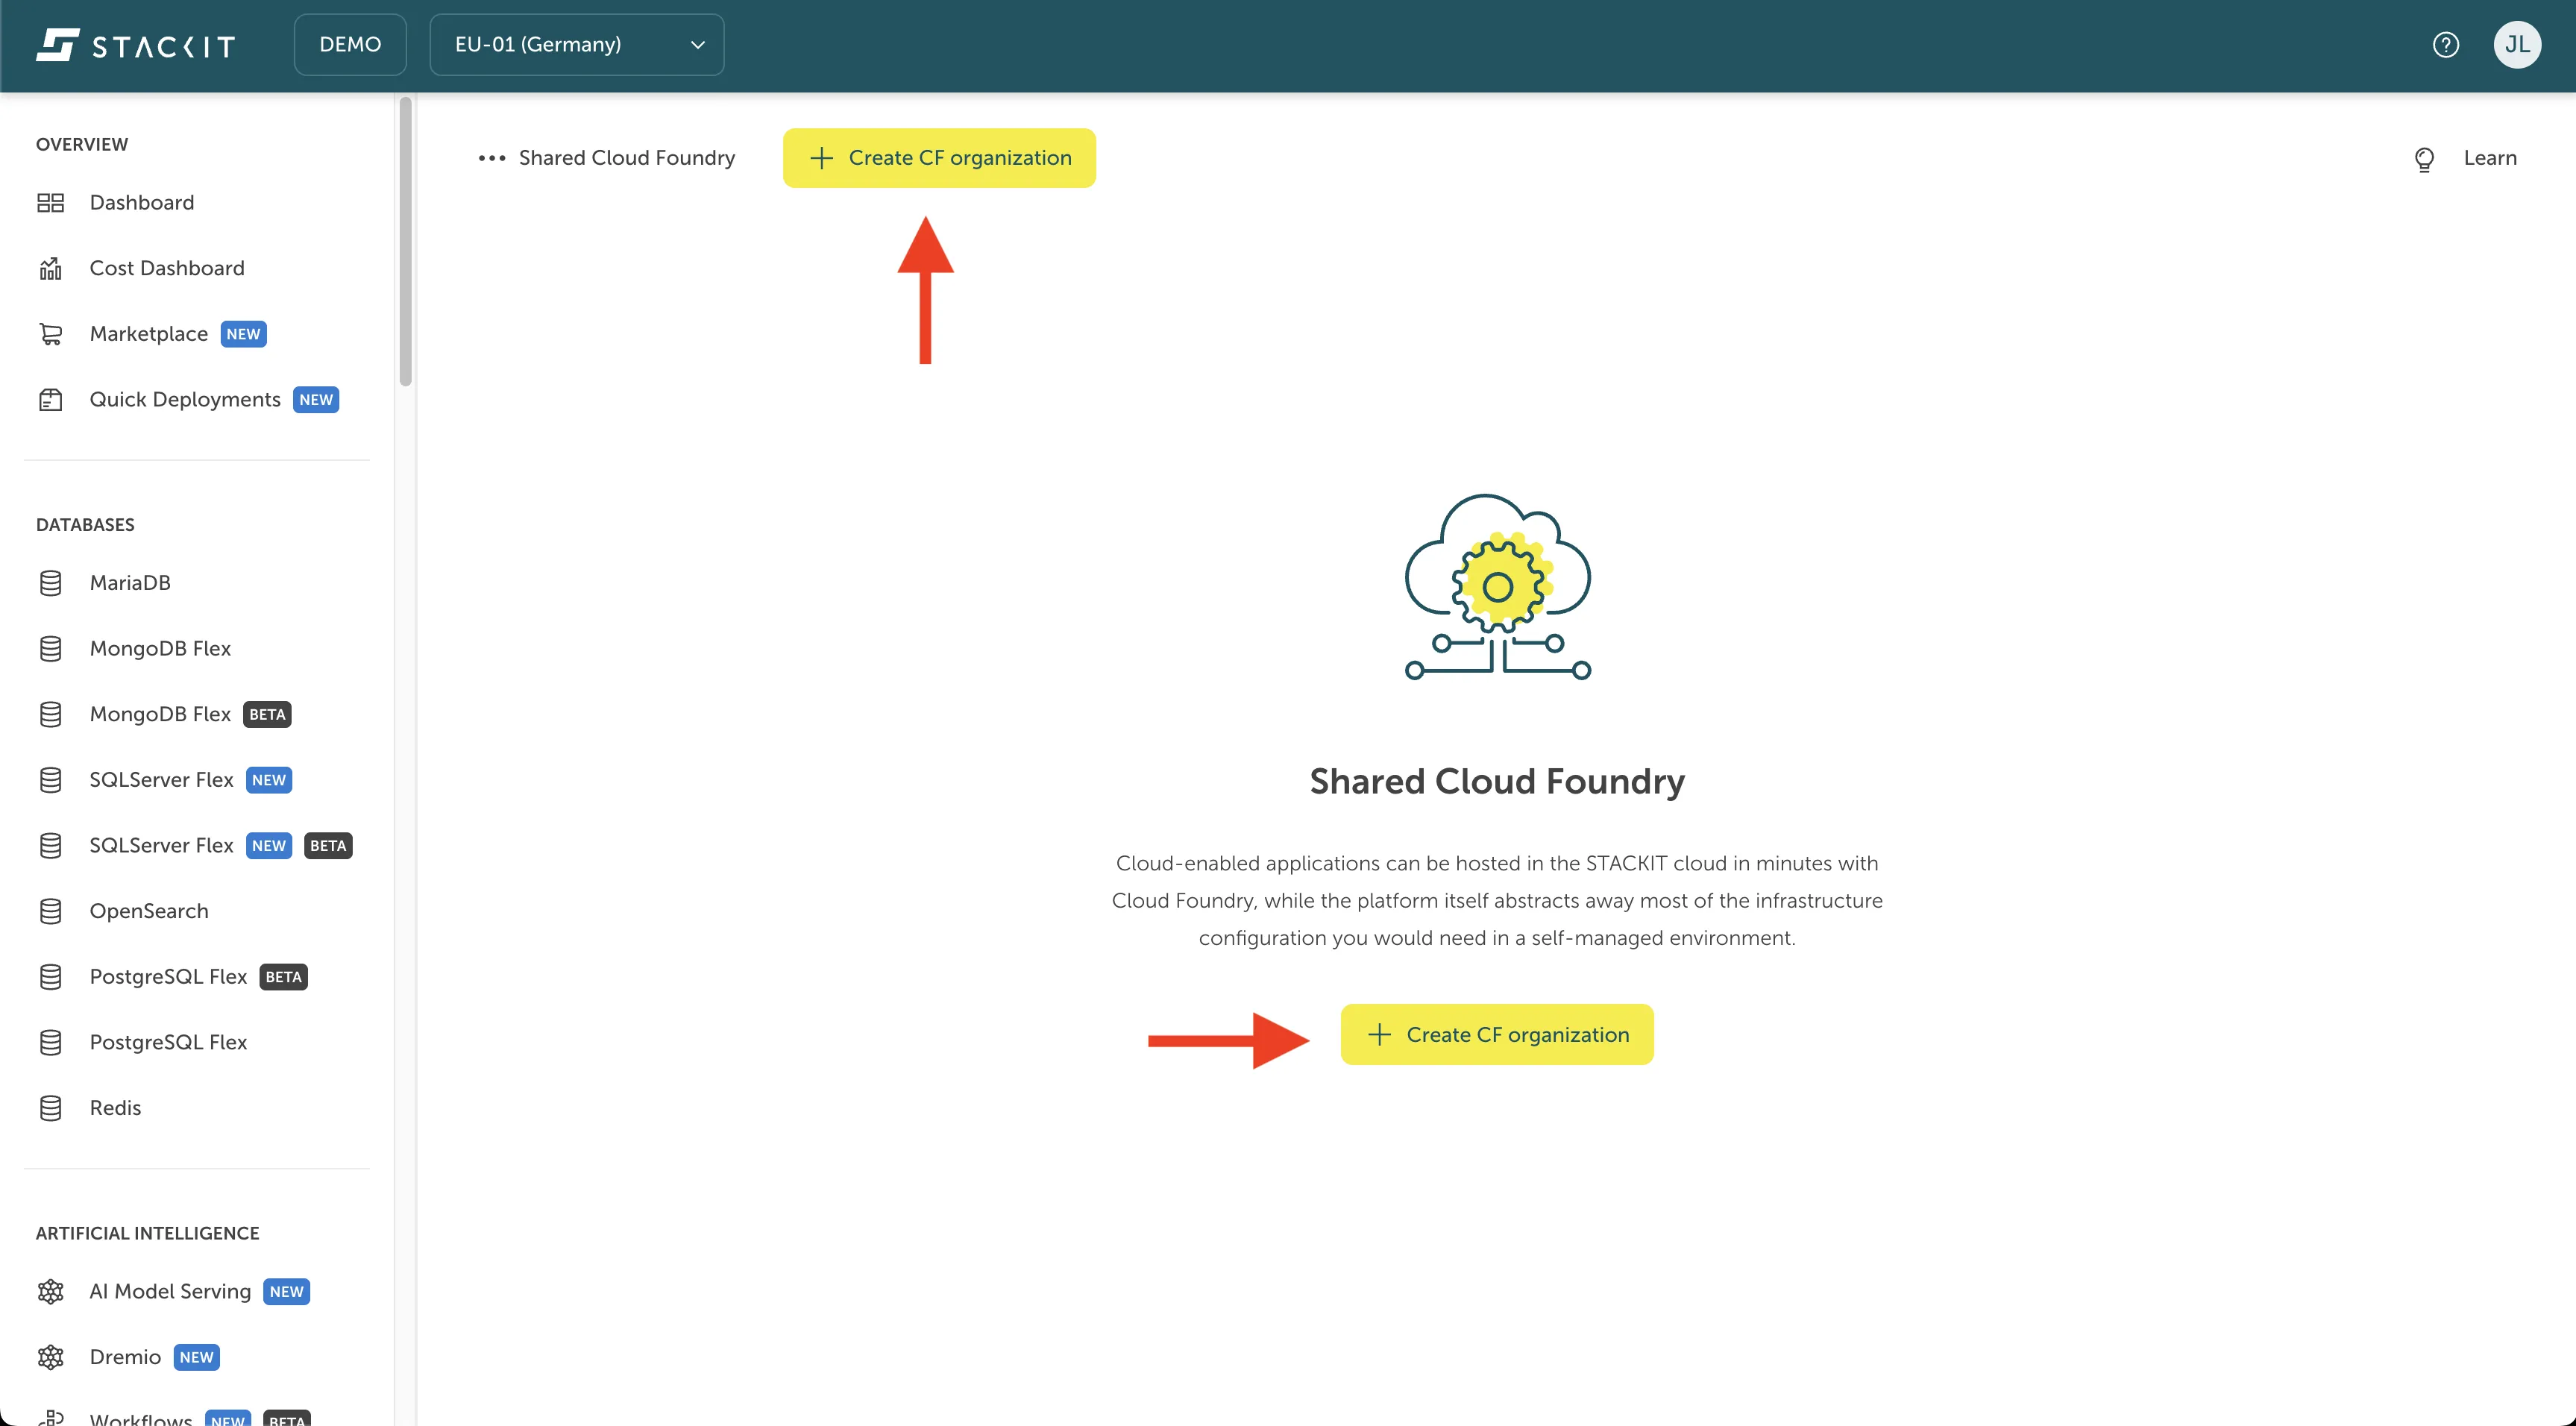
If you, or somebody else with the necessary permissions, has already created an organization in your project, this organization will replace the central Create organization button and the org will be listed there instead.
-
Name your organization.
After pressing the Create organization button, you will be directed to the org creation screen, where you first have to name the organization you are about to create.
Here you can see the field where you can type in the name of your organization:
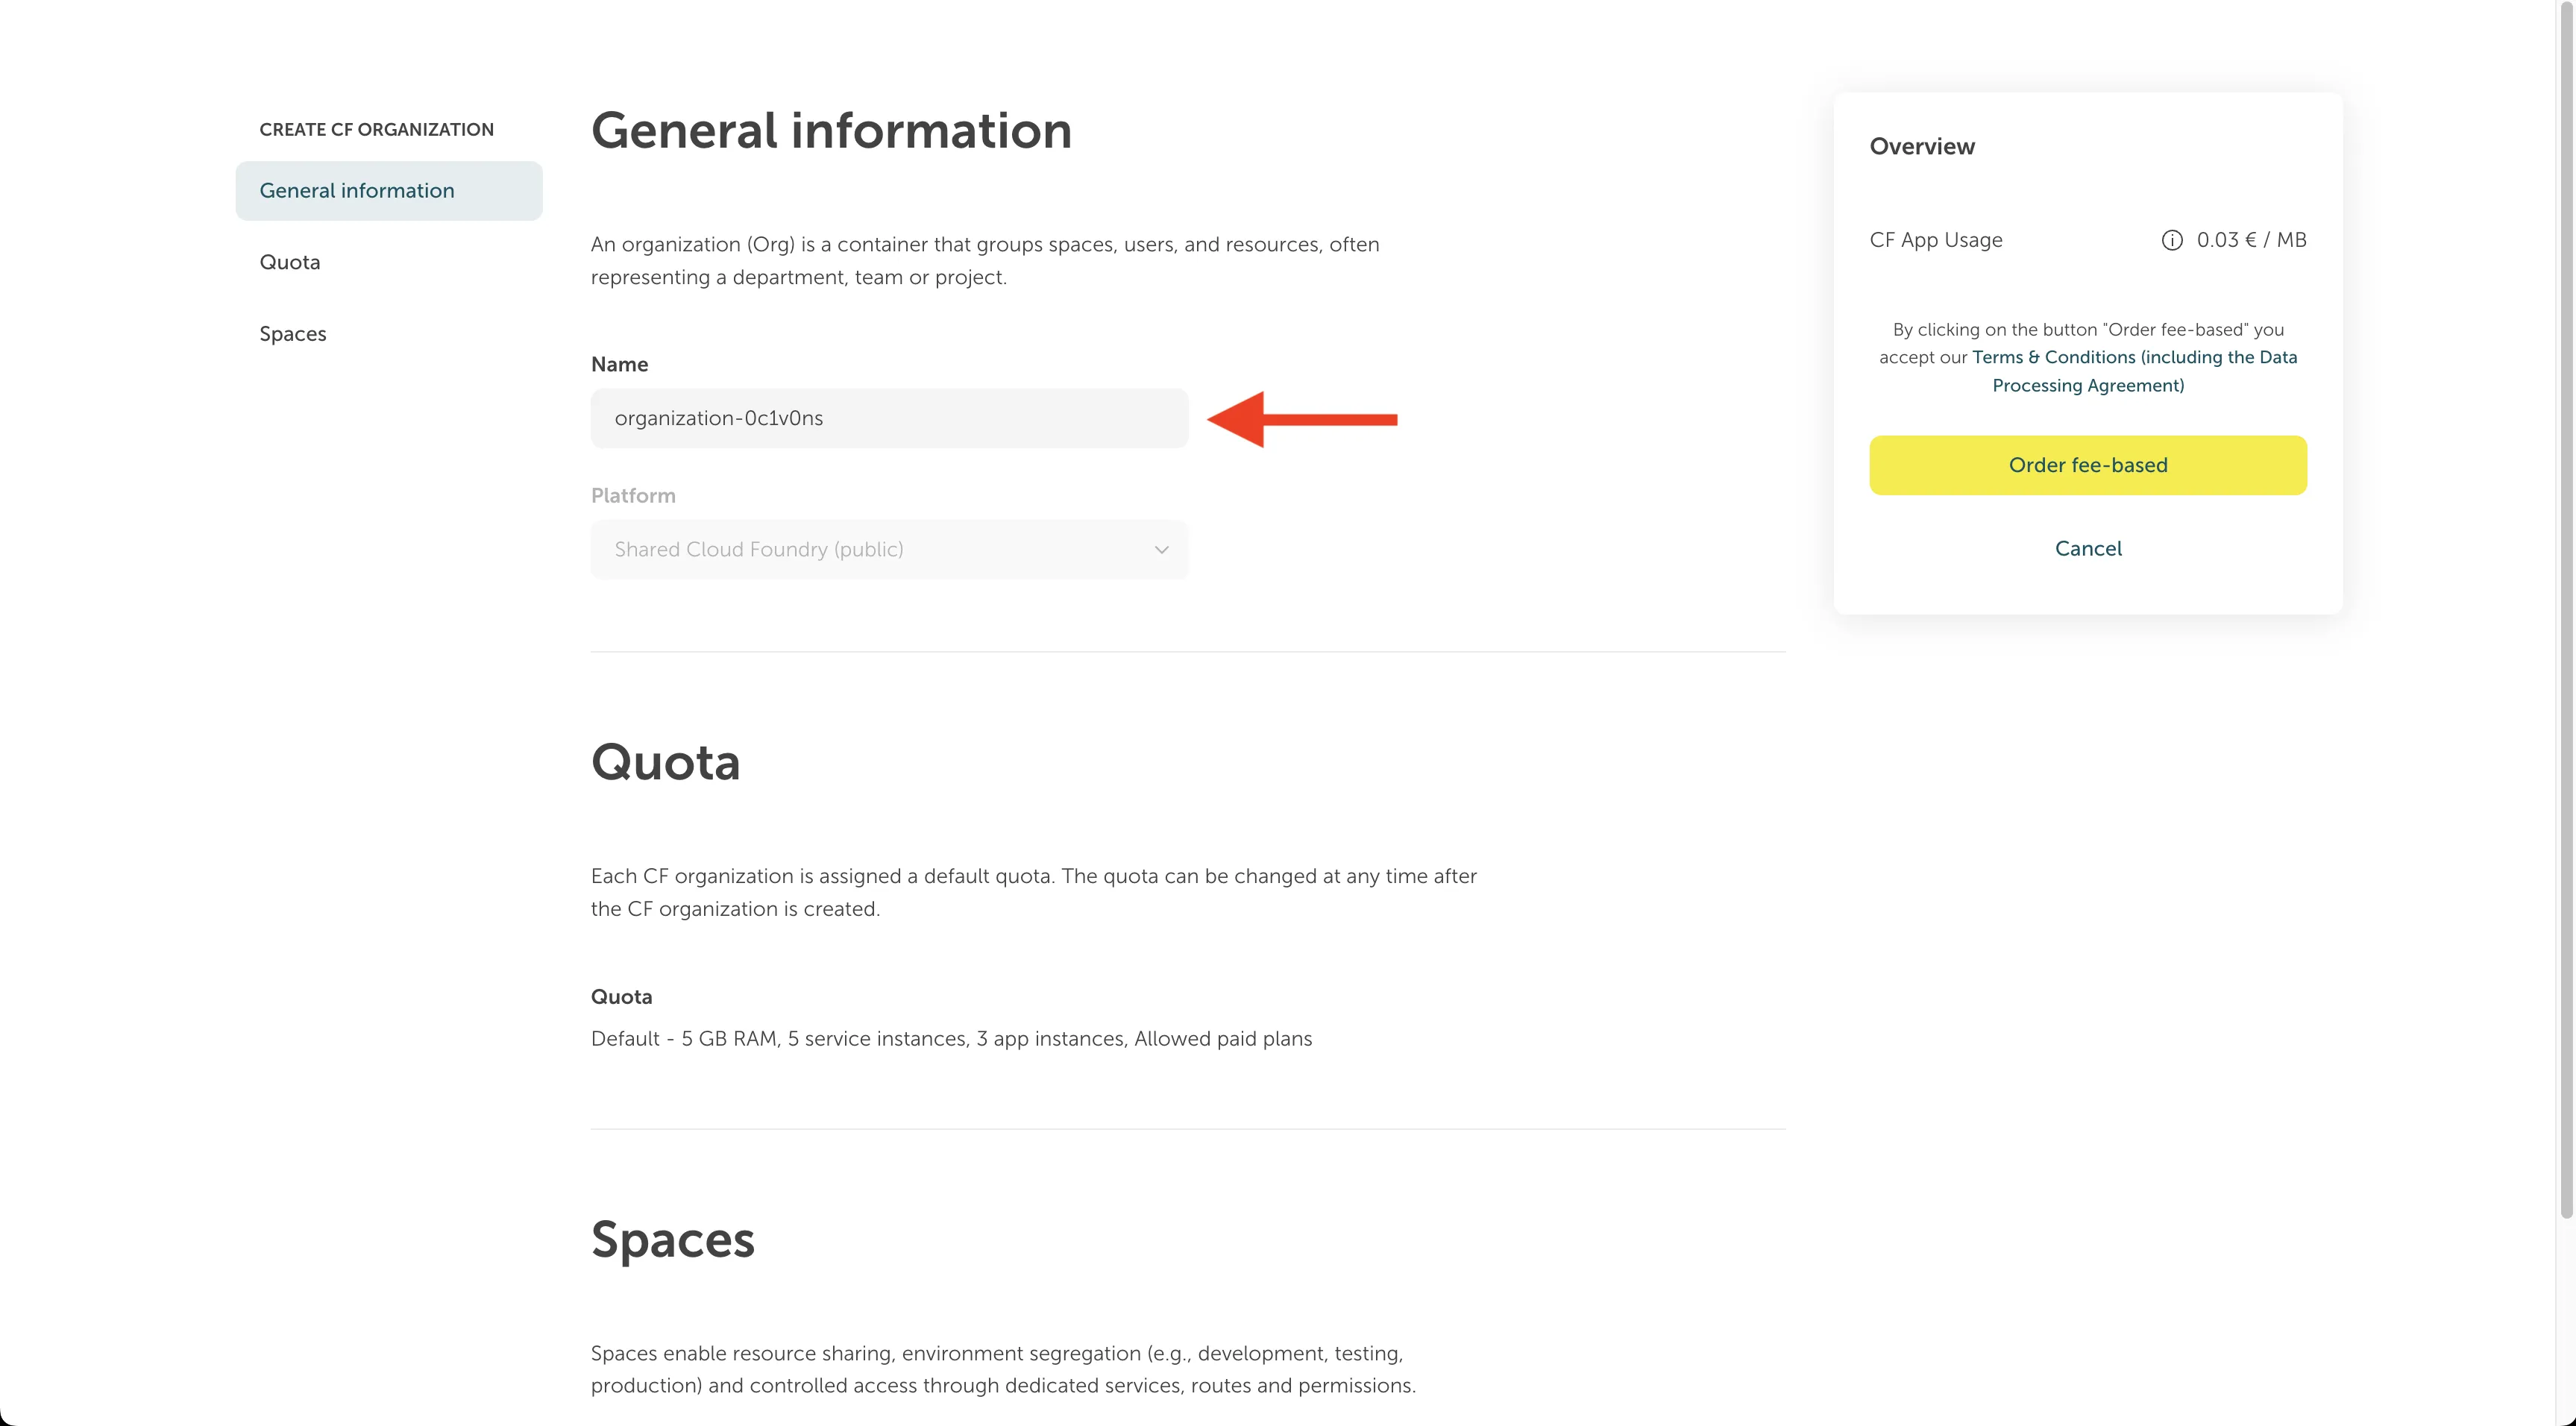
The organization name is an unique identifier on the platform that will later be used to target your space when working with the Cloud Foundry. You can select whatever name you like and the Portal will check if that name is already taken and throw an error if this is the case.
Besides being unique you can name your organization any way you like. Since orgs are only virtual structures you can use them to also organize your cloud infrastructure according to your organizational structures.
-
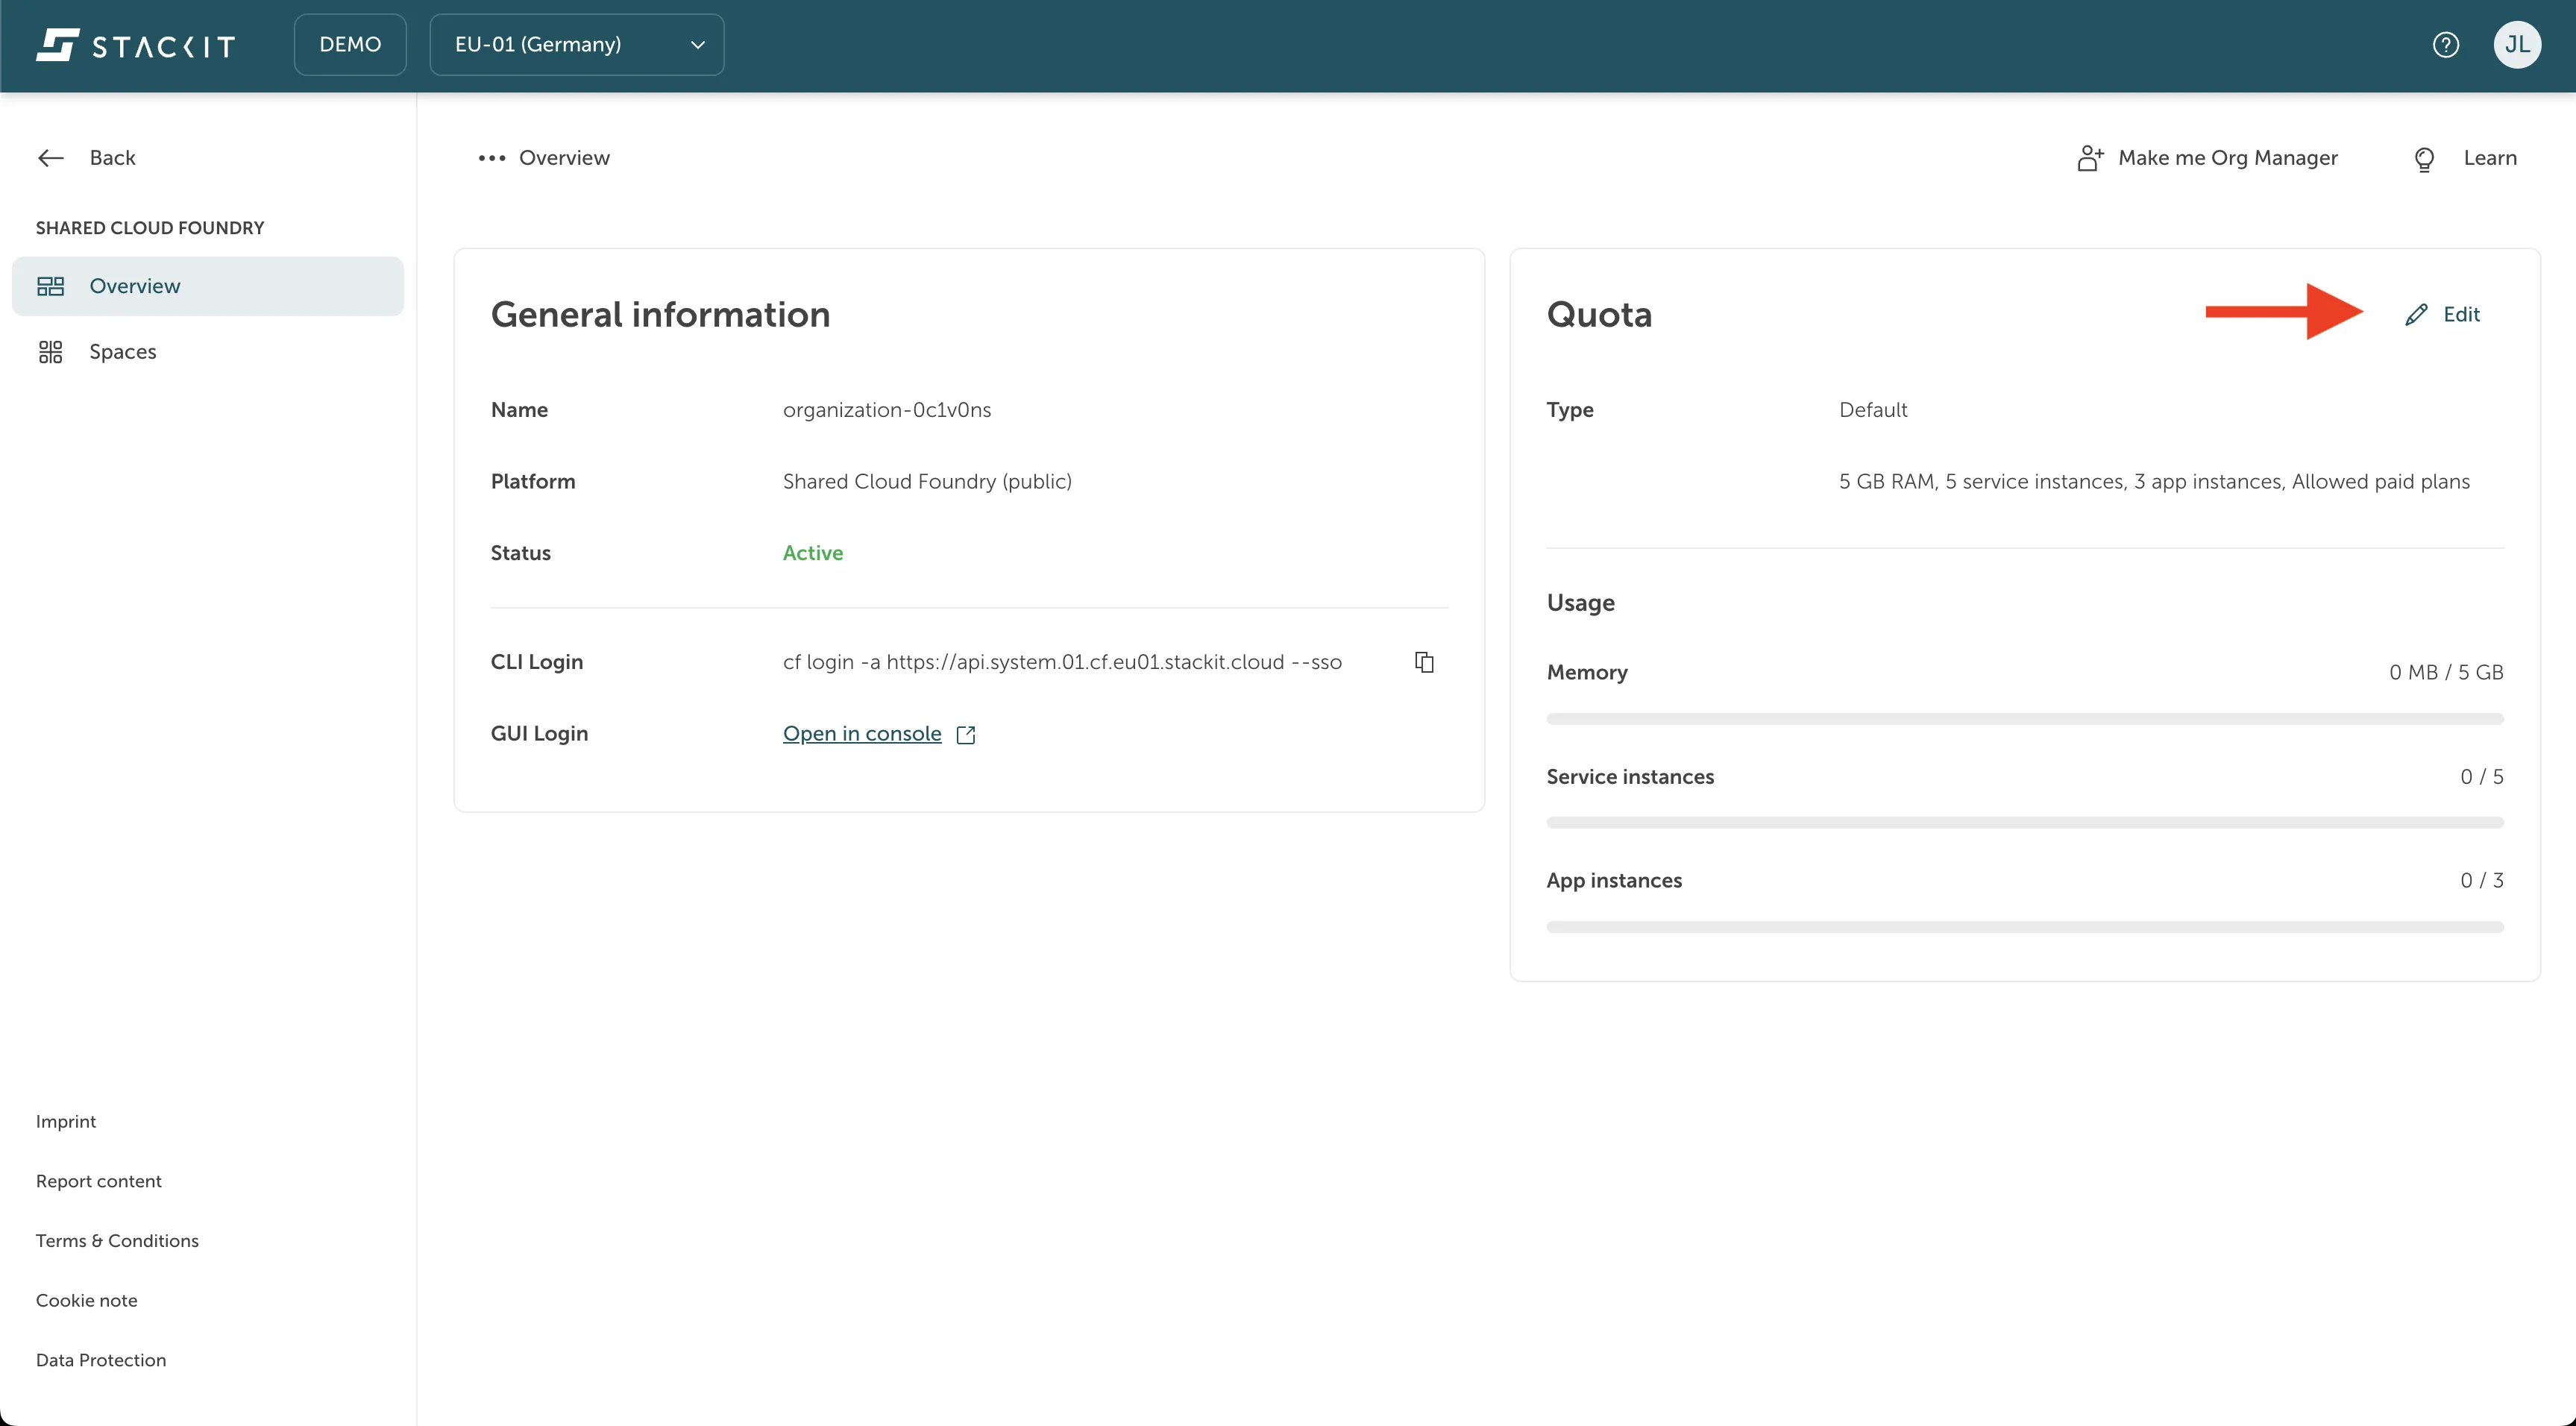
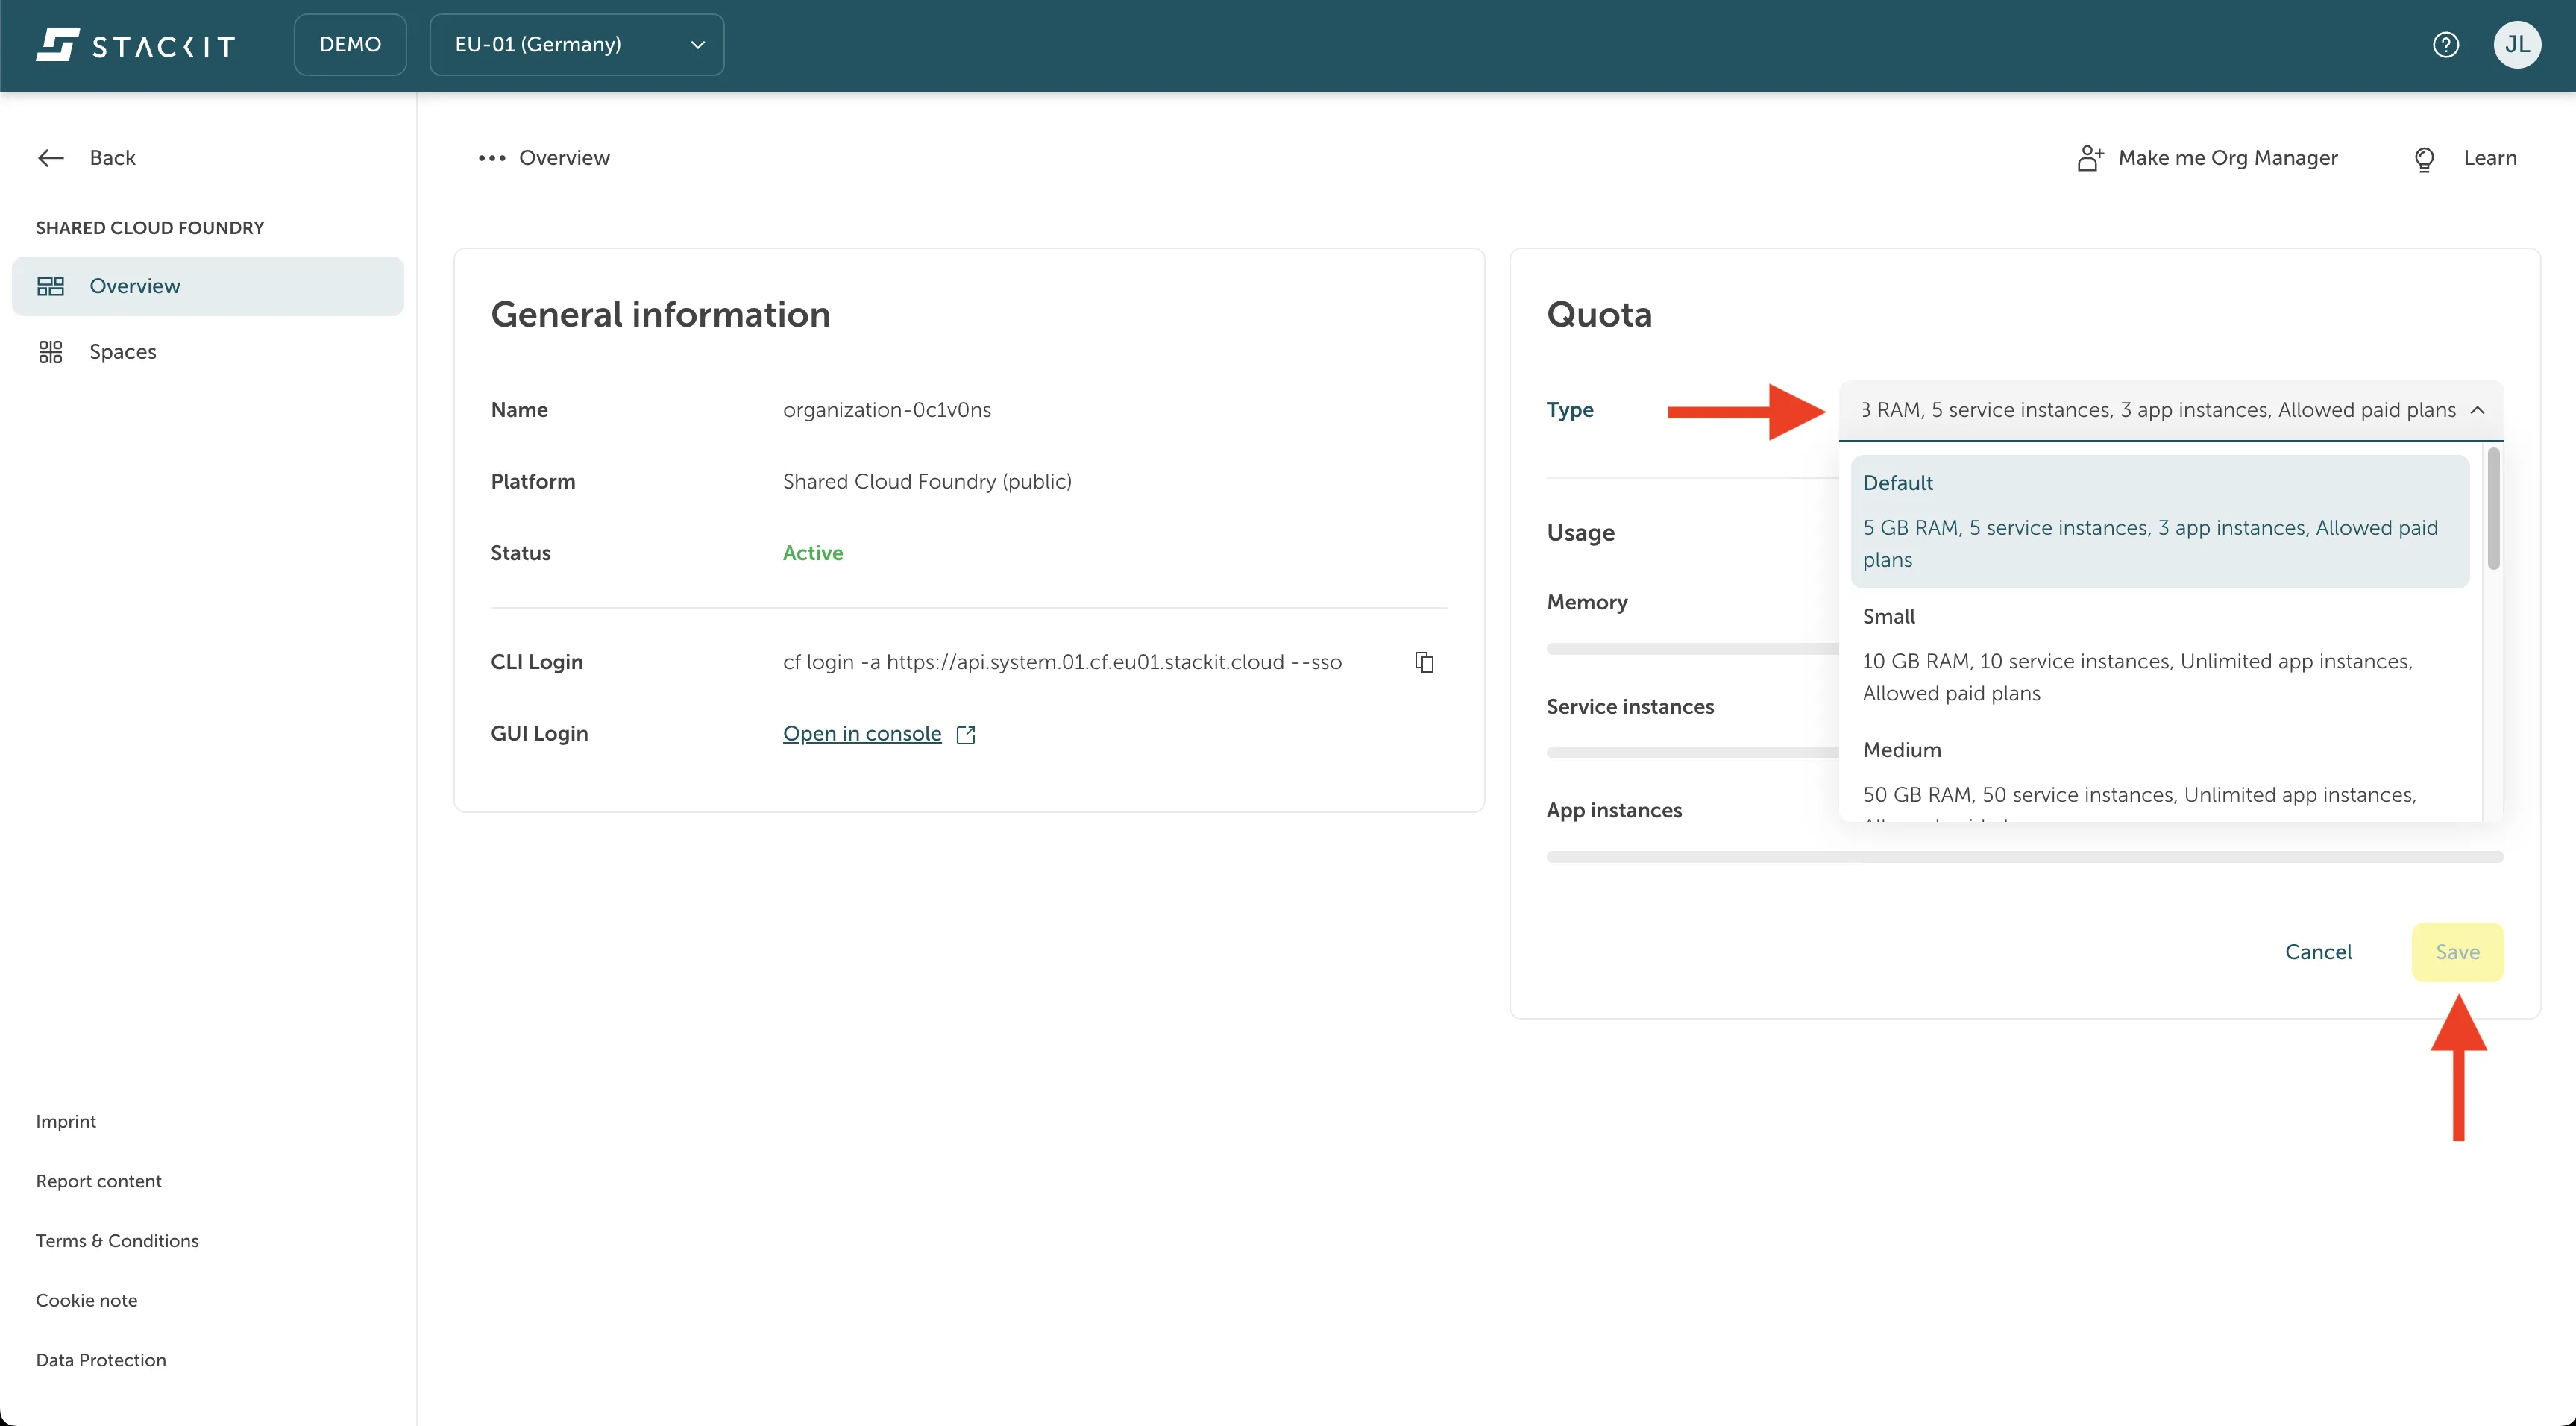
Select a quota limit for your organization.
As a next step you have to set the organizations quota limits. These limits define the maximum amount of resources that is shared over all the applications in the organization. You will not constantly pay for the resources you select as the quota limit here, but only the resources you use. This is more like setting a budget you want to and can afford. It is the maximum for all applications within your quota.
Here you can see the overview of the quota selection in the org creation screen of the portal. Just click on whatever org limit best fits your needs to select the one you want to define for your organization.
-
Define the spaces for your organization.
As a last step you have to define the spaces you want to have in your organization.
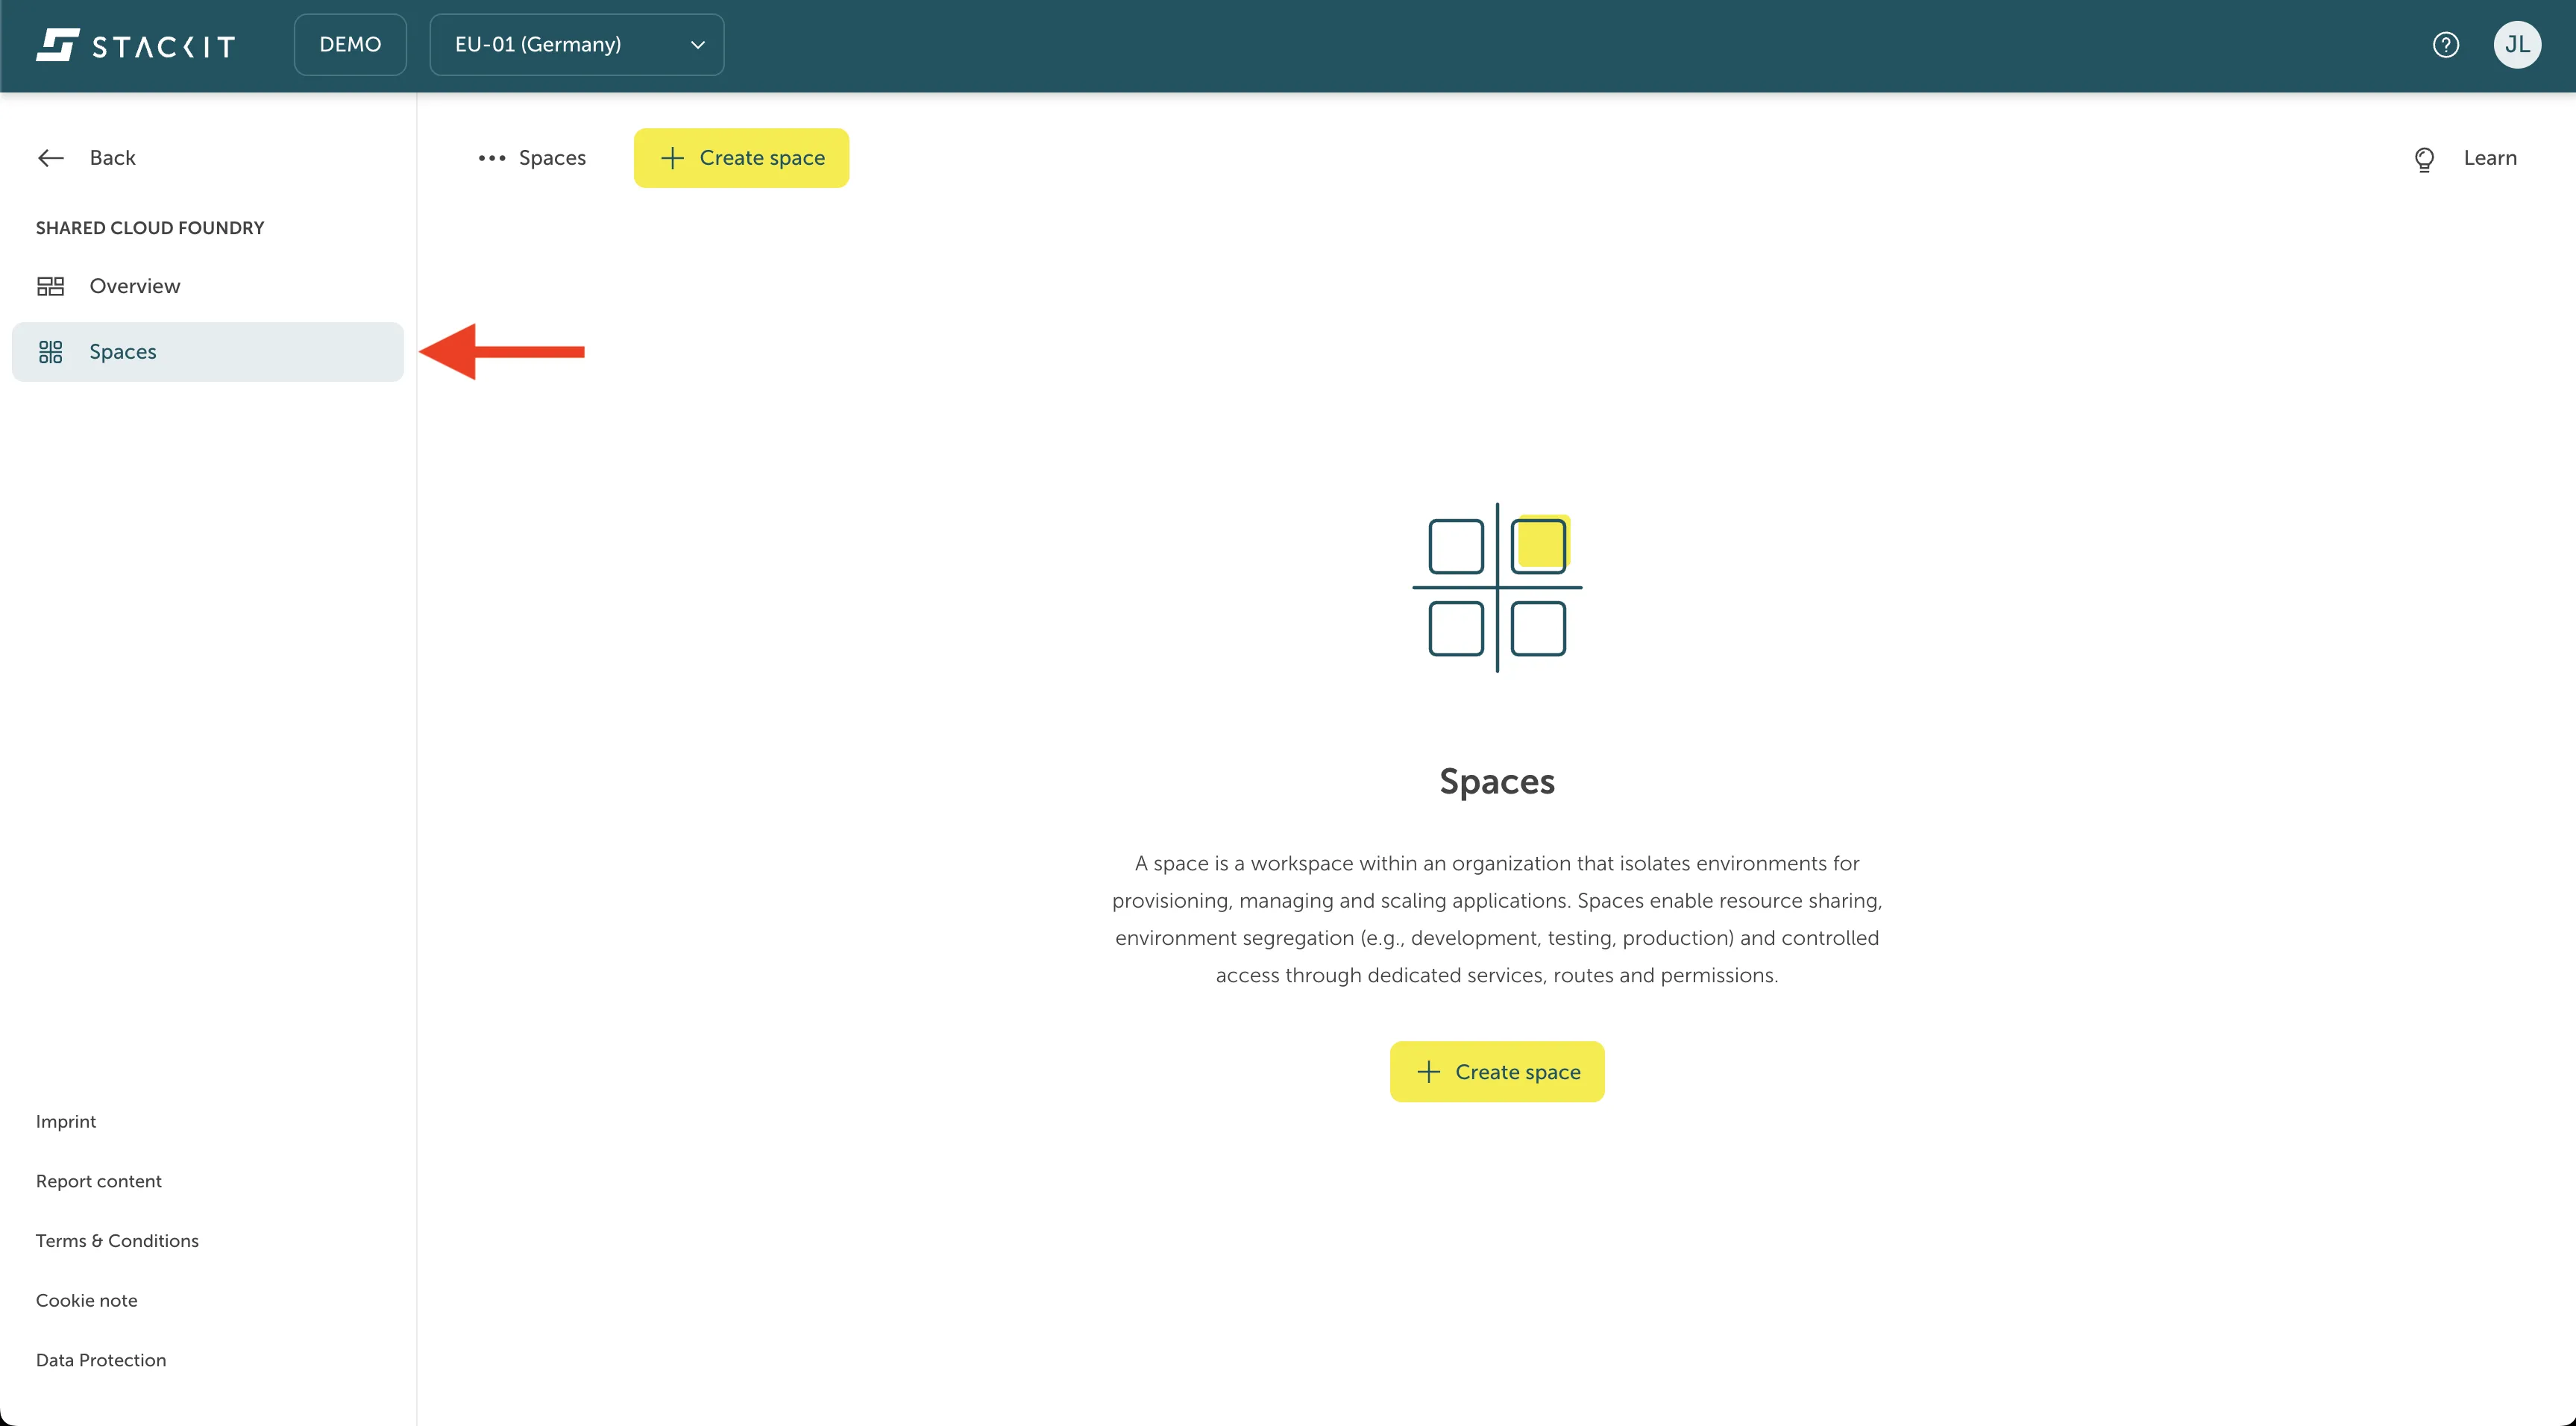
Here you see the overview for the space management at the bottom of the org creation screen in the portal.
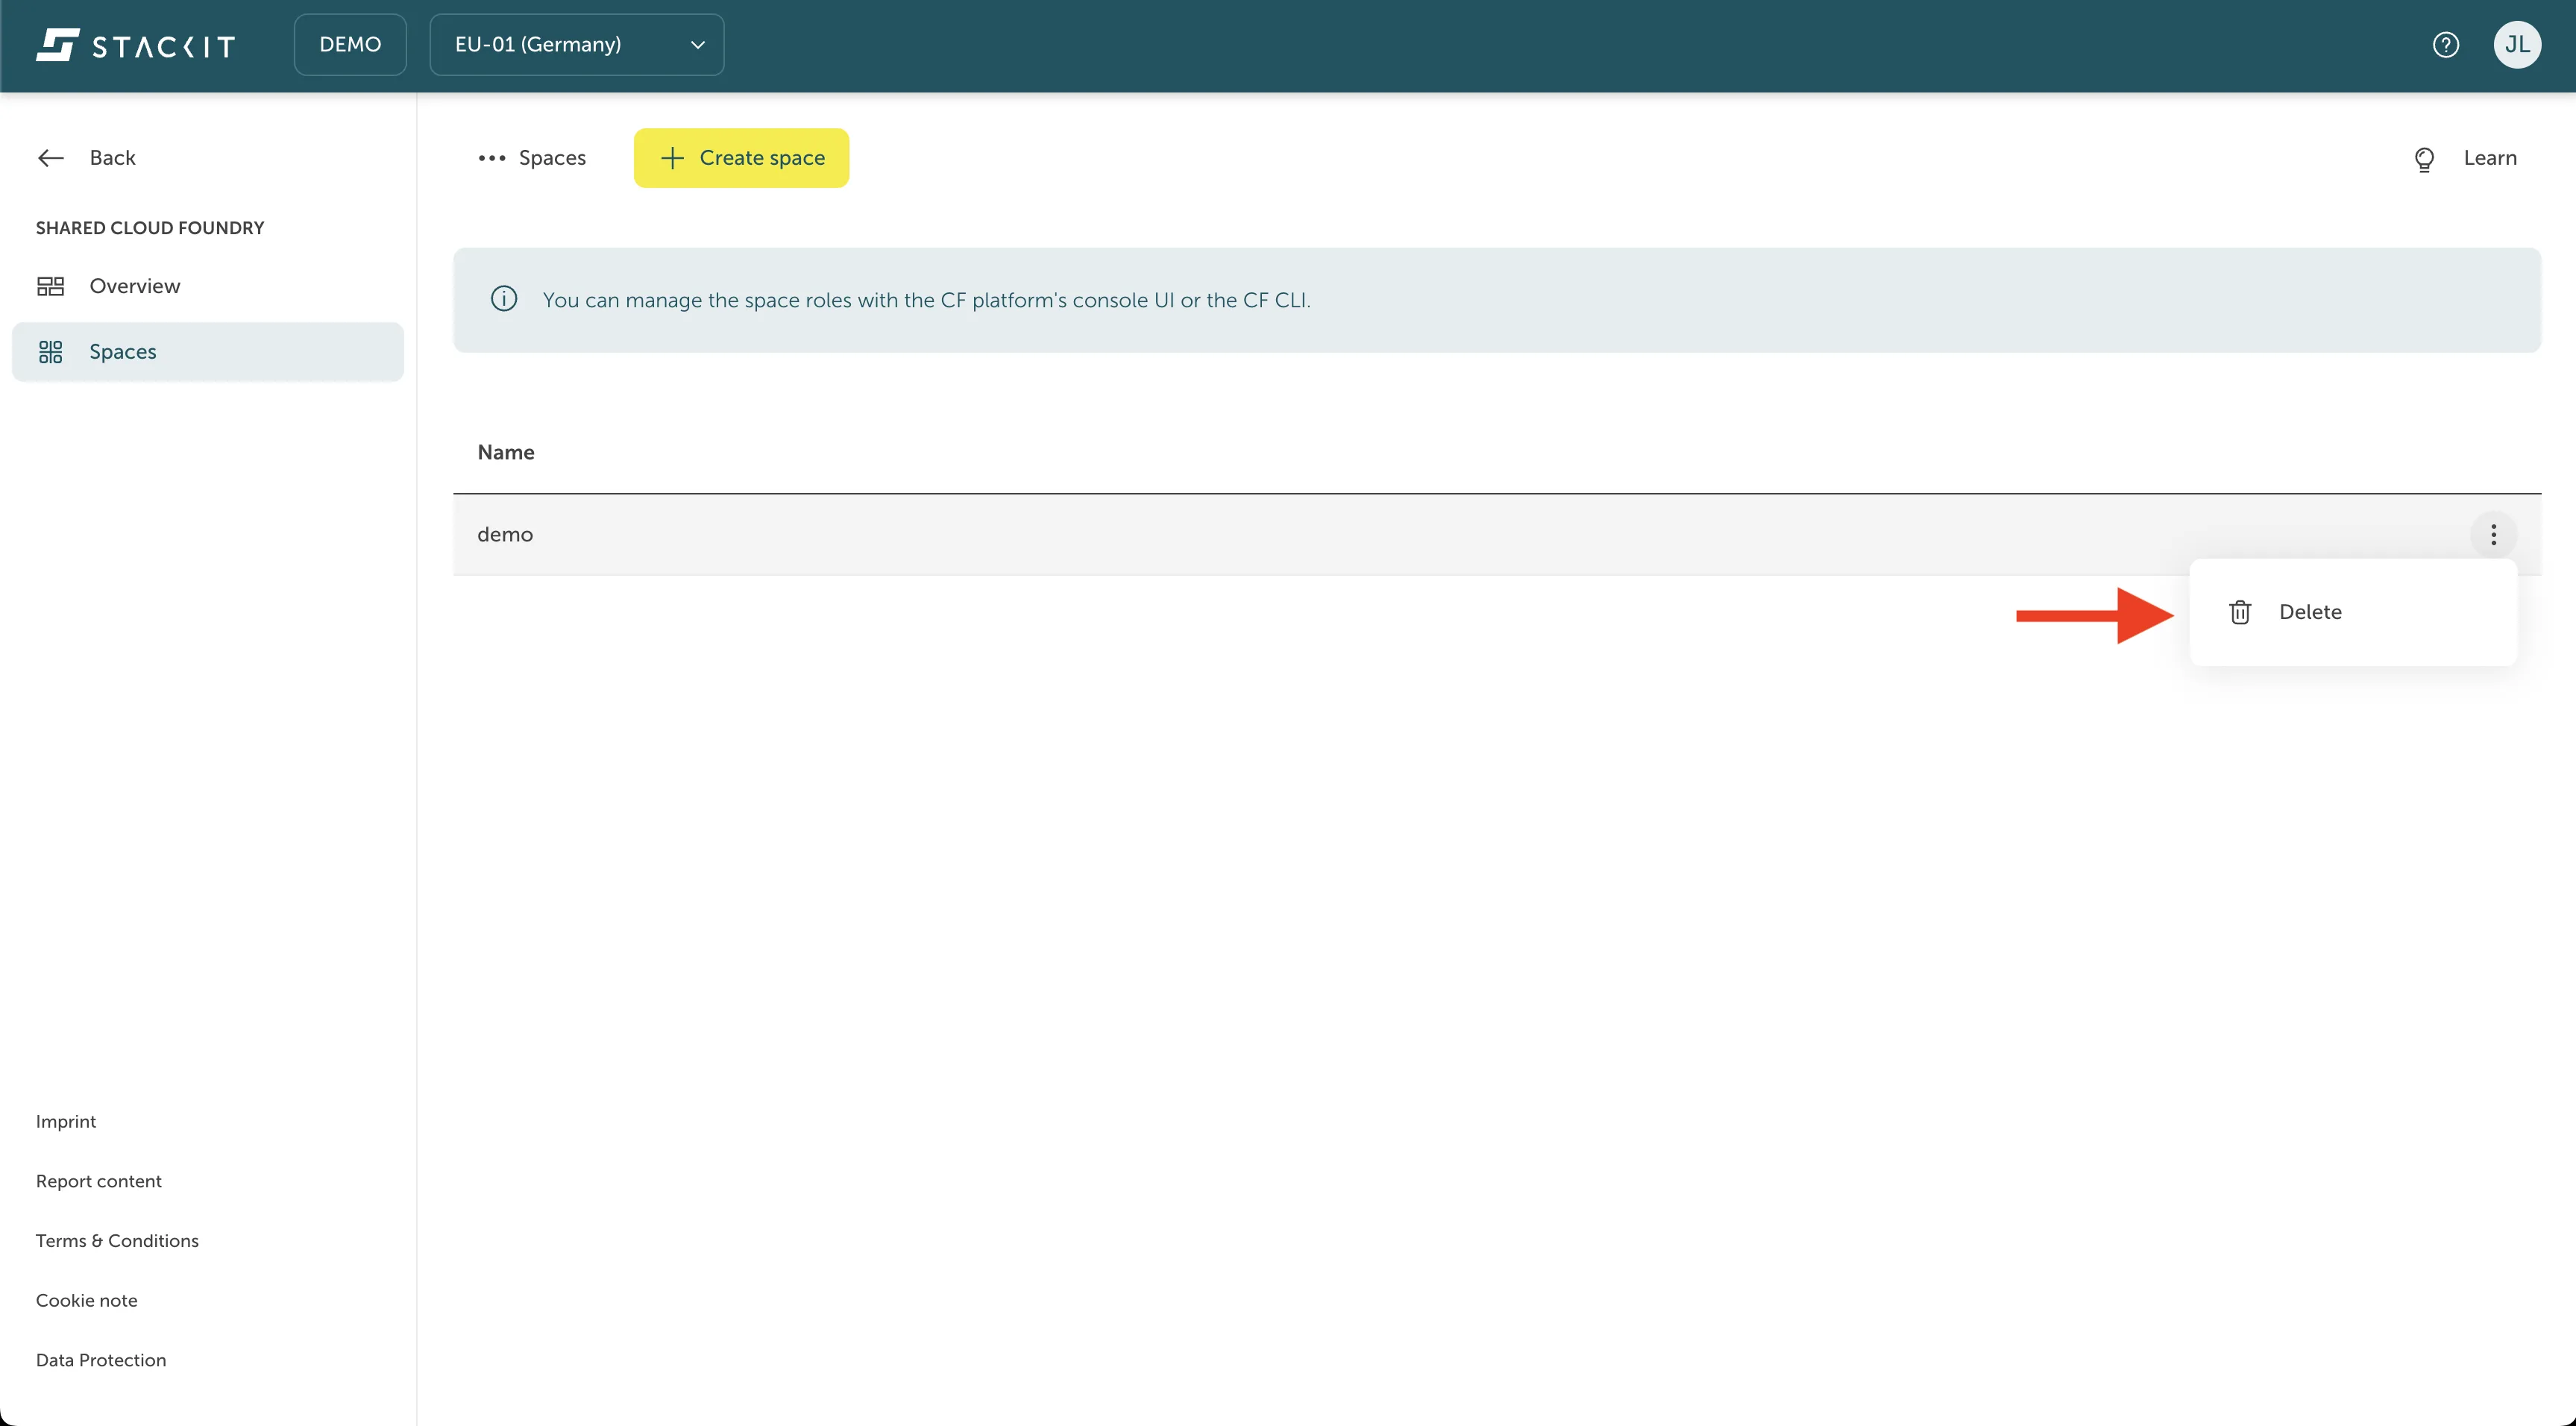
You can also create new spaces by pressing the “Create space”.
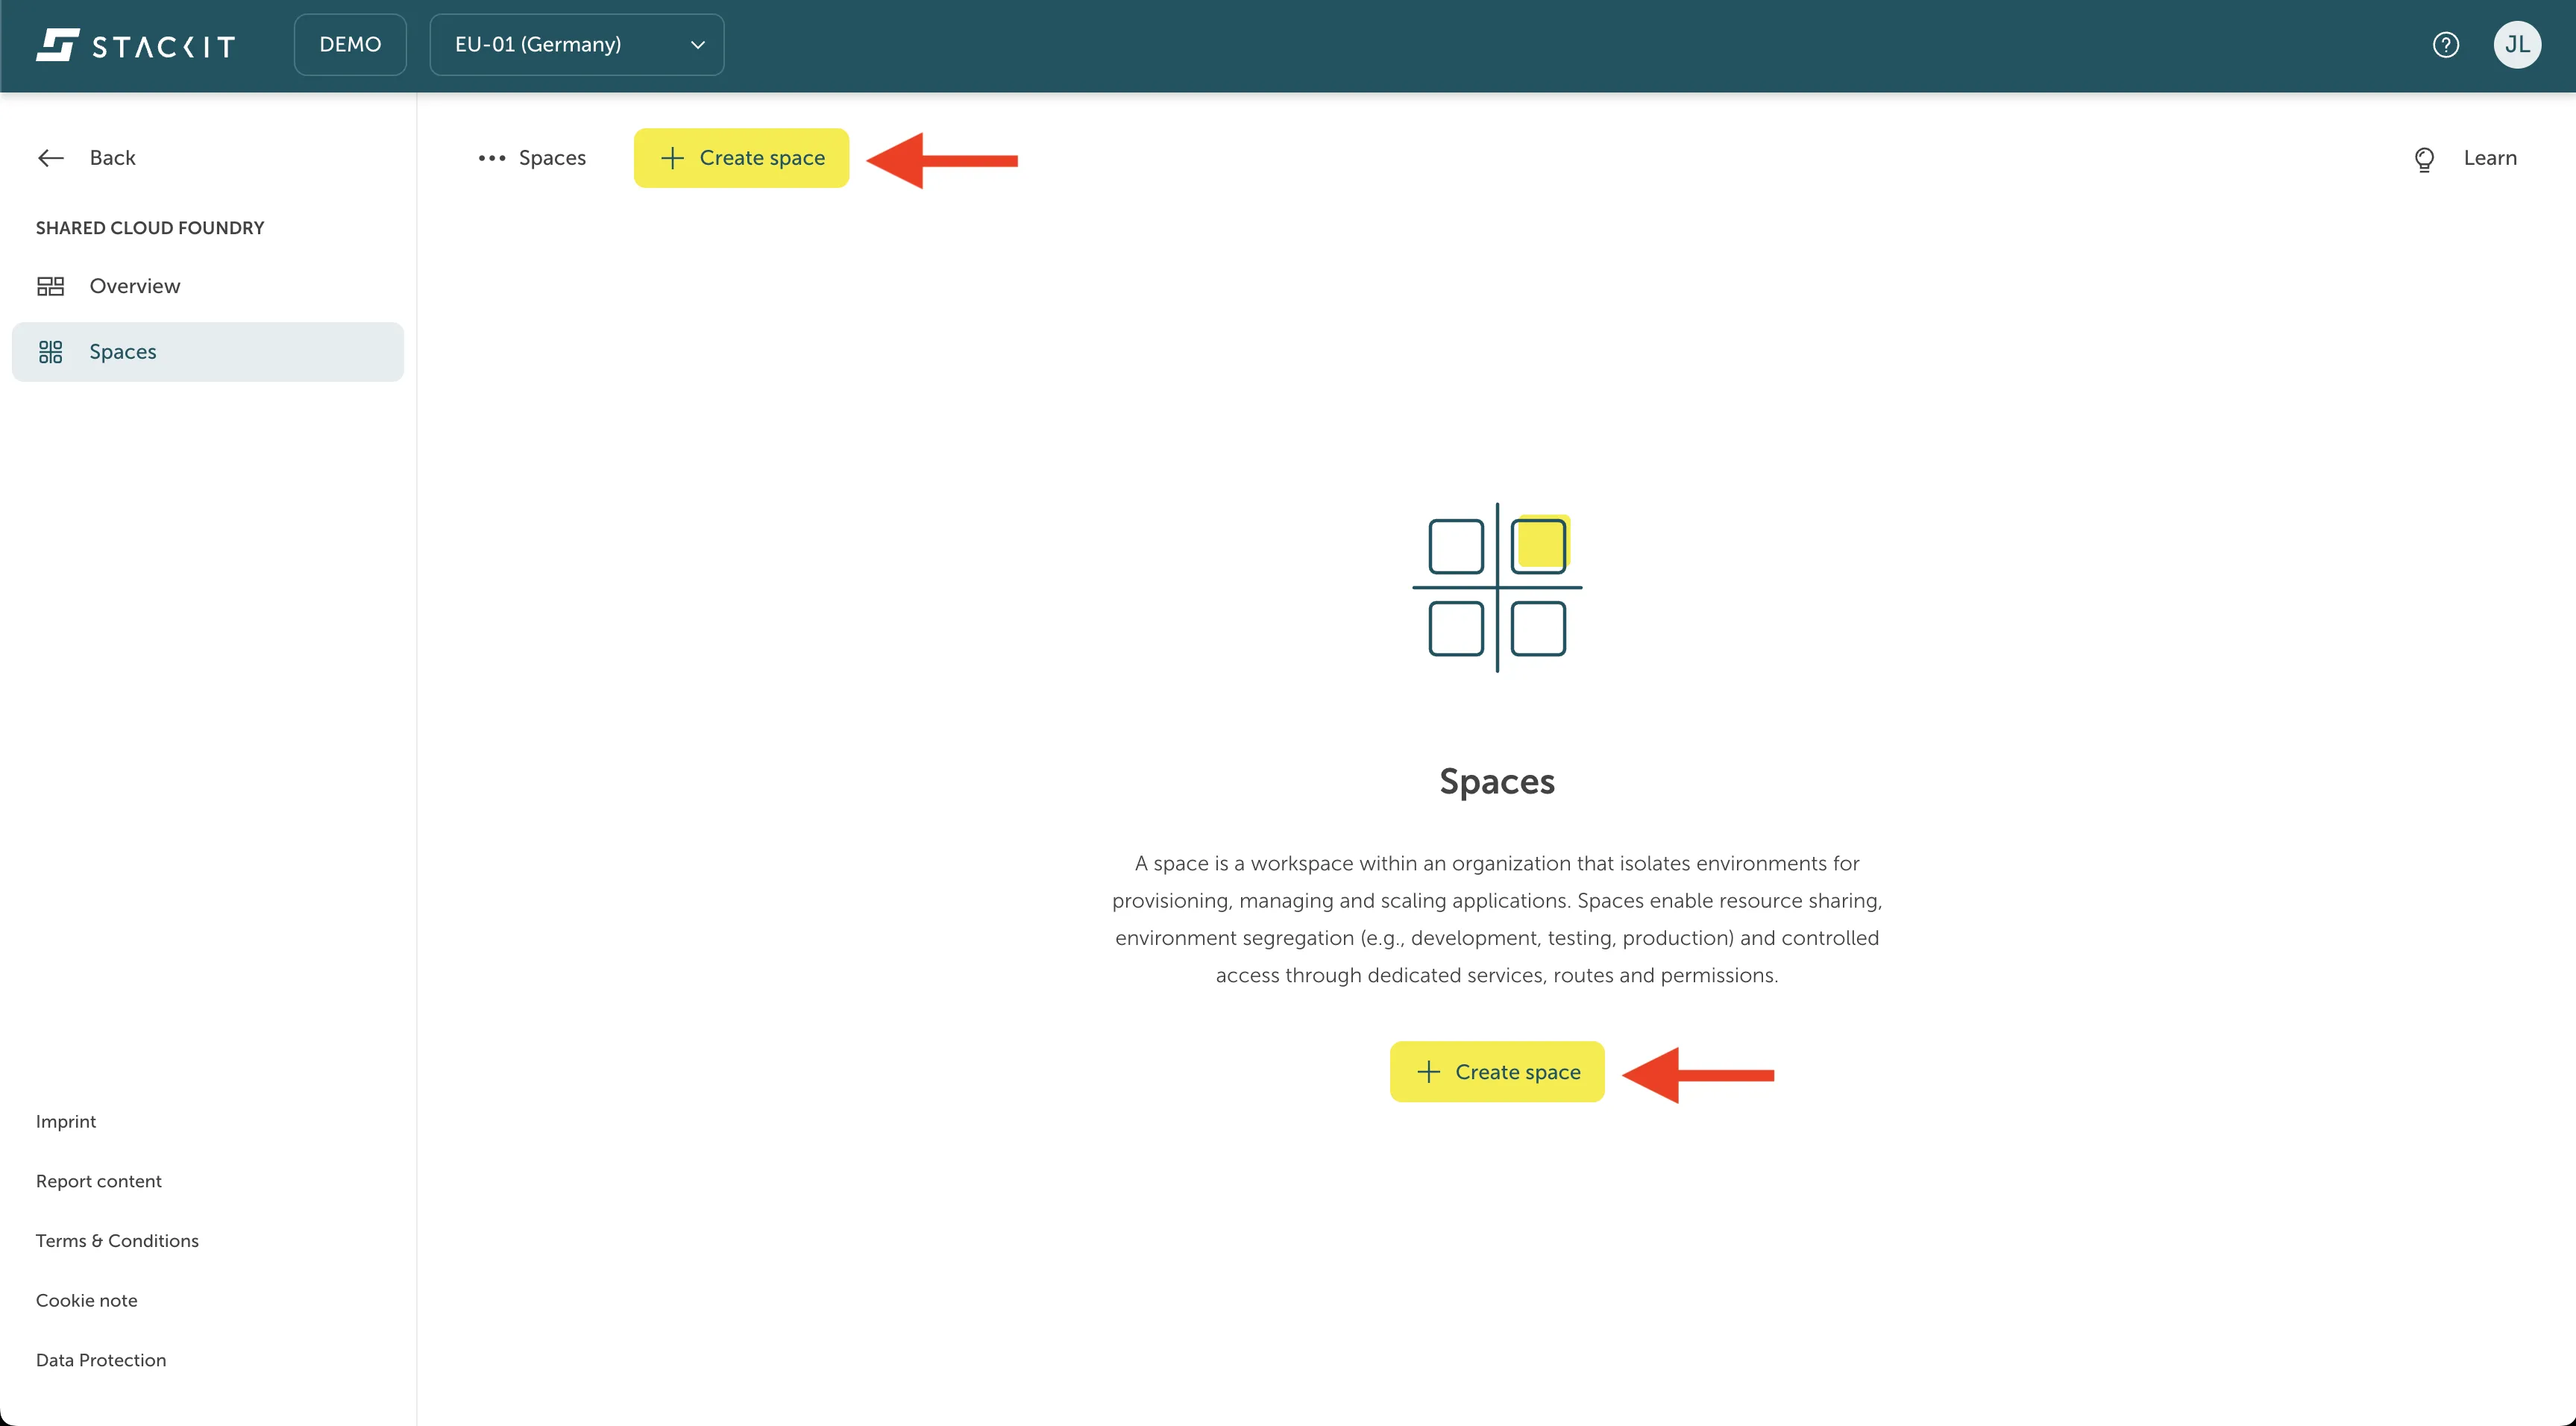
You can remove an existing space by pressing the three dot-sign for the context menu on the right side of the spaces row, as seen in the picture below.