Zugriff auf Ihren Server über die Web-Konsole
Zuletzt aktualisiert am
Diese Anleitung zeigt Ihnen, wie Sie die Web-Konsole im STACKIT Portal verwenden, um eine Verbindung zu Ihrem Server herzustellen.
Tastenkombinationen
Abschnitt betitelt „Tastenkombinationen“Es gibt einige vordefinierte Tastenkombinationen für die Web-Konsole, die deren Nutzung vereinfachen und Ihre Arbeit effizienter machen. Hier ist eine Liste der am häufigsten verwendeten Tastenkombinationen einschließlich Beispielen:
Bei einigen Sonderzeichen muss die Feststelltaste (Capslock) anstelle der Umschalttaste (Shift) gedrückt werden (die Feststelltaste kann entweder gleichzeitig oder vorher gedrückt werden).
- Beispiel: Anstelle von “Umschalt” + “7” für ”/” können Sie in der Web-Konsole “Feststelltaste” + “7” drücken (inklusive einer weiteren “Feststelltaste” danach zum Deaktivieren)
- Beispiel: Anstelle von “Umschalt” + “0” für ”=” können Sie in der Web-Konsole “Feststelltaste” + “0” drücken (inklusive einer weiteren “Feststelltaste” danach zum Deaktivieren)
- Beispiel: Anstelle von “Alt gr” + “Q” für ”@” Können Sie in der Web-Konsole “Feststelltaste” + “Umschalt” “2” drücken (inklusive einer weiteren “Feststelltaste” danach zum Deaktivieren)
- Beispiel: Anstelle von ”#” können Sie in der Web-Konsole “Feststelltaste” + “Umschalt” “3” drücken (inklusive einer weiteren “Feststelltaste” danach zum Deaktivieren)
Zugriff auf einen Server über die Web-Konsole
Abschnitt betitelt „Zugriff auf einen Server über die Web-Konsole“Die Web-Konsole ist ein emulierter Konsolenzugriff auf die jeweilige virtuelle Maschine (VM). Verwenden Sie sie, um bei einem Fehler in der SSH-Konfiguration Notfallaktionen über die Konsole durchzuführen. Die Web-Konsole kann wie folgt verwendet werden:
Zugangsdaten für die VM zuweisen
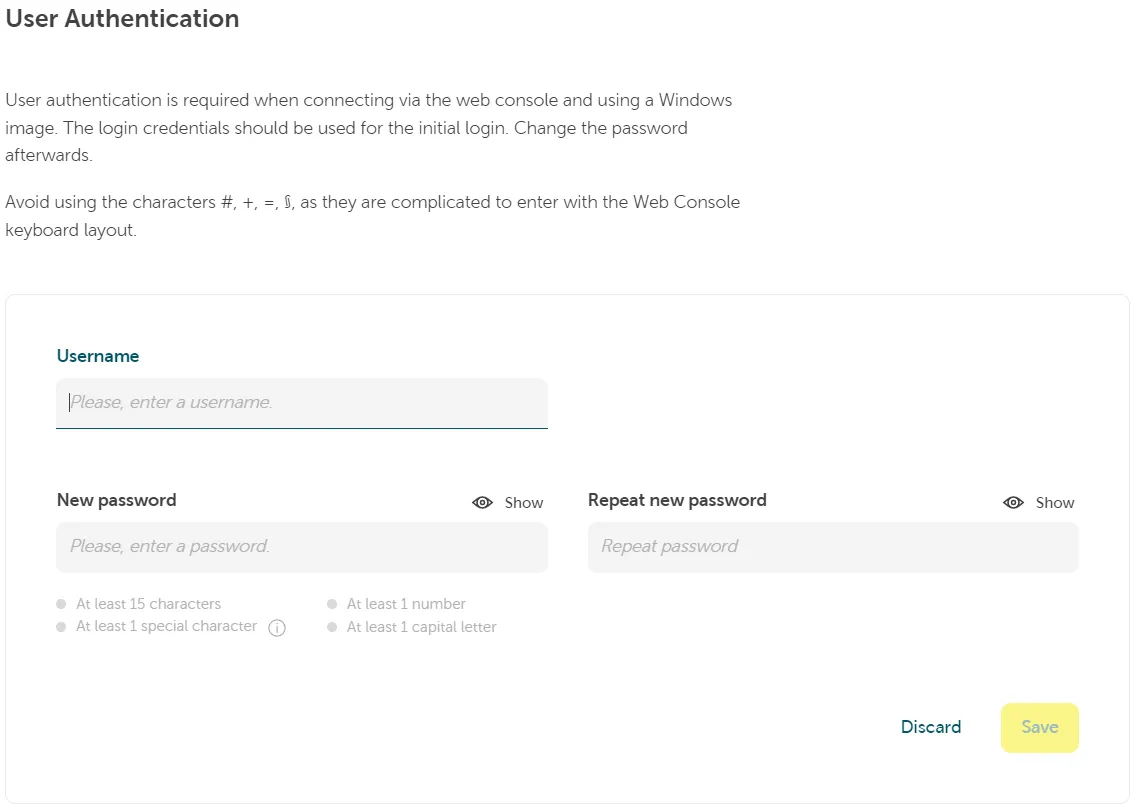
Abschnitt betitelt „Zugangsdaten für die VM zuweisen“Um die Web-Konsole nutzen zu können, generieren Sie während der Server-Installation (oder direkt auf dem Server) entsprechende Zugangsdaten: Eine neue Linux-Instanz erstellen
Beachten Sie die Informationen zur Passwortkomplexität und zur Vermeidung bestimmter Zeichen.
Web-Konsole öffnen
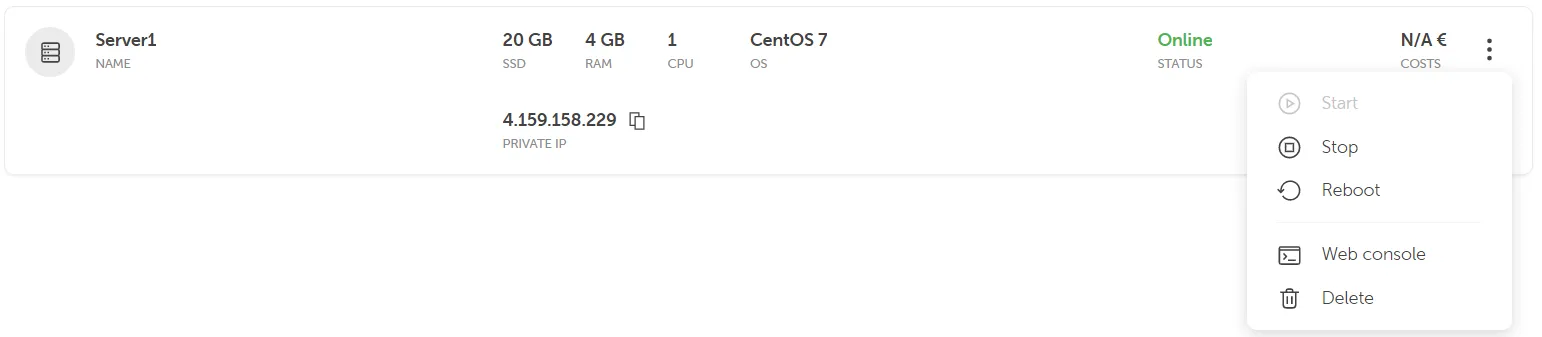
Abschnitt betitelt „Web-Konsole öffnen“Verwenden Sie das STACKIT Portal, um alle Server in Ihrem Projekt aufzulisten und den passenden auszuwählen. Sie können die Web-Konsole im Kontextmenü des Servers auswählen. Sie erreichen sie über das Funktionsmenü der jeweiligen VM.
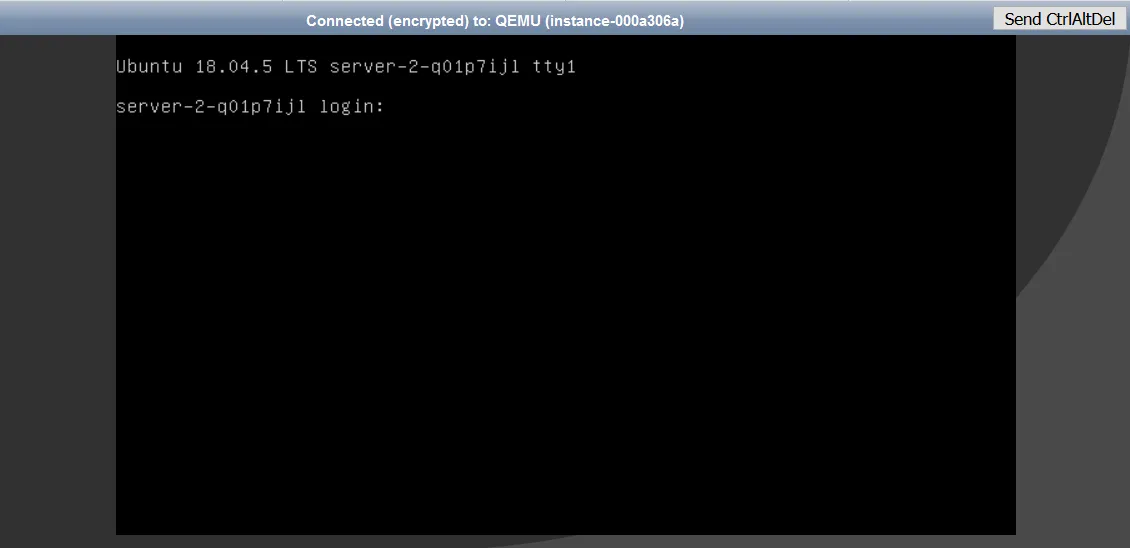
Die Web-Konsole öffnet sich dann und kann für die Anmeldung am Server verwendet werden. Als Logindaten verwenden Sie bitte die bei der Server-Installation angegebenen Informationen zu Benutzernamen und Passwort (siehe Eine neue STACKIT Server-Instanz erstellen).
Nachdem Sie Ihre Arbeit beendet haben, melden Sie sich aus Sicherheitsgründen vom Server ab, um die Terminal-Sitzung zu schließen. Bei Linux / Unix-Systemen können Sie dafür den Befehl “exit” verwenden.