Zugriff auf Ihre VM wiederherstellen oder Notfall-Fehlerbehebung durchführen
Zuletzt aktualisiert am
Falls Sie Ihren SSH-Schlüssel und Ihr Passwort verlieren oder der Server nicht booten kann, haben Sie immer noch die Möglichkeit, Ihre VM wiederherzustellen.
Voraussetzungen
Abschnitt betitelt „Voraussetzungen“Linux-Betriebssystem: Jede Linux-Distribution verwendet einen anderen Standard-Benutzernamen und die Namen der SSH-Daemons unterscheiden sich bei EL- und Debian-Derivaten. Bitte sehen Sie: Betriebssystem-Images.
Zugriff auf Ihre Linux-VM wiederherstellen
Abschnitt betitelt „Zugriff auf Ihre Linux-VM wiederherstellen“Starten Sie Ihre VM über die Web-Konsole neu.

Gehen Sie zum STACKIT Portal und greifen Sie auf die Web-Konsole zu:

Sie werden sehen, wie Ihre VM bootet. Klicken Sie auf die Schaltfläche Send CtrlAltDel in der oberen rechten Ecke.

Verwenden Sie die Pfeiltasten oder halten Sie die Umschalttaste während des Ladens von Grub gedrückt. Wenn Sie über BIOS booten oder das System UEFI verwendet, drücken Sie Esc, um den Menü-Timeout von Grub zu stoppen – dieser ist recht kurz. Wenn Sie den Moment verpassen, drücken Sie einfach erneut Send CtrlAltDel. Sie sollten etwas Ähnliches wie das hier sehen:
Drücken Sie Auf und Ab.
Wählen Sie den neuesten (obersten) Menüeintrag aus.
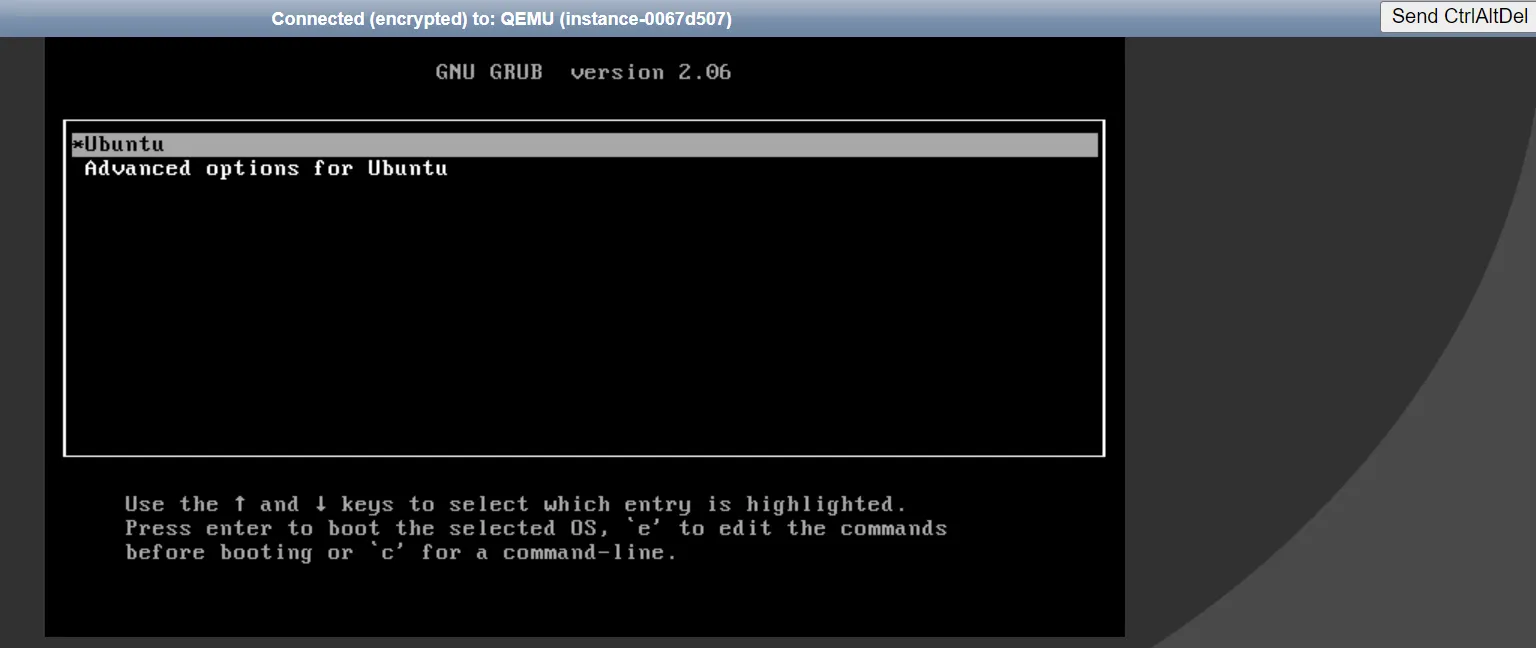
Bearbeiten Sie nun Ihr Menü (drücken Sie den Buchstaben e auf der Tastatur), um das Menü editieren zu können.
Sie werden etwas Ähnliches wie das hier sehen:
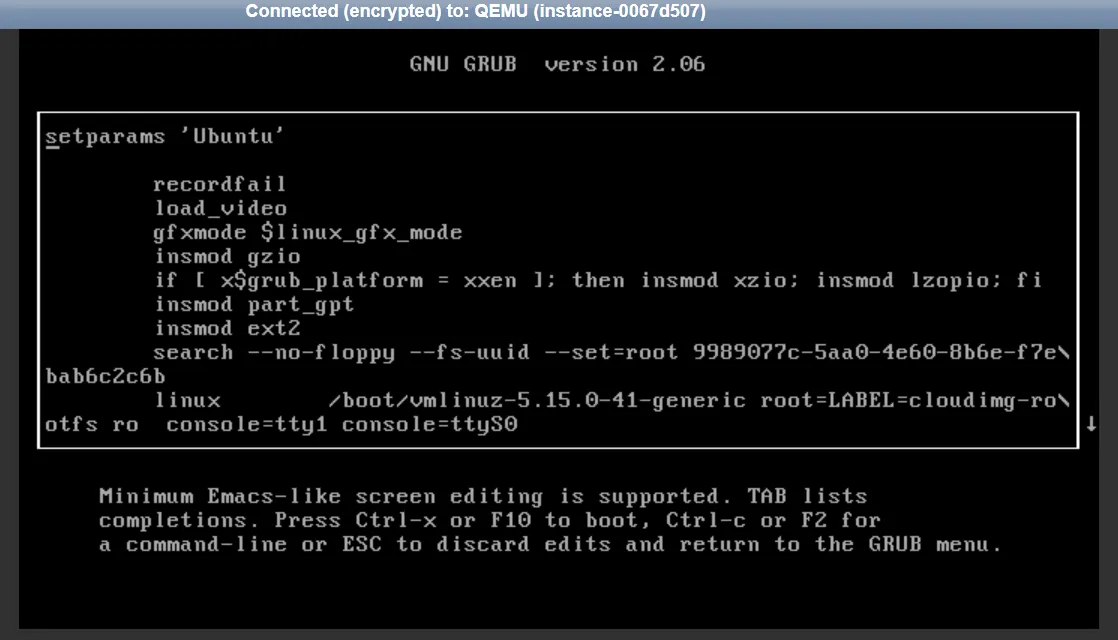
Scrollen Sie nun nach unten (verwenden Sie die Pfeiltasten) bis zu der Zeile, die je nach Distribution mit linux, linux16 oder linuxefi beginnt:
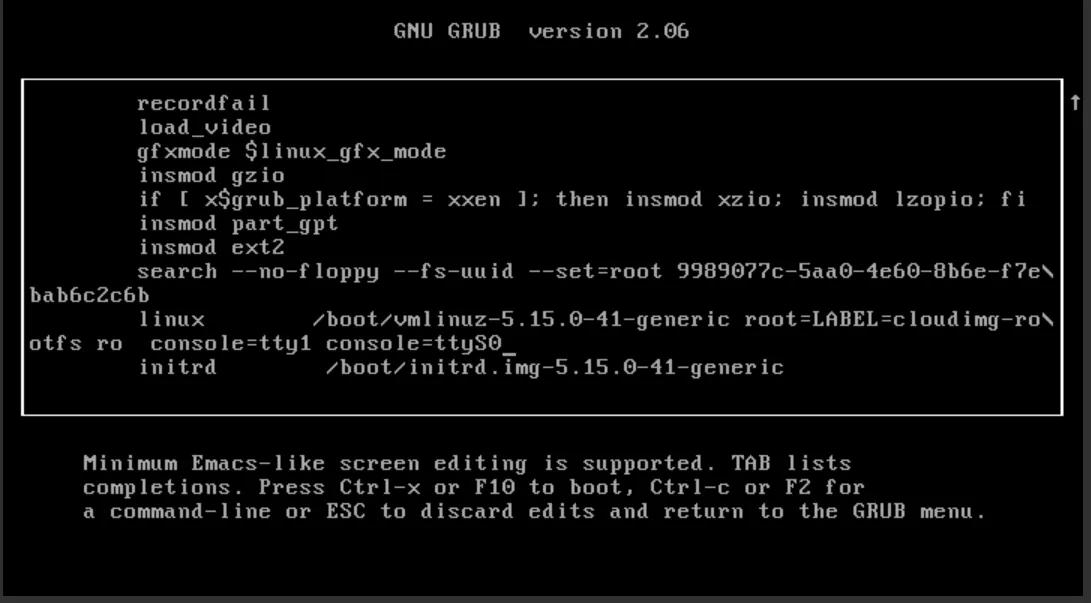
Gehen Sie nun zum Ende dieser Zeile und löschen Sie alles nach ro. Ändern Sie dann ro in rw um und fügen Sie danach init=/bin/bash hinzu. Bei Servern, die auf Fedora basieren, müssen Sie rootflags=subvol=root beibehalten, was nach ro steht, zum Beispiel rw rootflags=subvol=root init=/bin/bash.
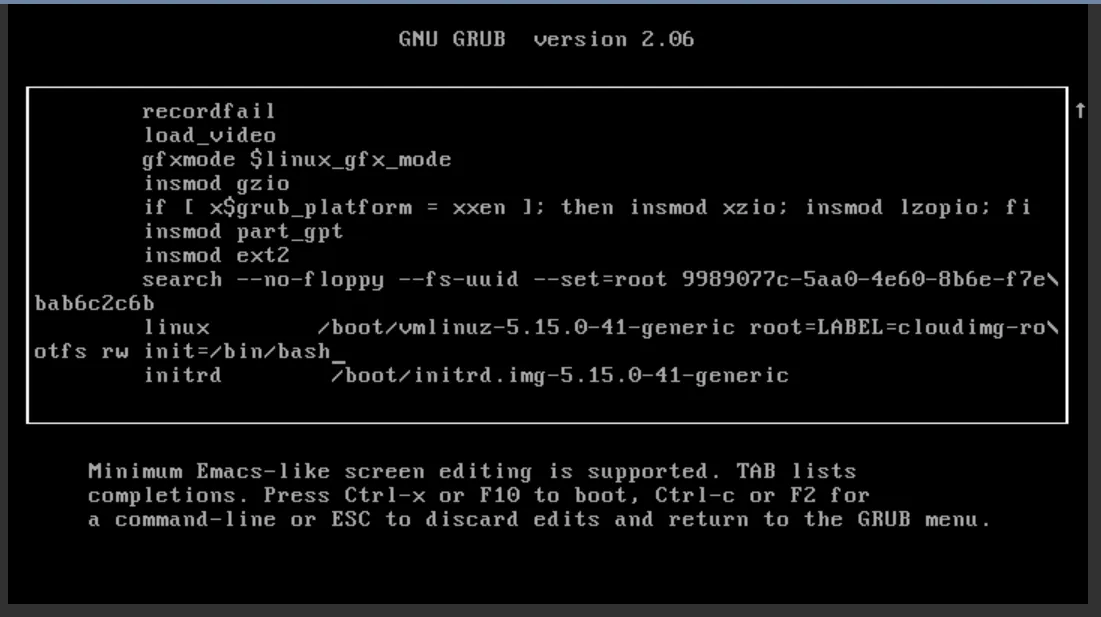
Halten Sie nun die Strg-Taste auf der Tastatur gedrückt und drücken Sie x. Das System beginnt zu booten.
Es wird einen Zustand erreichen, der etwa so aussieht:
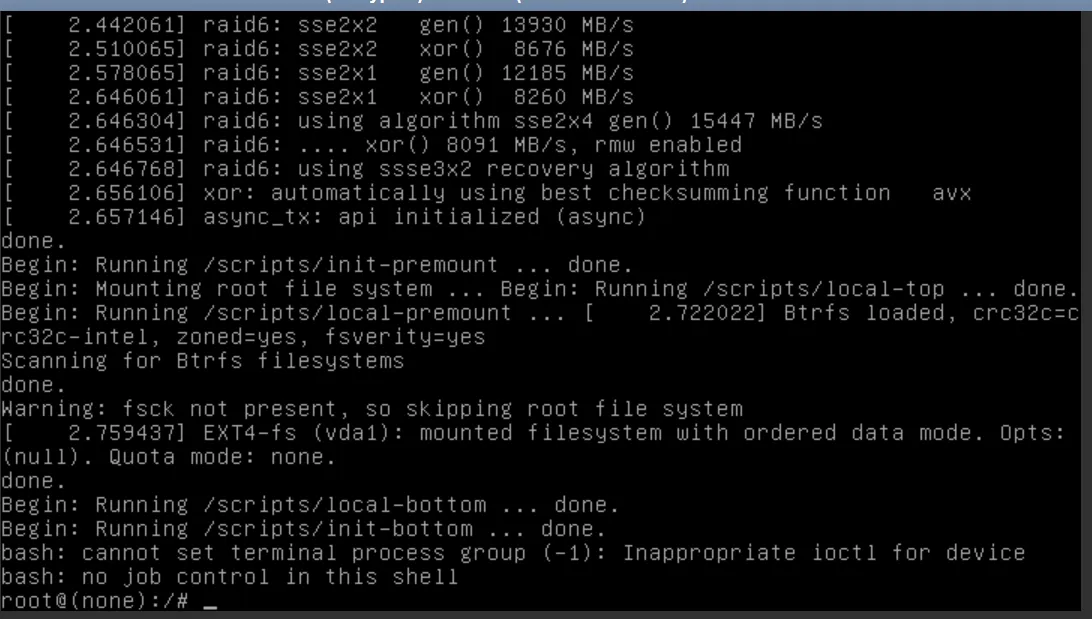
Jetzt können Sie eine Notfall-Fehlerbehebung durchführen oder einfach Ihren Zugriff auf den Server wiederherstellen, indem Sie Folgendes in Ihre Konsole eingeben (Kopieren und Einfügen funktioniert nicht):
passwd rootÄndern Sie nun das Root-Passwort, das Sie für die Anmeldung verwenden werden. Aus Sicherheitsgründen werden Sie das Root-Passwort später erneut ändern!

Wiederholen Sie den obigen Schritt für die Standard-Benutzer Ihrer Distribution.
Nun müssen Sie vorübergehend die Anmeldung per Passwort erlauben. Wir werden dies zu einem späteren Zeitpunkt wieder ändern. Öffnen Sie /etc/ssh/sshd_config.
vi /etc/ssh/sshd\_configSuchen Sie die Zeile, die so aussieht:
#PasswordAuthentication yesSobald sich der Indikator über dem Zeichen# befindet, drücken Sie x um dieses Zeichen zu löschen. Drücken Sie die folgende Tastenfolge: Esc, :, w, q, Enter.
Diese Sequenz speichert Ihre Änderungen.
Ihre Änderungen überprüfen
Abschnitt betitelt „Ihre Änderungen überprüfen“sshd -t
Eine gute Ausgabe sieht so aus:
![]()
Starten Sie den sshd-Daemon neu. Dieser Daemon steuert den Fernzugriff auf den Linux-Server.
systemctl restart sshdAuf EL-basierten Systemen (wie CentOS) heißt der Daemon sshd, während er auf Debian und Derivaten ssh heißt.
Wenn Ihr Server auf der Red Hat-Familie basiert (wie CentOS, CentOS Stream, Fedora, AlmaLinux, Rocky Linux), müssen Sie nun die SELinux-Sicherheit mit dem Befehl
touch /.autorelabel.neu kennzeichnen. Wenn Ihr Server auf der Debian-Familie basiert (wie Debian, Ubuntu), benötigen Sie dies nicht. Starten Sie danach den Server mit dem Befehl exec /sbin/init 6 neu.
touch /.autorelabel exec /sbin/init 6Jetzt sollten Sie in der Lage sein, sich per SSH mit Ihrem Passwort anzumelden. Verwenden Sie das von Ihnen erstellte Passwort:
ssh centos@4.159.97.5 Warning: Permanently added '4.159.97.5' (ECDSA) to the list of known hosts. centos@4.159.97.5's password: X11 forwarding request failed on channel 0 Last login: Thu May 21 09:15:14 2020 from 4.159.97.30 [centos@vm-1-fq4tx0z0 \~]$Bearbeiten Sie Ihre authorized_keys, um Ihren neuen SSH-Key zu erlauben.
echo 'ssh-rsa AAAAB3NzaC1yc2EAAAADAQABAAACAQDMbC29mO0j9NnjTt/eSNQuwX0XPcFT77Fg20wUKCHFyJrC+yldMja8EEEo+LY2HRgu5mzDHdKG9nHW2yGtPt1kUfz6Icck/Of5uT5G9139IKdDd1VxdqDOKKQq6e+3cbtLe0JvAdEG/B7M0nIkpguVX2T2Lojsi7xF3sHjrg7vjYeFWmoBjWl7tilgu0eXTHFdmKvCJ05qjgU5OwXitE8YtxKd/iifs0YACan3PCFX4P4vAe/oBjmaIW2qCLaBTEI2COMl6/EVaIhiudplTFJV4ebbbidwhXkGWj8o0mMEv7umgIsU3Fv4UoUQ0fU7ZxqReApIBGLtKL6rG7NntTD6r6ROrh5VXfJfWRXQgBh+S/Ei9gvRBeu0qzqEiSIyIWT14+RsXjDuGBRch2GZmGjres7XEqtCRvpnDJ6A1gS8NFeHr9GcATUbBhS45iFCuDTvFfNgI7ydyOfWlB+/D8fvrfgXH7k1r5291oiNonVTmYkF3sDVWGmRvFoyZcSqBxftok4TCD9vEmqg7Uqa0eAkYIxyxffNmzUgY3UrxRLD+IyUFAoaXKMtkuxE5KrrBYSweIOa5pCvbJOjX/yP7R5SumvEOEJMSiu0bdd5UsP6ed8omax6FWcp3g+P4PMRMbaM/aMowAE+02TizdJ+PDfWD1+f6W4XMZHHyfwsfTeLKw== someuser@MYPC' >> \~/.ssh/authorized\_keysÜberprüfen Sie den Zugriff per Schlüssel. Sie sollten ohne Passwort angemeldet werden.
Machen Sie Ihre Änderungen in der sshd-Konfigurationsdatei rückgängig. Da wir nun in der Lage sind, in der Shell (nicht in der Web-Konsole) Kopieren / Einfügen zu nutzen, können Sie Folgendes ausführen:
sudo sed -i 's/PasswordAuthentication yes/#PasswordAuthentication no/' /etc/ssh/sshd\_configÜberprüfen Sie Ihre Änderungen erneut und starten Sie sshd neu, wenn keine Fehler erkannt werden:
sshd -t systemctl restart sshdSELinux reparieren (CentOS und Derivate):
touch /.autorelabel restorecon -RFvv /etc/shadow restorecon -RFvv /etc/ssh/sshd\_config setenforce 1Setzen Sie nun die Passwörter der Benutzer auf einen Zufallswert:
cat /dev/urandom | tr -dc 'A-Za-z0-9!"#$%&'\\''()*+,-./:;<=>?@[\\]^\_`{|}\~' | head -c 25 | passwd --stdin root cat /dev/urandom | tr -dc 'A-Za-z0-9!"#$%&'\\''()*+,-./:;<=>?@[\\]^\_`{|}\~' | head -c 25 | passwd --stdin centosNeustart:
reboot