Use a server backup
Last updated on
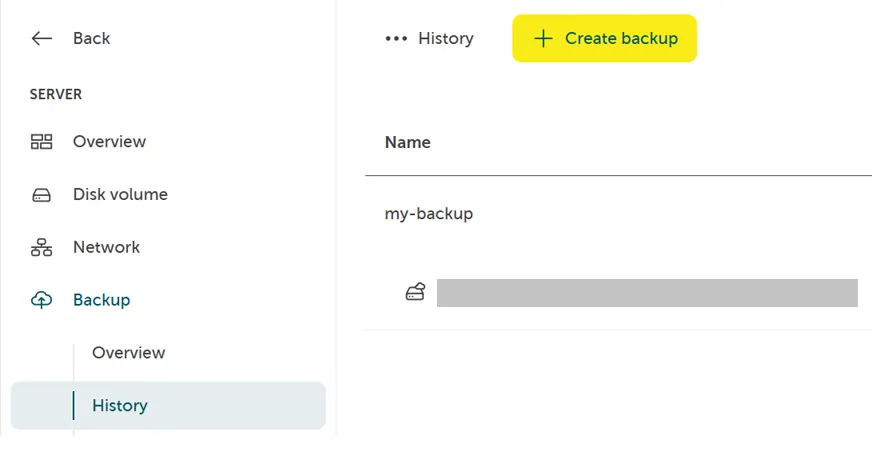
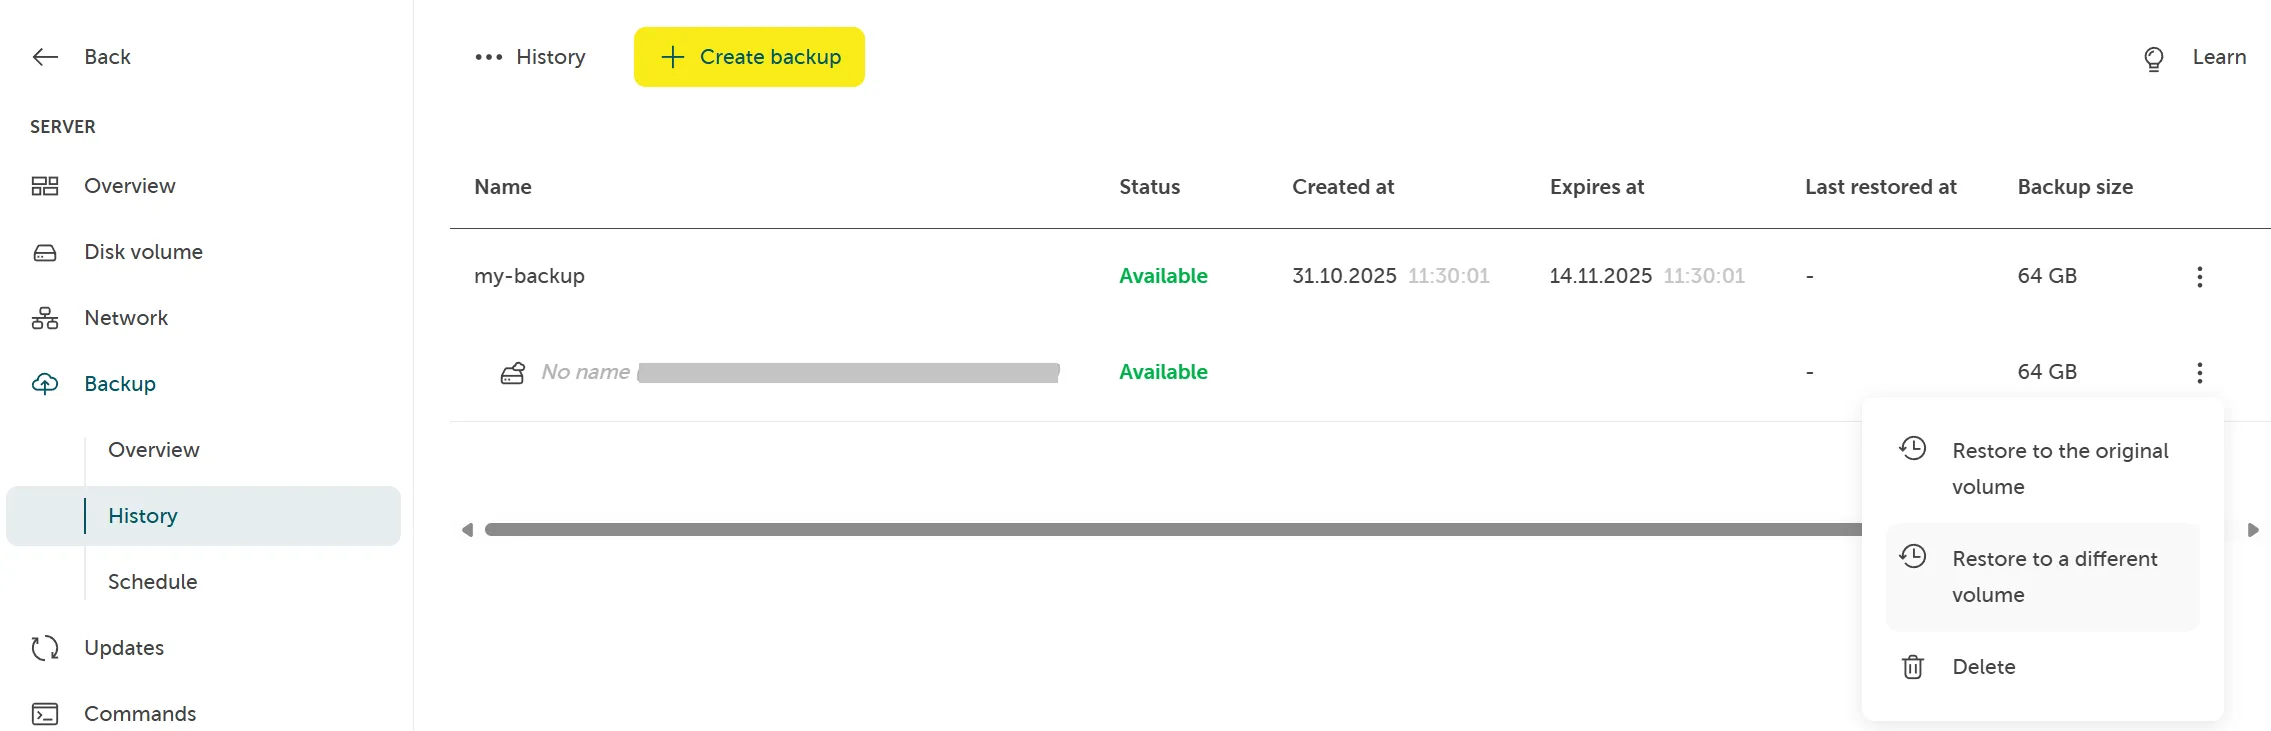
Backup history
Section titled “Backup history”In the backup history you can view the history of your backup jobs for the given server, perform a one time backup, delete backup jobs and restore from backup.

One time backup
Section titled “One time backup”In the backup history you can create a one time backup by clicking Create backup:
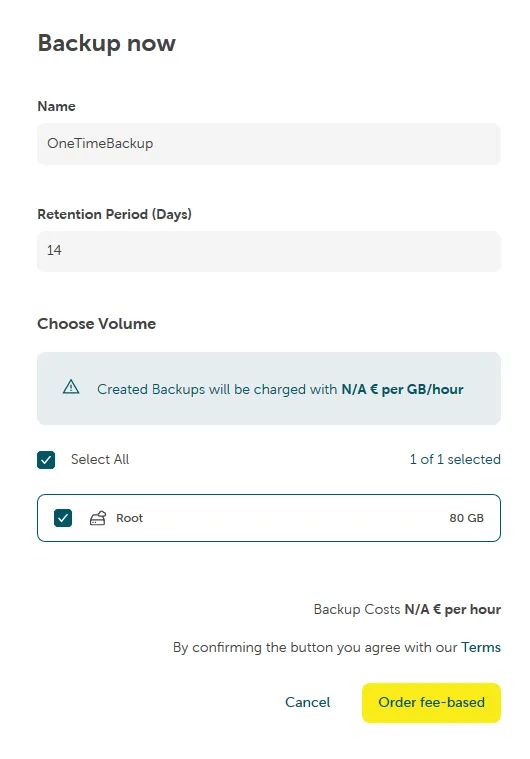
Provide a backup name, retention period, choose volume and click on Order fee-based:
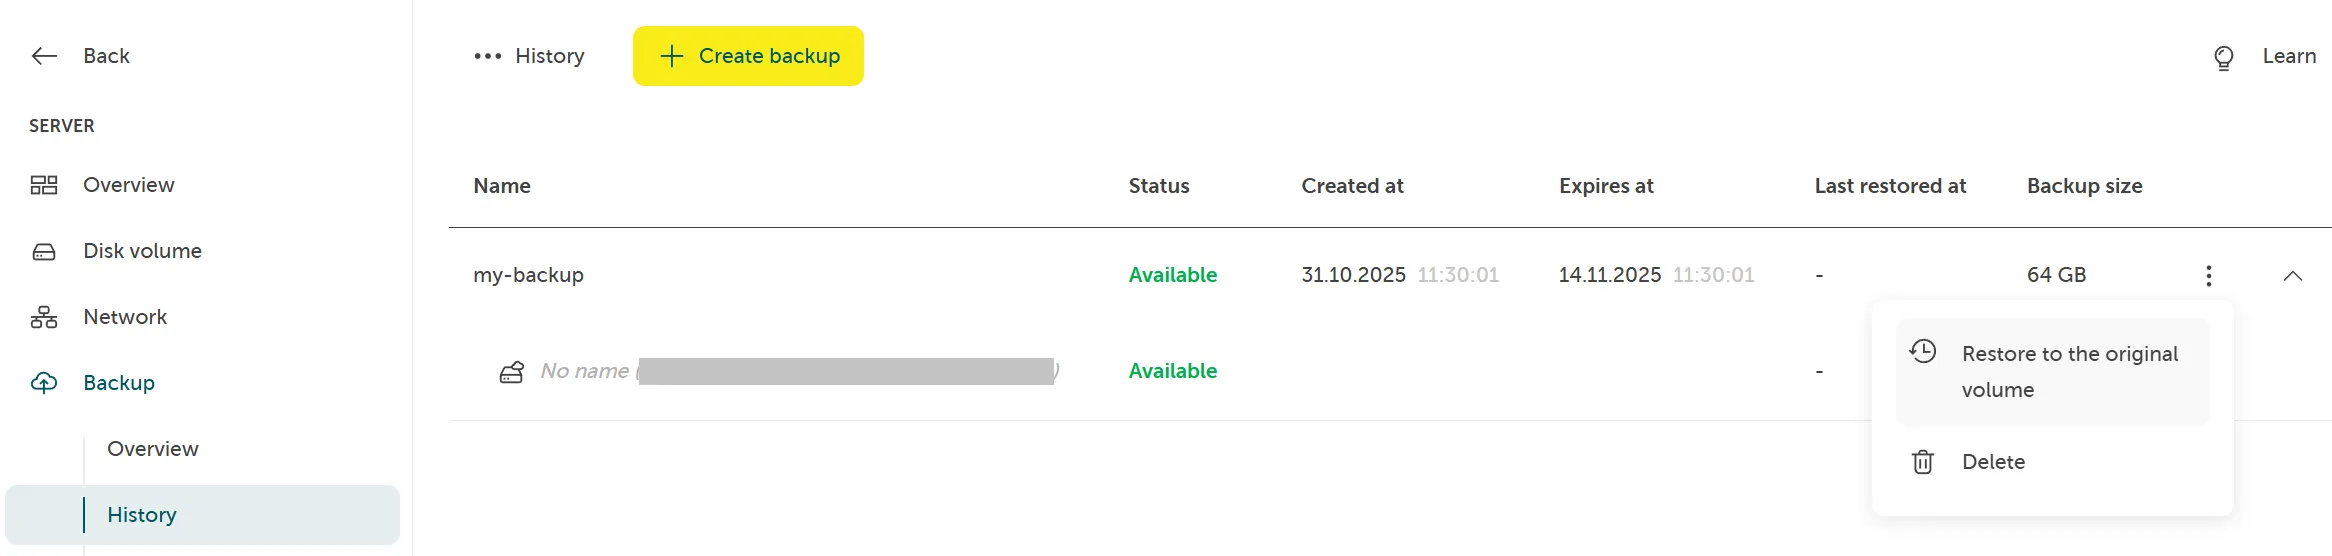
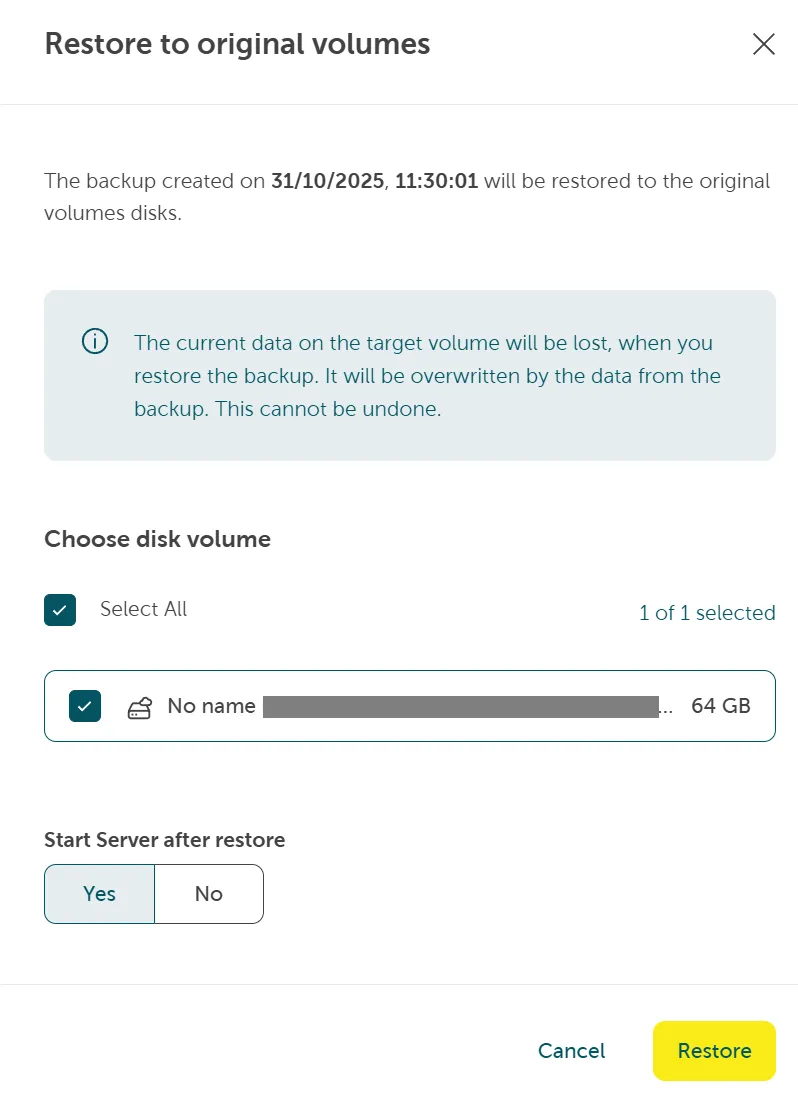
Restore to original volumes
Section titled “Restore to original volumes”In the backup history you can restore a backup of the given server to the original volume. Select a backup by clicking its three-dot menu and select Restore to the original volume:
Confirm by clicking Restore:
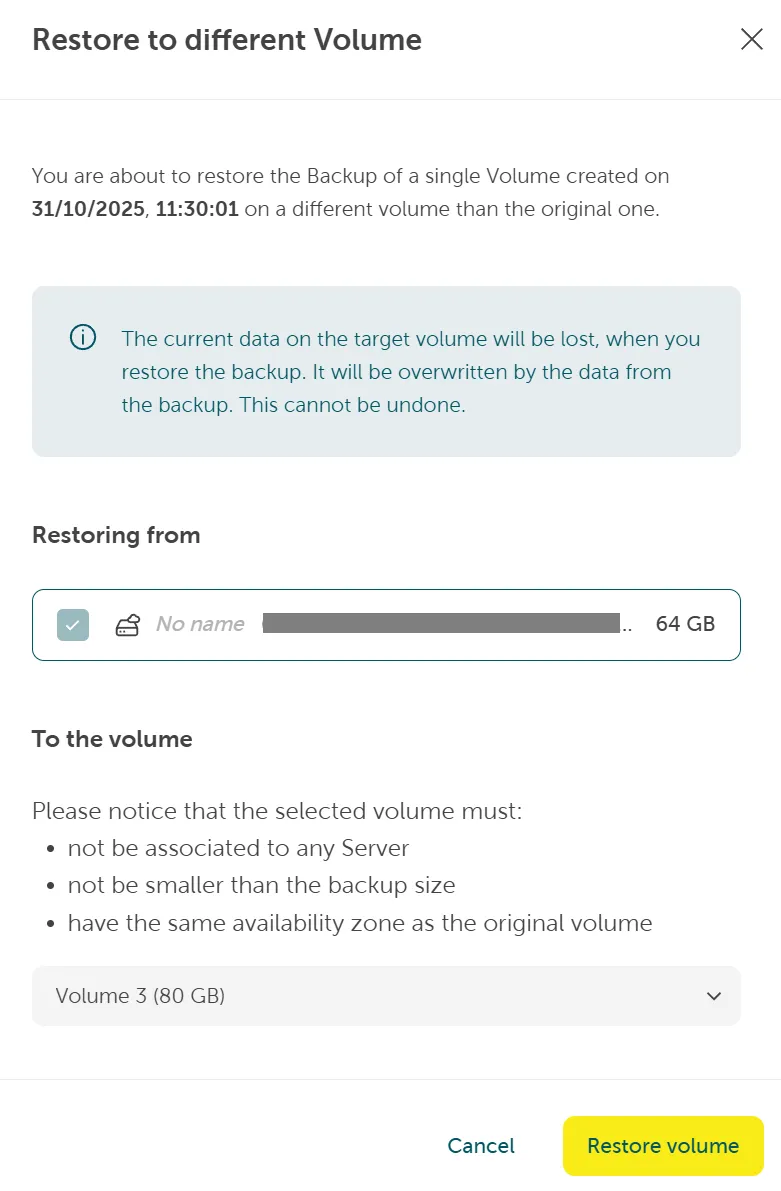
Restore to a different volume
Section titled “Restore to a different volume”Steps to restore your backup to a different volume than the original:
-
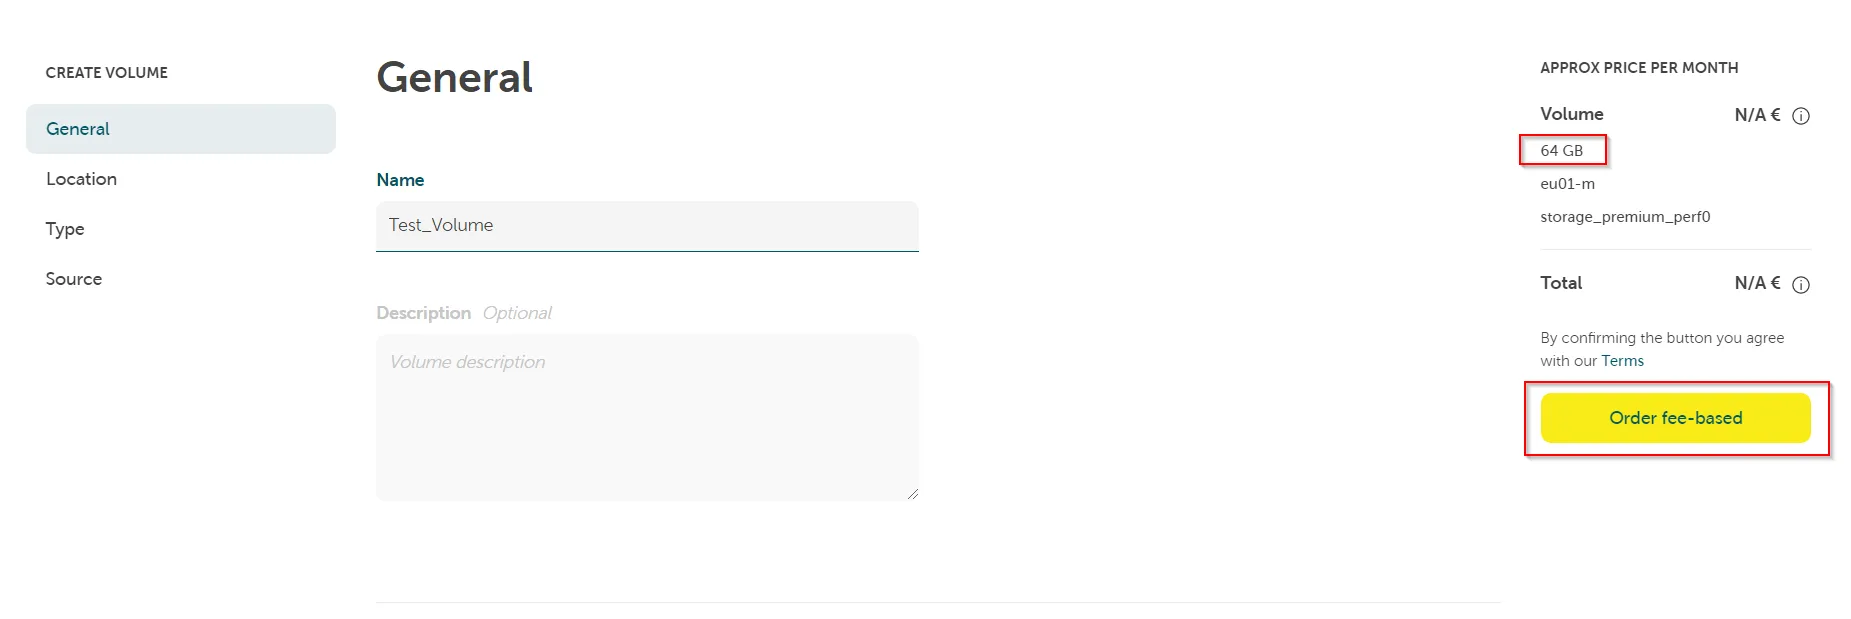
Create new volume
Create a new volume in the project. Navigate to Computing > Disk volumes and click Create disk volume:

The size must not be lower than the backup of original volume and it has to be in the same availability zone as the original volume.
-
Restore to different volume
In Server > Backup > History click on the backup via context menu and select Restore to a different volume. Makes sure it is not attached yet to your or any other server.
Choose the volume you created in step one and click on Restore volume.
-
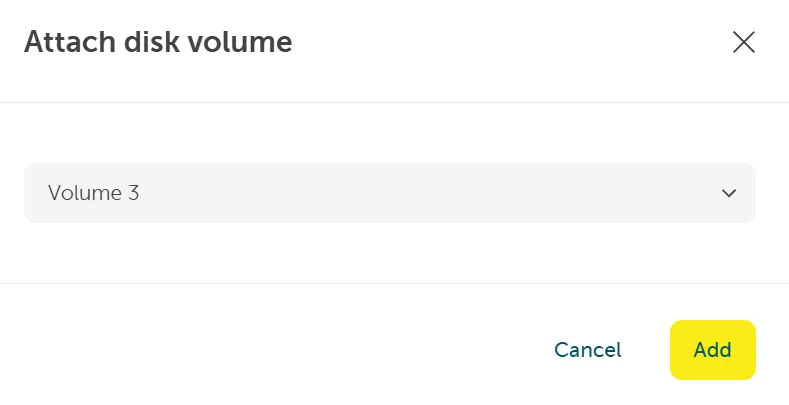
Add volume
After restore is done, go to Computing > Disk volumes, click Attach disk volume and choose your volume with the restored backup:

-
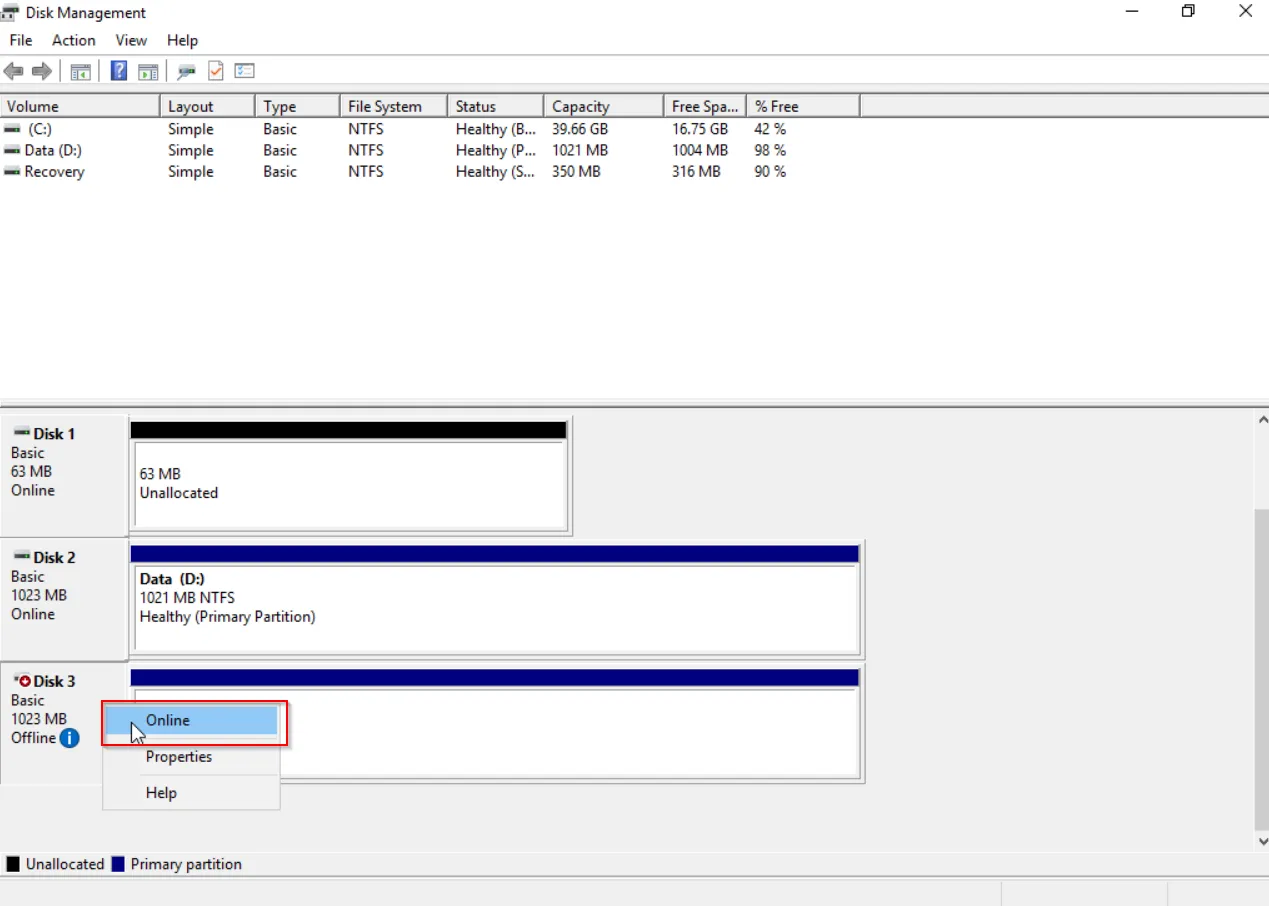
Bring attached volume online
Now login to your server and bring the new attached volume online via the diskmanagment (diskmgmt.msc):
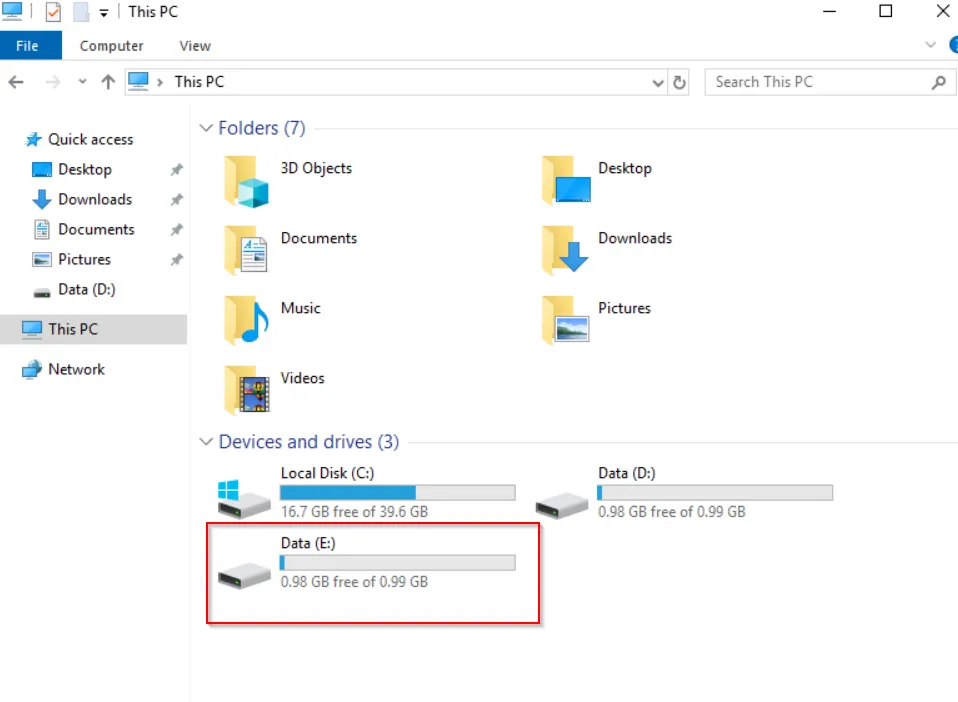
You can now see it in the explorer as extra disk with your restored backup content: