Overview
You can use the Application Load Balancer API to create, delete and modify the Application Load Balancer using tools like Postman. You can refer to the API documentation for Application Load Balancer for detailed instructions.
Before you can use the Application Load Balancer API, make the preparations listed on this page.
Prerequisites
Section titled “Prerequisites”In order to follow the steps described on this page, the following conditions need to be met:
-
Your organization has a customer account.
(See: Create a customer account) -
You have a User Account with the necessary permissions.
(See: Create a user account, Identity and Access Management) -
You have a Project in your customer account.
(See: Create a Project) -
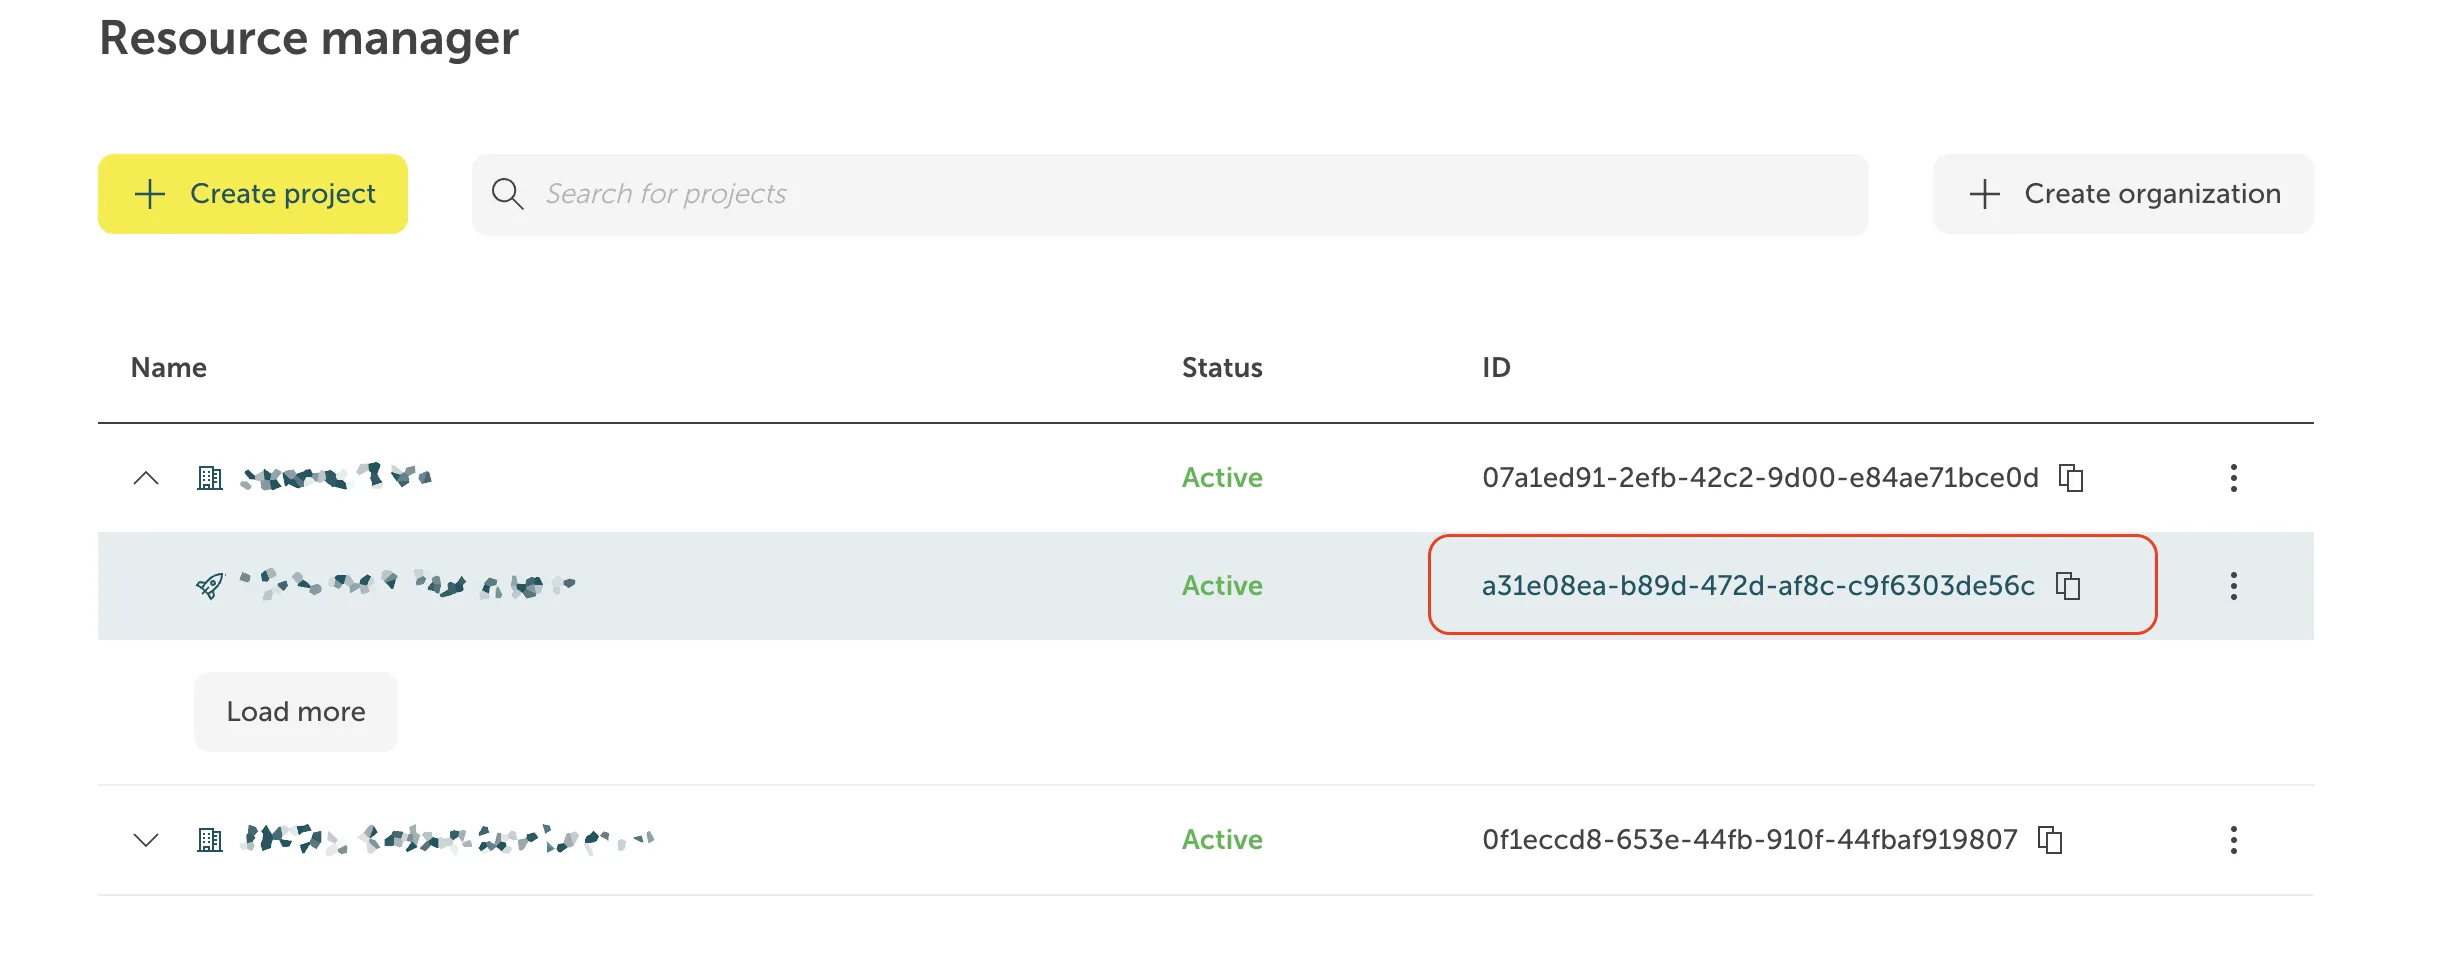
You know the Project ID.
Where do I find the Project ID?
The project ID is displayed in the projects list of the Resource Manager:
- You have created a Service Account.
(See: Create a Service account) - You have assigned the required project permissions to this service account.
(See: Assign permissions to a service account) - You have created an Access Token for this service account.
(See: Assign authentication token to a service account)
To be set up beforehand
Section titled “To be set up beforehand”If you haven’t done so already, prepare the following:
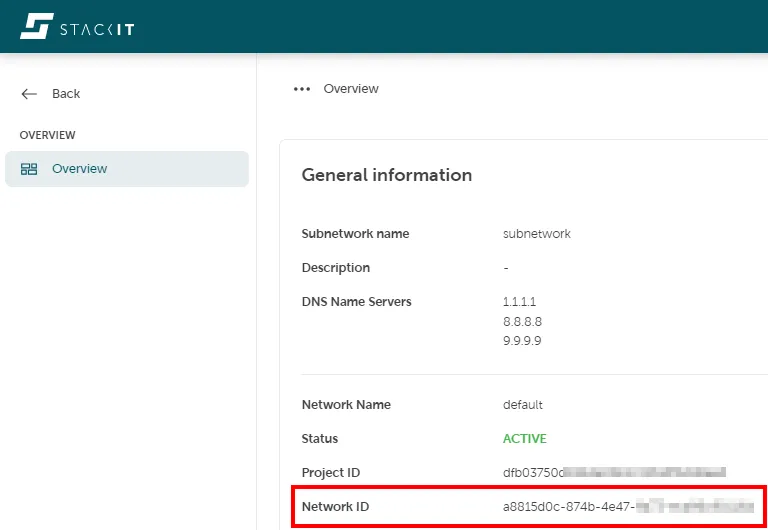
- Set up a STACKIT network with a router/internet access, where the Application Load Balancer VM will be deployed to, and note down the Network ID.
Where do I find the Network ID?
The Network ID is displayed in the Overview tab of your network instance.
- If your service is accessible from the internet, create a public IP address.
See: Creation of a public IP-Address. - Set up a target (the backend server) to which the Application Load Balancer forwards the incoming traffic.
Note down the IP address of this target and the network port where the service is running.
To display the port, you can use thenetstatcommand on Windows/Linux, orlsoforsson Linux.
Parameters to define
Section titled “Parameters to define”- Define the network port your Application Load Balancer should listen on.
For HTTP traffic, which typically uses port 80, it is advisable to configure your Application Load Balancer to also use port 80. - Define names for your Application Load Balancer, network, target pool and targets.
A DNS-like naming convention is enforced, allowing only lowercase letters, numbers and hyphens, with hyphens not permitted at the start or end of the name.