CLI & API
Last updated on
Prerequisites
Section titled “Prerequisites”- Create a service account for your STACKIT project and note its email address.
- Add the service account to the project.member group in the permissions section.
- Create an access token for the service account.
With this access token you can either continue using the STACKIT CLI or the API directly to provision your instances and users.
Secrets Manager API
Section titled “Secrets Manager API”If you prefer to interact with the API directly, visit the OpenAPI specification.
Interacting with your Secrets Manager instance
Section titled “Interacting with your Secrets Manager instance”Vault CLI
Section titled “Vault CLI”Install the CLI as described in the Vault Documentation.
Set the cluster address as environment variable and login with the userpass method to manage your credentials via CLI:
$ export VAULT\_ADDR=https://prod.sm.eu01.stackit.cloudAuthentication
Section titled “Authentication”To authenticate yourself against the Vault CLI, use the userpass method. For this, you have to create a new user in your Secrets Manager Instance and afterwards, use the username and password to authenticate yourself:
$ vault login -method=userpass username= password=""With this authentication method, a token is deposited in your system which is used for future authentication. This token has a default TTL (time-to-live) of 15 min.
You can also maintain this token, e.g. increase the TTL, view it, delete it etc.
For more information visit the HashiCorp token documentation.
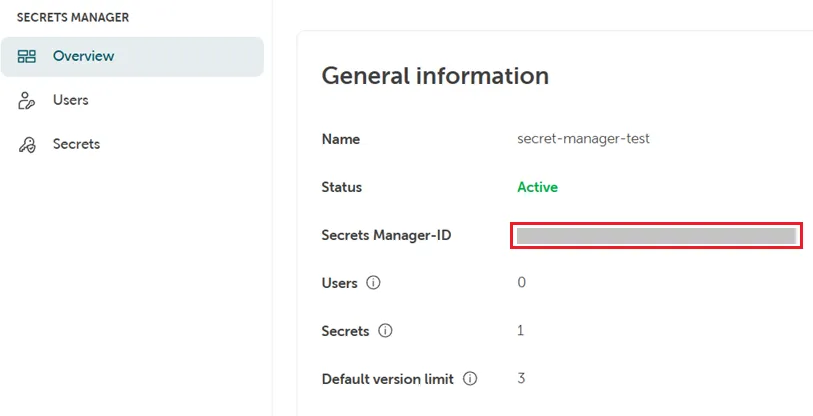
Secrets Path @STACKIT
Section titled “Secrets Path @STACKIT”As the name suggests, this is the path that describes the desired secret path.
HashiCorp Secrets Path: secret/data/creds
STACKIT Secrets Path: [Secrets-Manager-ID]/data/[Secrets-Name]
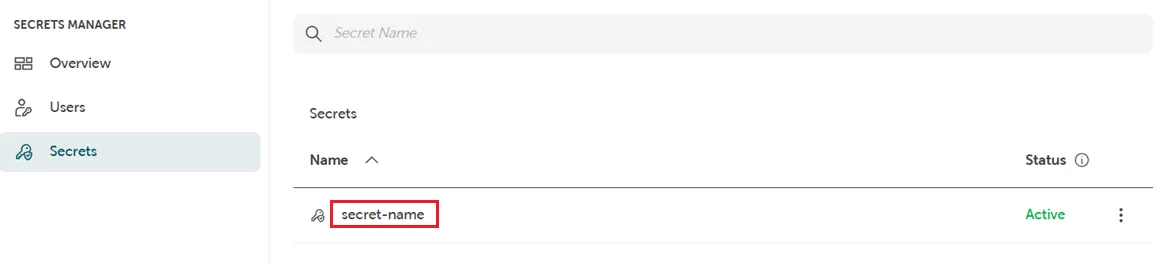
You can also maintain your secrets in a folder structure. This could look like this: SecretsFolder/SecretsName
Basic Examples
$ vault kv put \\ -mount \\ \\ \= \= \======= Secret Path ======= /data/ \======= Metadata ======= Key Value --- ----- created\_time 2024-11-15T01:52:23.434633061Z custom\_metadata deletion\_time n/a destroyed false version 5$ vault kv get -mount \======= Secret Path ======= /data/ \======= Metadata ======= Key Value --- ----- created\_time 2024-11-13T21:58:32.128442898Z custom\_metadata deletion\_time n/a destroyed false version 3 ===== Data ===== Key Value --- -----$ vault token renew --increment=30m ()For further information, please see the HashiCorp documentation.
Vault API
Section titled “Vault API”You can use any client which is compatible to HashiCorp Vault KV Version 2 by using the authentication “UserPass” API-Endpoint https://prod.sm.eu01.stackit.cloud/ui/vault/auth?with=userpass
Authentication
Section titled “Authentication”To authenticate, you will need a username and a password, which you can create in your Secrets Manager instance (see above). With that you can use the userpass endpoint to generate a token that you can use for further API requests.
bash $ curl \\ --request POST \\ --data '{password: ""}' \\ /v1/auth/userpass/login/
This token is valid for 15 min and can be maintained via API or CLI.
You can find further information in the HashiCorp documentation
Basic examples
Section titled “Basic examples”{ "data": { "key": "", "value": "" }, "options": { "max\_versions": 5 } }bash $ curl \\ --header "X-Vault-Token: " \\ --request POST \\ --data @payload.json \\ /v1//data/
bash $ curl \\ --header "X-Vault-Token: " \\ --request GET \\ /v1//data/
Further information can be found in the HashiCorp documentation.