Erstellen einer ersten Redis-Instanz und Verbinden zu jener
Zuletzt aktualisiert am
Voraussetzungen
Abschnitt betitelt „Voraussetzungen“- Sie haben ein STACKIT Kundenkonto: Kundenkonto erstellen
- Sie haben ein STACKIT Benutzerkonto: Benutzerkonto erstellen
- Sie haben ein STACKIT Projekt: Projekt erstellen
Instanz vorbereiten, bestellen und erstellen
Abschnitt betitelt „Instanz vorbereiten, bestellen und erstellen“In dieser Anleitung für die ersten Schritte werden Sie eine Instanz erstellen und konfigurieren. Diese Anleitung zeigt die gängigsten Einstellungen für eine kleine Entwicklerumgebung. Wenn Sie dieser Anleitung folgen, arbeiten Sie mit dem STACKIT Portal. Es gibt viele andere Möglichkeiten, Instanzen zu verwalten. Für ein tieferes Verständnis lesen Sie Erstellen und Verwalten von Instanzen.
- Besuchen Sie das STACKIT Portal.
- Klicken Sie in der Seitenleiste auf Redis.
- Klicken Sie in der Leiste oben auf Redis erstellen.
Nach Abschluss der Schritte sehen Sie ein Overlay mit drei Abschnitten (Allgemeine Informationen, Pläne und Benutzerdefinierte Parameter).
Allgemeine Informationen
Abschnitt betitelt „Allgemeine Informationen“- Übernehmen Sie entweder den vorgeschlagenen Namen oder geben Sie einen benutzerdefinierten Namen ein.
- Wählen Sie unter Instanzversion die Redis-Version aus, die Sie verwenden möchten. Für neue Projekte empfehlen wir die Verwendung der neuesten verfügbaren Version.
- Lassen Sie die Einstellung für den Plan so, wie sie ist (1 Knoten, 1 vCPU, 4 GB RAM und 10 GB Disk), es sei denn, Sie wissen im Voraus, wie viele Ressourcen Sie benötigen werden. Sie können den Plan nachträglich nur innerhalb gewisser Grenzen ändern.
Benutzerdefinierte Parameter
Abschnitt betitelt „Benutzerdefinierte Parameter“-
Lassen Sie die Einstellung für den Disk-Schwellenwert so, wie sie ist (80%).
-
Fügen Sie die IPv4-Adresse Ihres Clients zur Liste der ACLs hinzu.
Wenn Sie sich mit dem Computer verbinden möchten, mit dem Sie diese Dokumentation lesen, verwenden Sie das IP-Trace-Tool von Cloudflare, um Ihre IPv4-Adresse zu ermitteln. Öffnen Sie einen Browser Ihrer Wahl und besuchen Sie das Cloudflare Trace Tool. Kopieren Sie den Wert hinter
ip. Er sollte wiexxx.xxx.xxx.xxxaussehen. Hängen Sie nun/32daran an und fügen Sie es als ACL-Eintrag hinzu. Hängen Sie es dazu mit einem führenden Komma an die vorhandenen Einträge an. Für ein tieferes Verständnis von ACL-Einträgen besuchen Sie Erstellen und Verwalten von Instanzen.
Nachdem Sie alle Einstellungen überprüft haben, klicken Sie auf Zahlungspflichtig bestellen. Dies erstellt Ihre neue Instanz. Sie sehen dann eine Bestätigung, dass Ihre Instanz erstellt wurde. Ihre neue Instanz wird der Liste der Instanzen hinzugefügt. Nach einigen Minuten wechselt sie von In Erstellung zu Aktiv.
Instanz konfigurieren
Abschnitt betitelt „Instanz konfigurieren“Wählen Sie Ihre Instanz aus, um Änderungen an dieser vorzunehmen. Klicken Sie in der Seitenleiste auf Redis und dann auf Ihre neu erstellte Instanz. Dann wird die Übersichtsseite Ihrer Instanz angezeigt.
Anmeldeinformationen erstellen
Abschnitt betitelt „Anmeldeinformationen erstellen“-
Klicken Sie in der Seitenleiste auf Anmeldeinformationen.
-
Klicken Sie auf Anmeldeinformationen erstellen.
-
Kopieren Sie die Informationen aus dem Popup an einen sicheren Ort.
-
Klicken Sie auf Schließen.
Verbindung zur neuen Instanz herstellen
Abschnitt betitelt „Verbindung zur neuen Instanz herstellen“Um eine Verbindung zu Ihrer neuen Instanz herzustellen, benötigen Sie eine Client-Software. In dieser Anleitung verwenden wir Redis Insight. Sie können sie auf der Redis Insight Download-Seite herunterladen. Eine Alternative ist der Befehl redis-cli. Besuchen Sie die Redis-CLI Dokumentation, um weitere Informationen zu erhalten.
Folgen Sie den Anweisungen Ihres Betriebssystems, um das heruntergeladene Redis Insight Installationspaket zu installieren. Öffnen Sie nach erfolgreicher Installation Redis Insight und fügen Sie Ihre Verbindung hinzu:
-
Klicken Sie nach dem Öffnen von Redis Insight auf + Add Redis database.
-
Fügen Sie im neuen Bereich den Connection-String, den Sie im Abschnitt Anmeldeinformationen erstellen erhalten haben, in das Feld Connection URL ein.
-
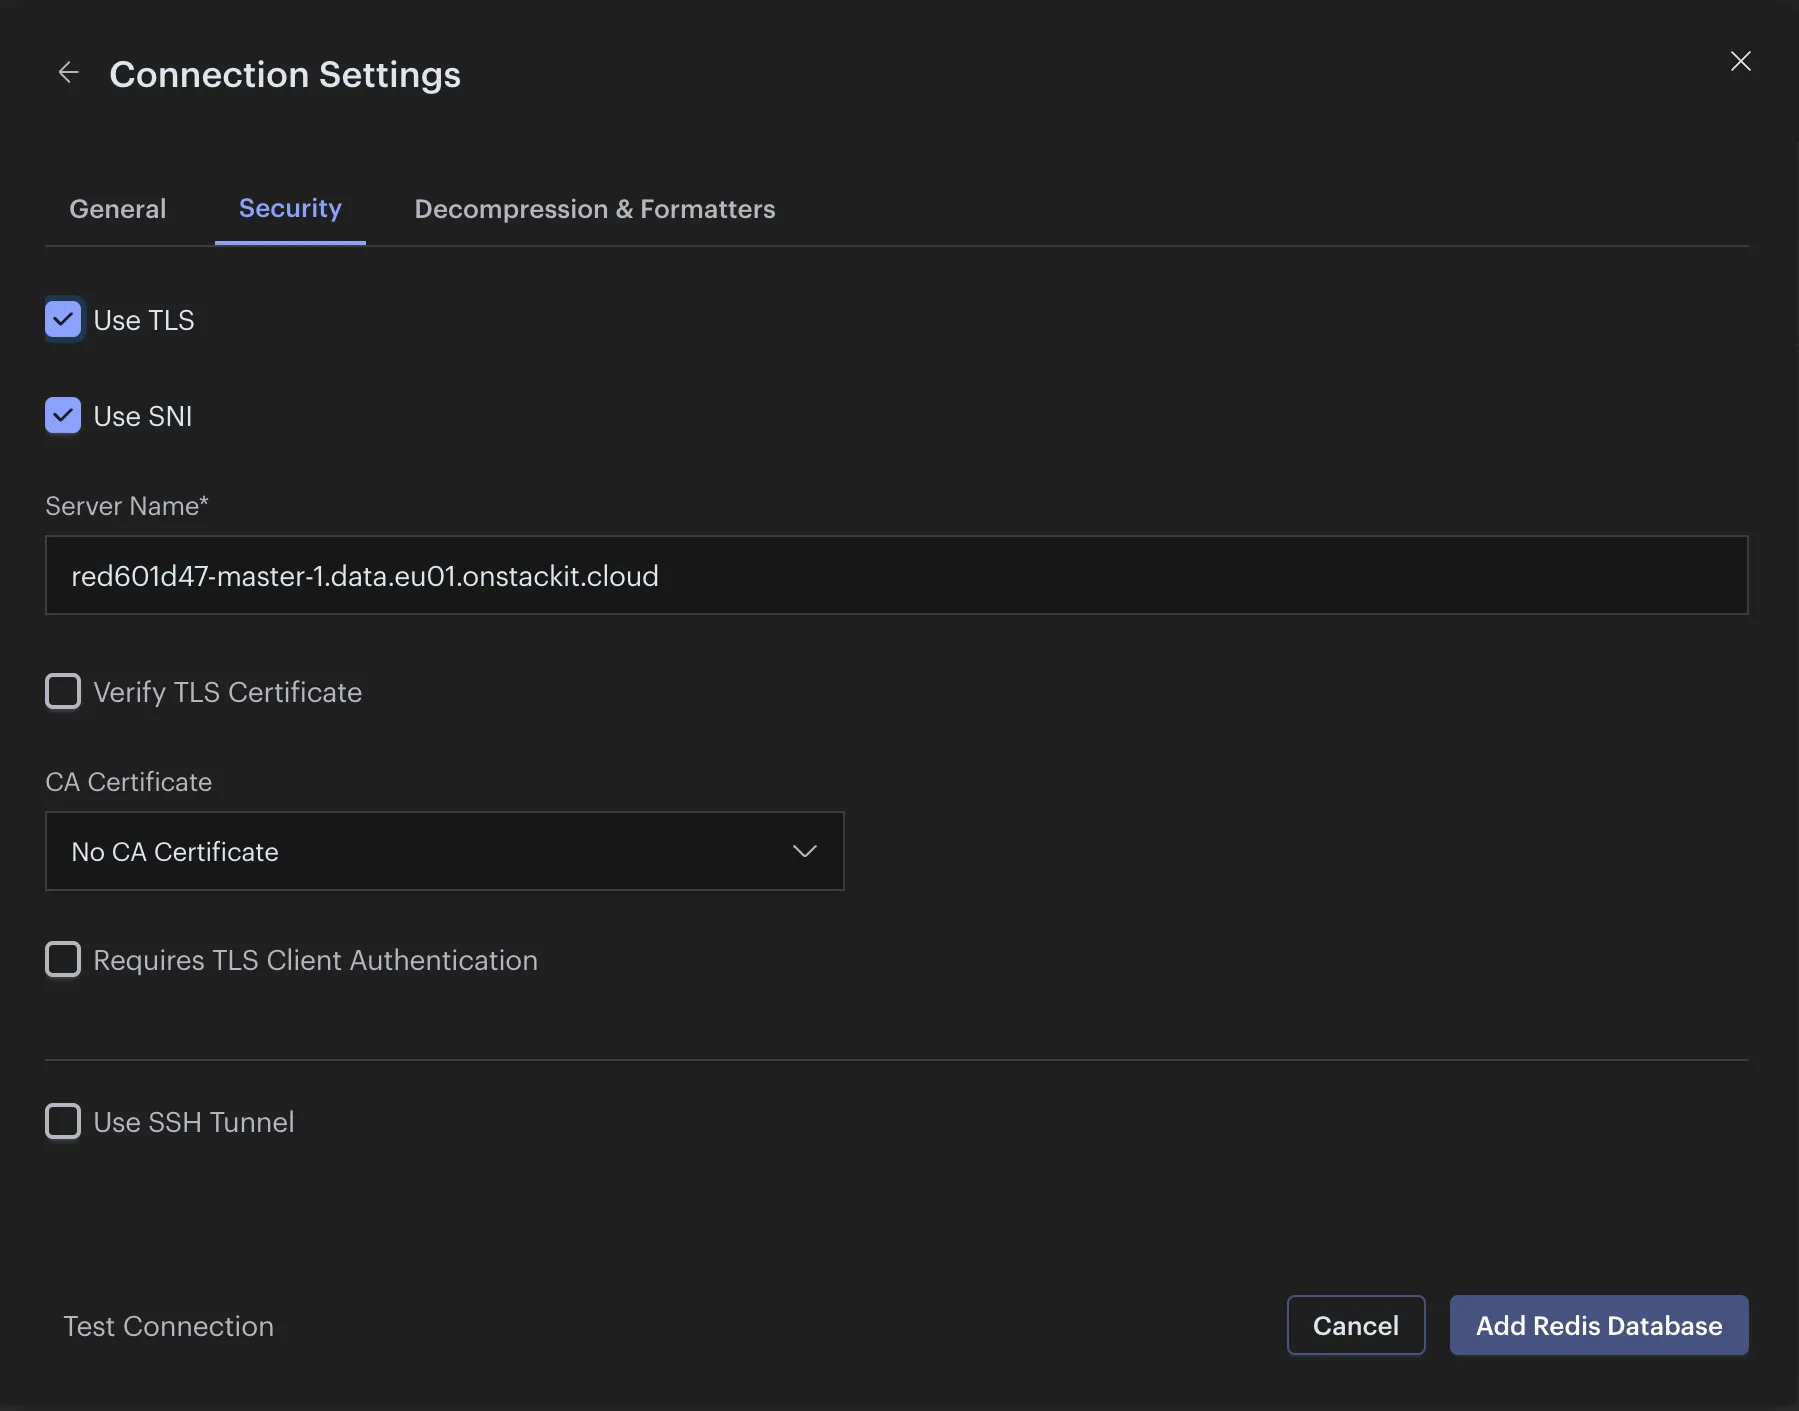
Klicken Sie dann auf Connection Settings und wechseln Sie zum Reiter Security.
-
Klicken Sie auf Use SNI und lassen Sie das vorausgefüllte Feld so, wie es ist.
-
Klicken Sie auf Add Redis Database
Nachdem Ihr Client eine Verbindung hergestellt hat, können Sie einige Beispiel-Leaderboard-Daten als praxisnahes Anwendungsbeispiel einfügen:
Klicken Sie unten links auf >_ CLI und fügen Sie einen Satz von vier Spielern und deren Punktzahl ein, die ein Leaderboard darstellen: