Create logins and users in SQLServer Flex instances
Zuletzt aktualisiert am
Prerequisites
Section titled “Prerequisites”- You have created a Service Account.
(See: Create a Service account) - You have assigned the required project permissions to this service account.
(See: Assign permissions to a service account) - You have created an Access Token for this service account.
(See: Assign authentication token to a service account)
Creating first login after creating a new SQLServer Flex instance
Section titled “Creating first login after creating a new SQLServer Flex instance”Creating the first login is the first step after setting up a new SQLServer Flex instance. Without this login there is no possibility to access the instance and perform any operation there. The first login is the customer main account to perform database administrative tasks.
When setting up the login, the following requirements must be met:
- There is no fixed name for the login, you can choose whatever you want.
The password to this account, however, must adhere to SQL Server password policy, which includes the following rules:- Password does not contain the account name of the user.
- Password is at least six characters long.
- Password contains characters from three of the following four categories: uppercase letters, lowercase letters, base 10 digits, and symbols.
- Password expires 90 days after the login creation or after the last password change.
- User must change password at next login.
- The login has to be assigned the SQL Server role
**##STACKIT_LoginManager##**in order to be able to create other logins.
Using this account, you can create other logins with the same level of administrative permissions as the main administrative login, as well as other logins with normal permissions. - Also, the login needs the SQL Server role
**##STACKIT_DatabaseManager##**in order to be able to create databases.
Any databases created by this login are owned by this account by default.
The login can be created via the following methods:
- Navigate to SQLServer Flex and select the database server on which you want to create a database.
- Select Users from the menu.
- Click Create User.
- Enter the username and select the roles for this user.
See: Creating first login after creating a new SQLServer Flex instance. - Select the default database for this user.
If you do not select a database or there is none to select, the user will be assigned tempdb as default database. - Click Create.
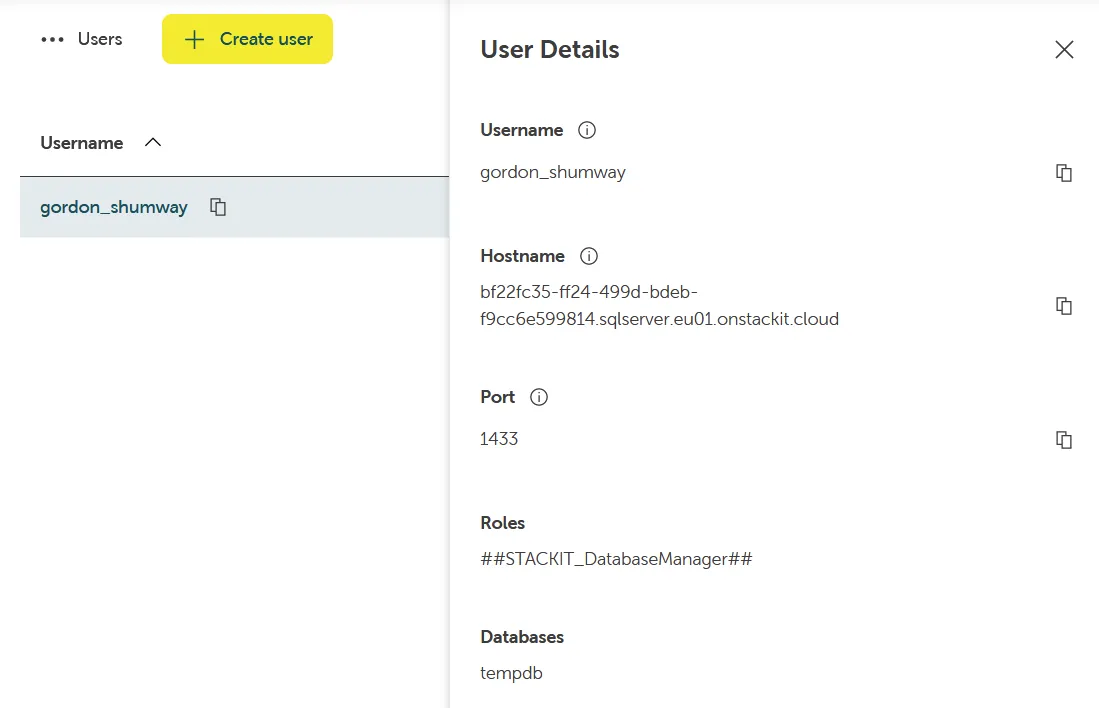
- Copy and save the created credentials in a safe place.
These credentials cannot be retrieved later! - Click Done.
The user is now available and can be used to create a new database. (See: Create Databases in SQLServer Flex Instances).
- Click the username in the user list to see the details of a user.
API calls can be performed using Postman or curl
- Prepare the JSON payload, which a simple JSON object containing the username and the roles of the
new account (replace
Administratorwith the login name of your choice):
{ "username":"Administrator", "roles": ["##STACKIT_LoginManager##", "##STACKIT_DatabaseManager##"]}-
Download and install Postman: Download Postman | Get Started for Free
-
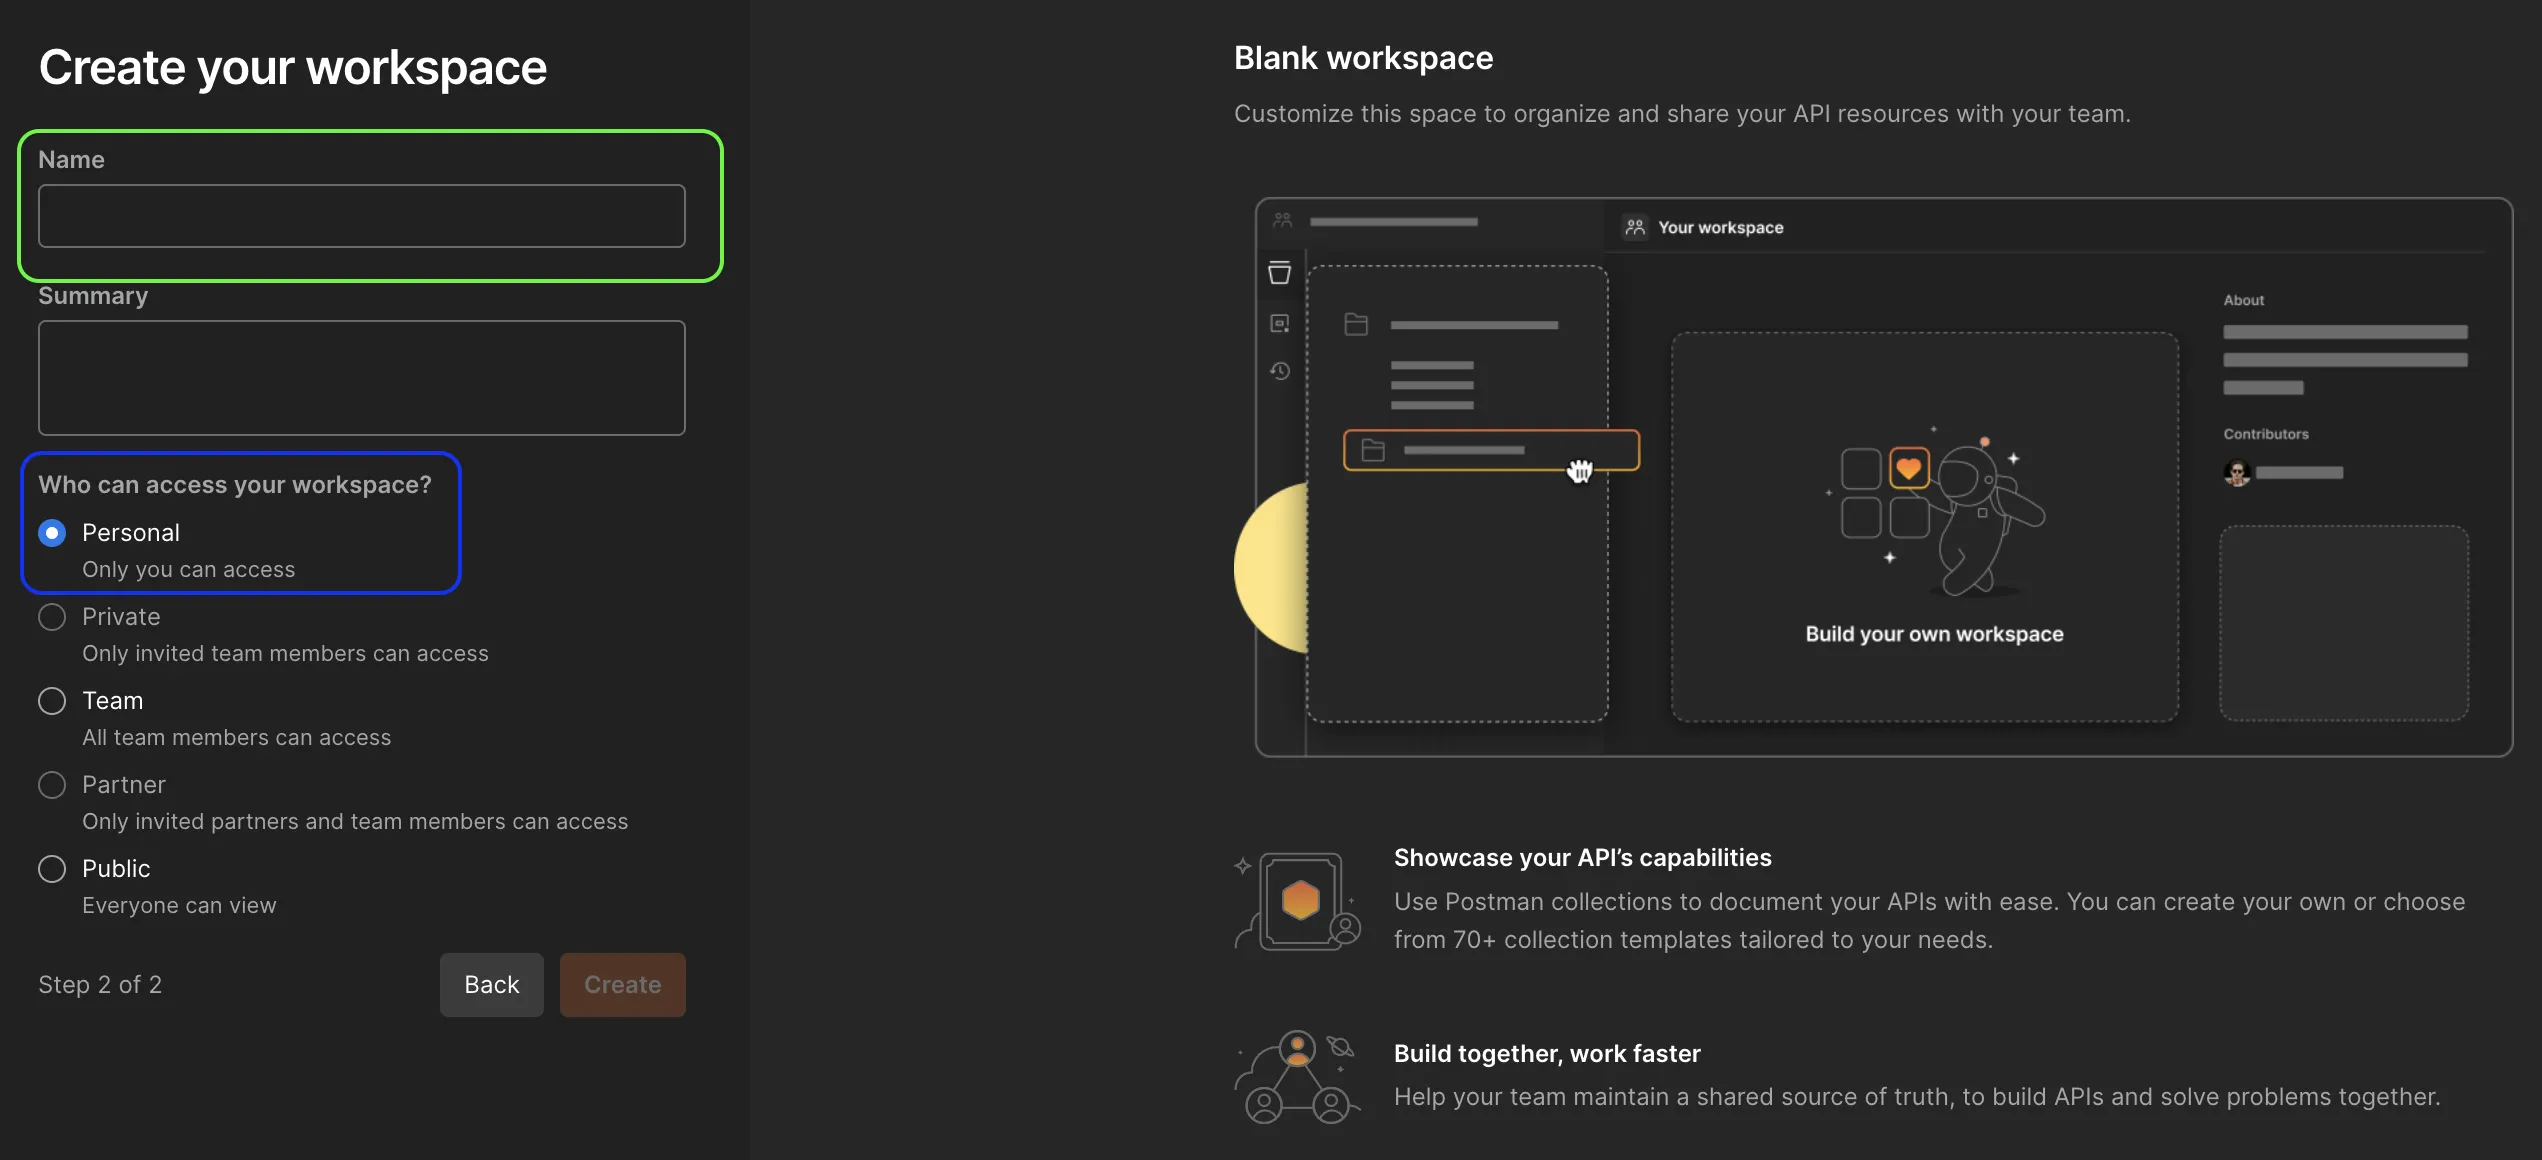
Open Postman and create a new workspace.

-
Name the new workspace and define the access.
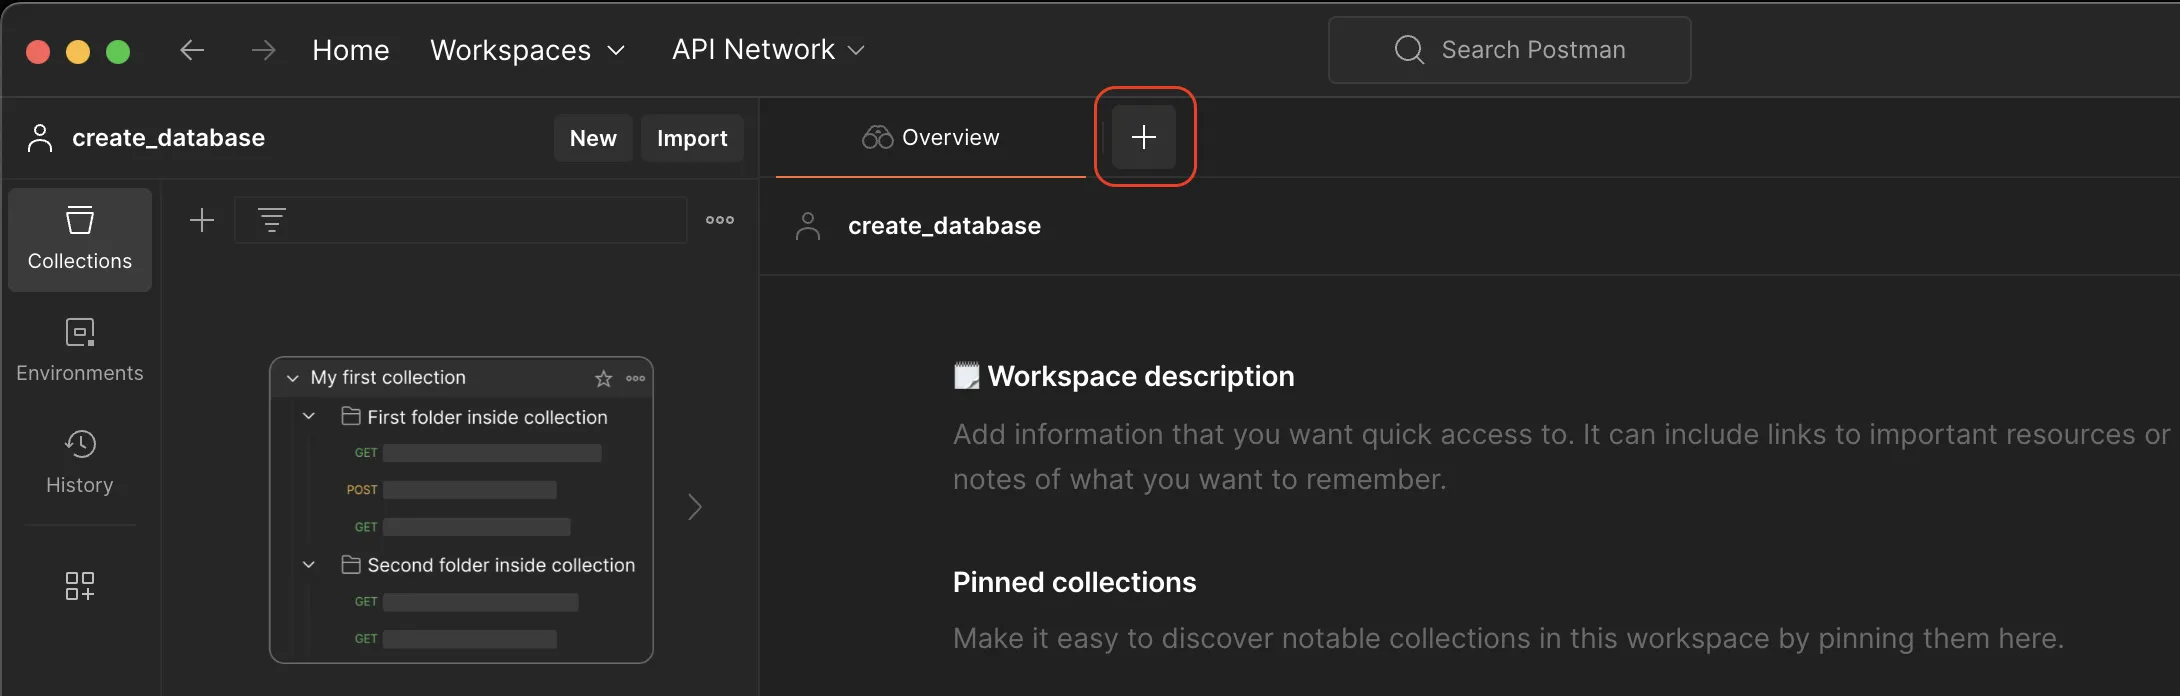
-
Go to Collection and press the ”+” sign to create a new API request.
-
In the Request window, select the POST option from the drop-down list.
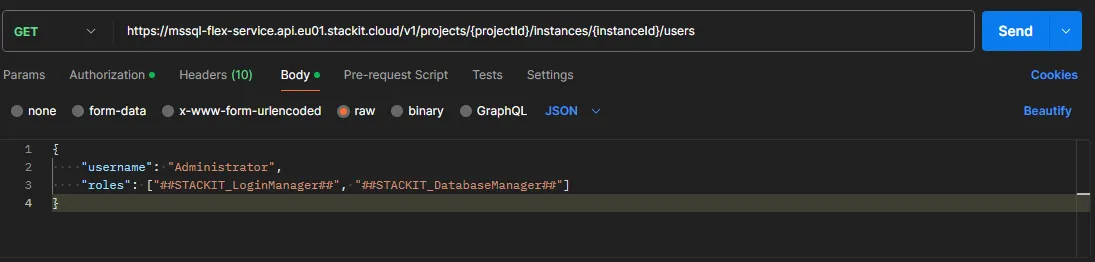
-
Paste the endpoint URL into the address bar:
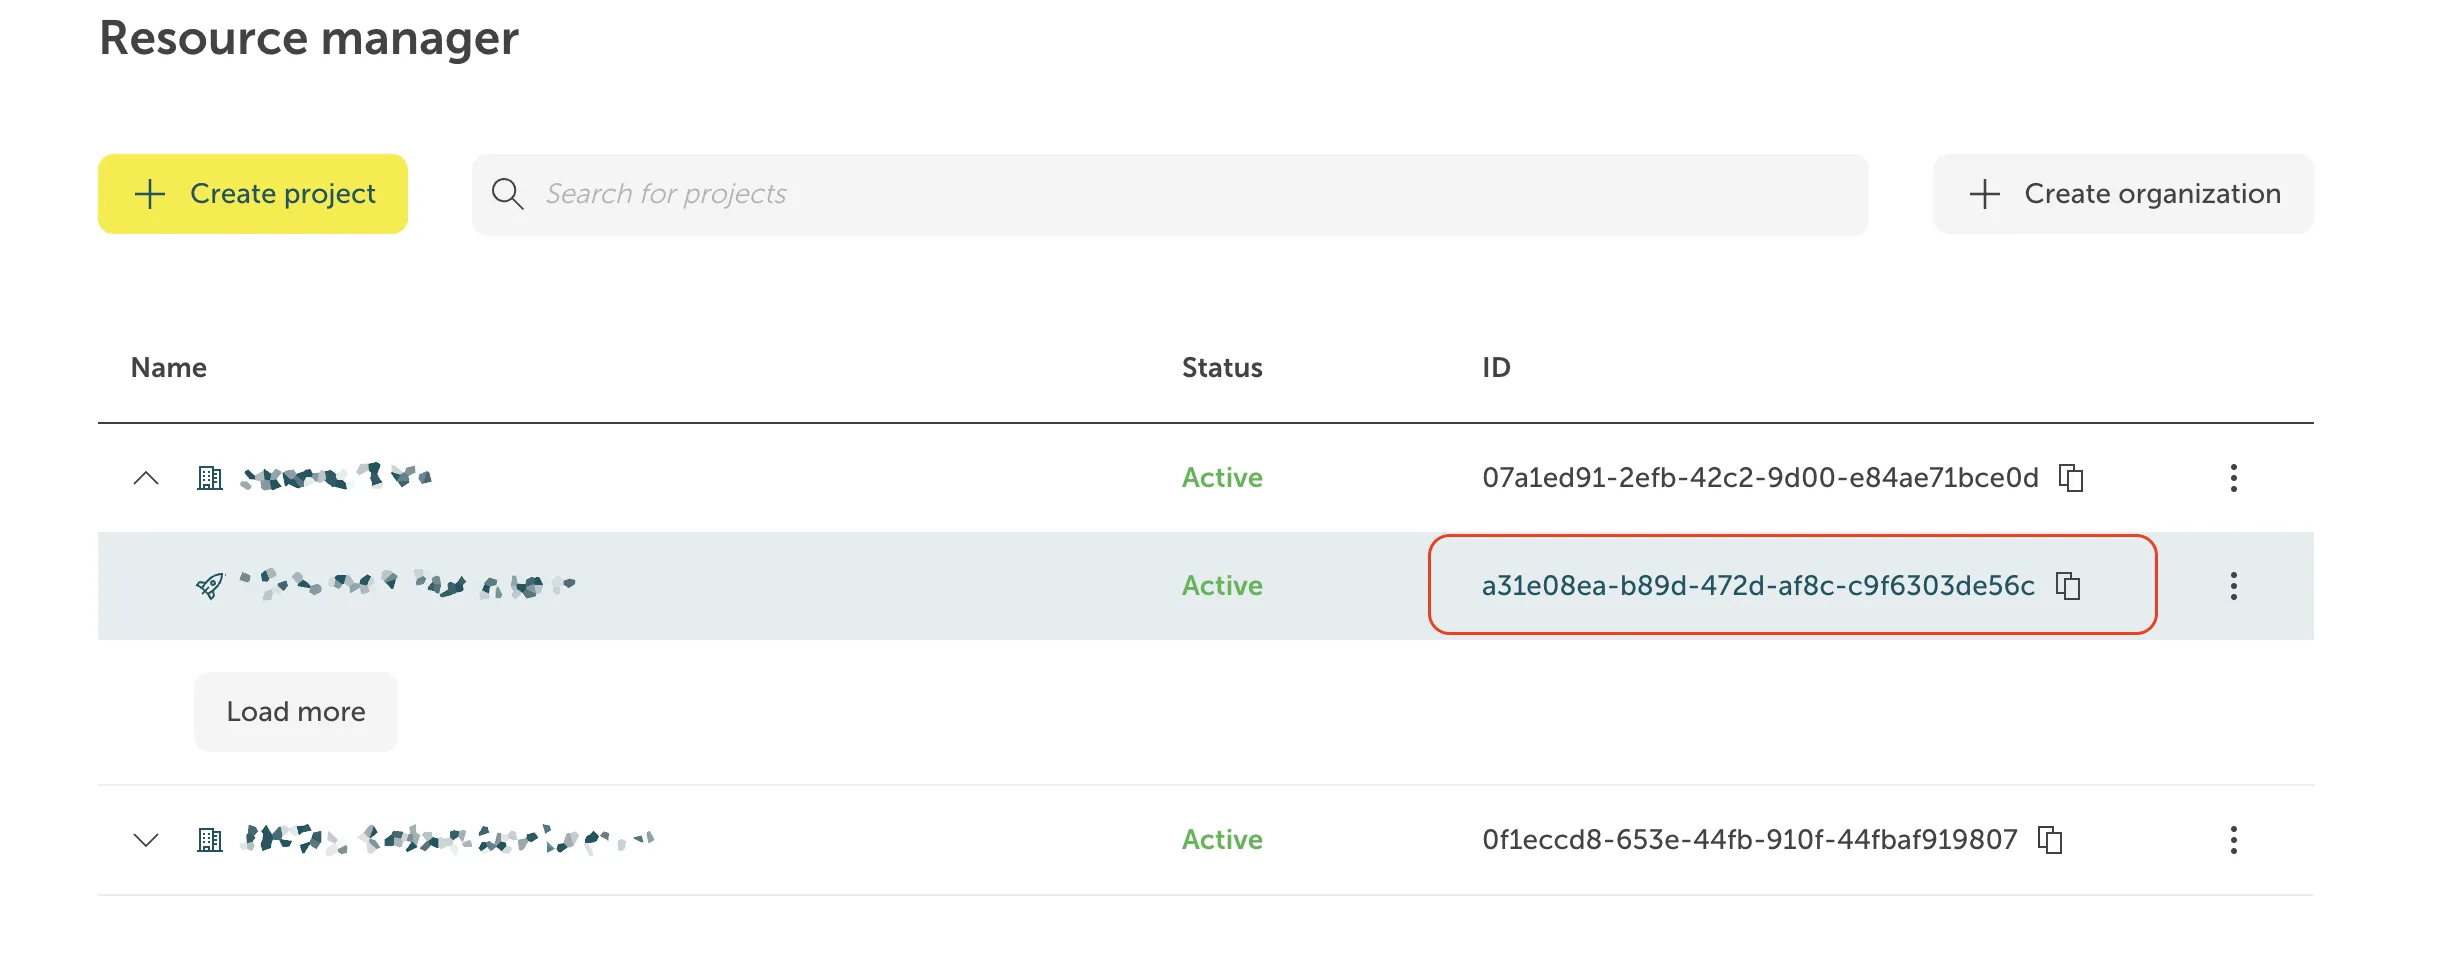
https://mssql-flex-service.api.eu01.stackit.cloud/v2/projects/{PROJECT_ID}/instances/{INSTANCE_ID}/usersand replace{PROJECT_ID},{REGION}and{INSTANCE_ID}with the project id, region id and the instance id of your SQL Server instance, respectively.Where do I find the Project ID? The project ID is displayed in the projects list of the Resource manager:
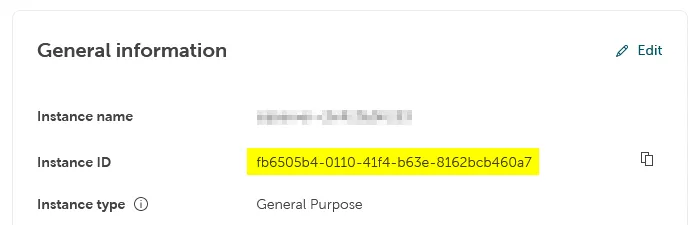
Where do I find the Instance ID? The instance ID has the form of a UUID. It is displayed in the Overview tab of your instance in the STACKIT Portal, in the section General information.
 For some products, the display of the
instance ID in the Portal is not implemented yet. In these cases the instance ID is visible as
part of the instance URL in the address field of your browser when you are on the instance page
in the Portal, and it can be copied from there:
For some products, the display of the
instance ID in the Portal is not implemented yet. In these cases the instance ID is visible as
part of the instance URL in the address field of your browser when you are on the instance page
in the Portal, and it can be copied from there:

-
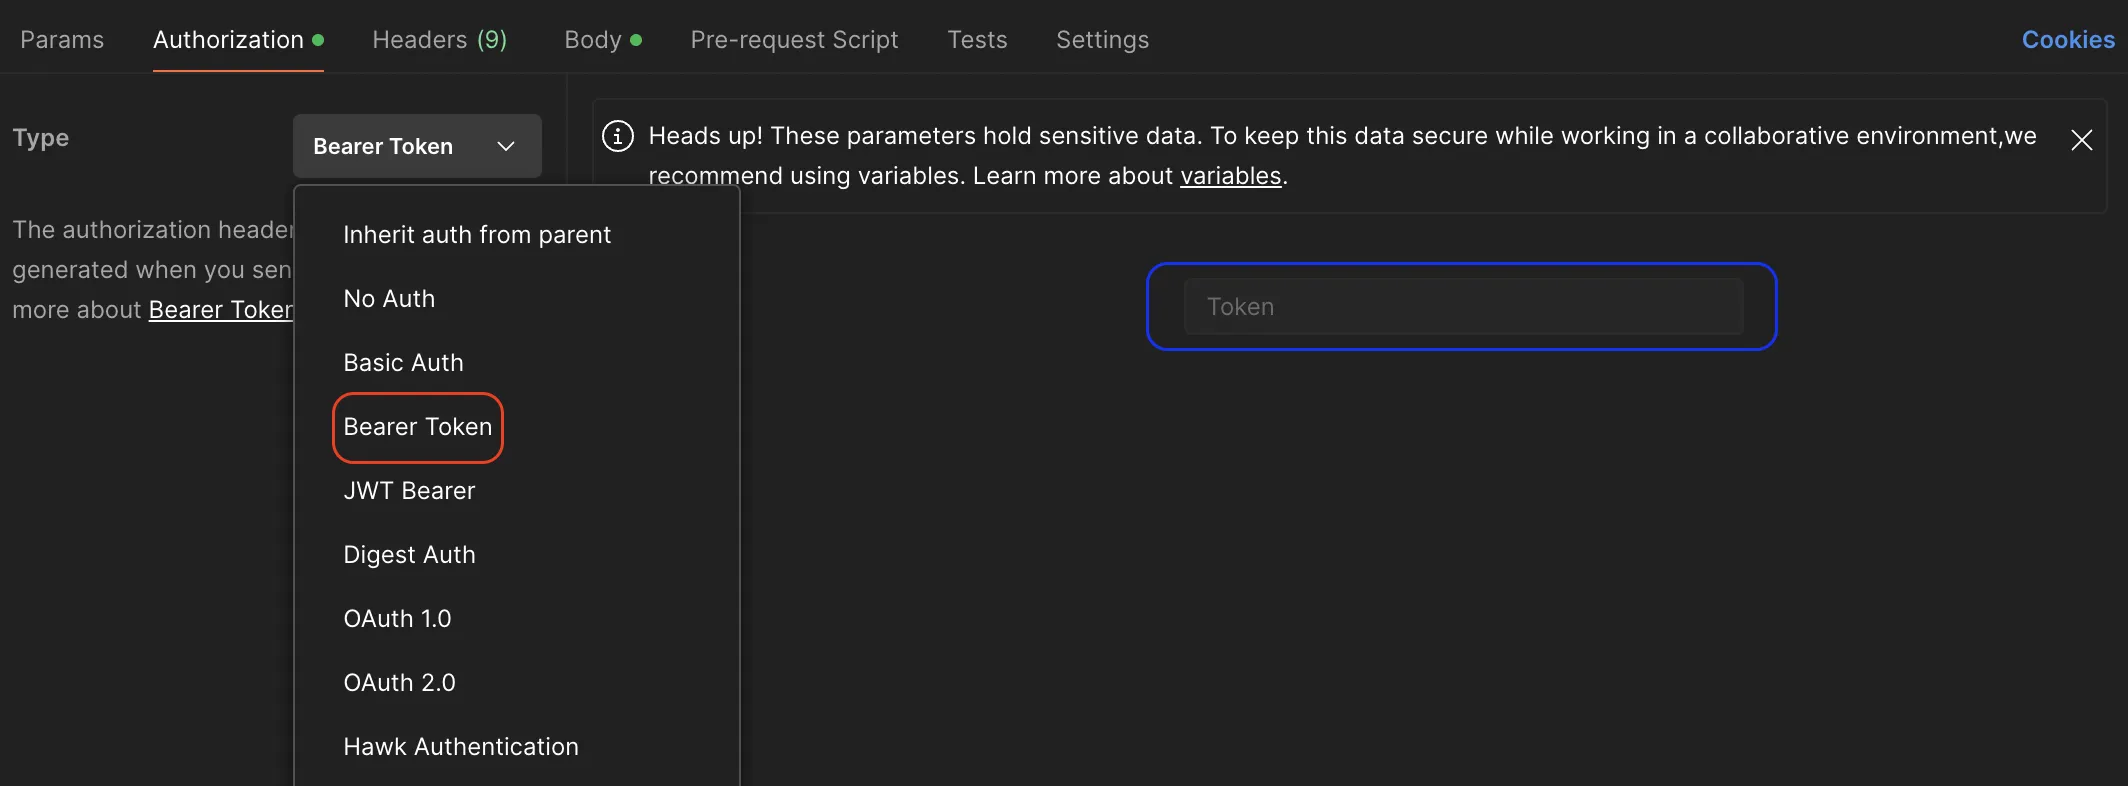
Go to Authorization section and select Bearer Token from the Type drop-down list.
-
Copy your token and past it into the Token section to be used in authentication process when executing the API.
-
Select the _Body* tab.
-
Select raw and paste the JSON payload you prepared before into the input area. 12. Send the request.
- Open a terminal.
- Paste the code below.
- Replace
{PROJECT_ID},{REGION},{INSTANCE_ID}and{TOKEN}with the project ID and the instance ID of your SQL Server instance. - Replace
Administratorwith the login name of your choice. - Run the code.
curl --location --request POST 'https://mssql-flex-service.api.eu01.stackit.cloud/v2/projects/{PROJECT_ID}/regions/{REGION}/instances/{INSTANCE_ID}/users' --header 'Accept: application/json' --header 'Authorization: Bearer {TOKEN}' --data '{"username": "Administrator","roles": ["##STACKIT_LoginManager##", "##STACKIT_DatabaseManager##"]}' | jq.- Open a PowerShell session.
- Paste the code below.
- Replace
{PROJECT_ID},{REGION},{INSTANCE_ID}and{TOKEN}with the project ID and the instance ID of your SQL Server instance. - Replace
Administratorwith the login name of your choice. - Run the code.
curl --location --request POST 'https://mssql-flex-service.api.eu01.stackit.cloud/v2/projects/{PROJECT_ID}/regions/{REGION}/instances/{INSTANCE_ID}/users' --header 'Accept: application/json' --header 'Authorization: Bearer {TOKEN}' --data '{"username": "Administrator","roles": ["##STACKIT_LoginManager##", "##STACKIT_DatabaseManager##"]}' | ConvertFrom-Json | ConvertTo-JsonServer logins can be created by connecting to one of SQL Server client tools, e.g. SQL Server Management Studio, Azure Data Studio or any other client tool that supports connections to SQL Server.
- Connect to the SQL Server Flex instance.
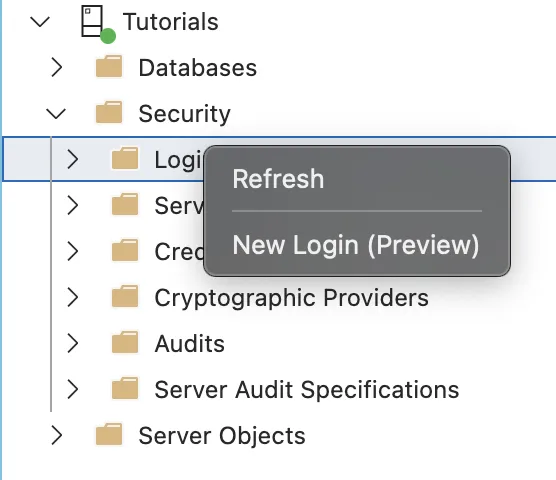
- Navigate to Security → Logins.
- Right click on Logins and select New Login.

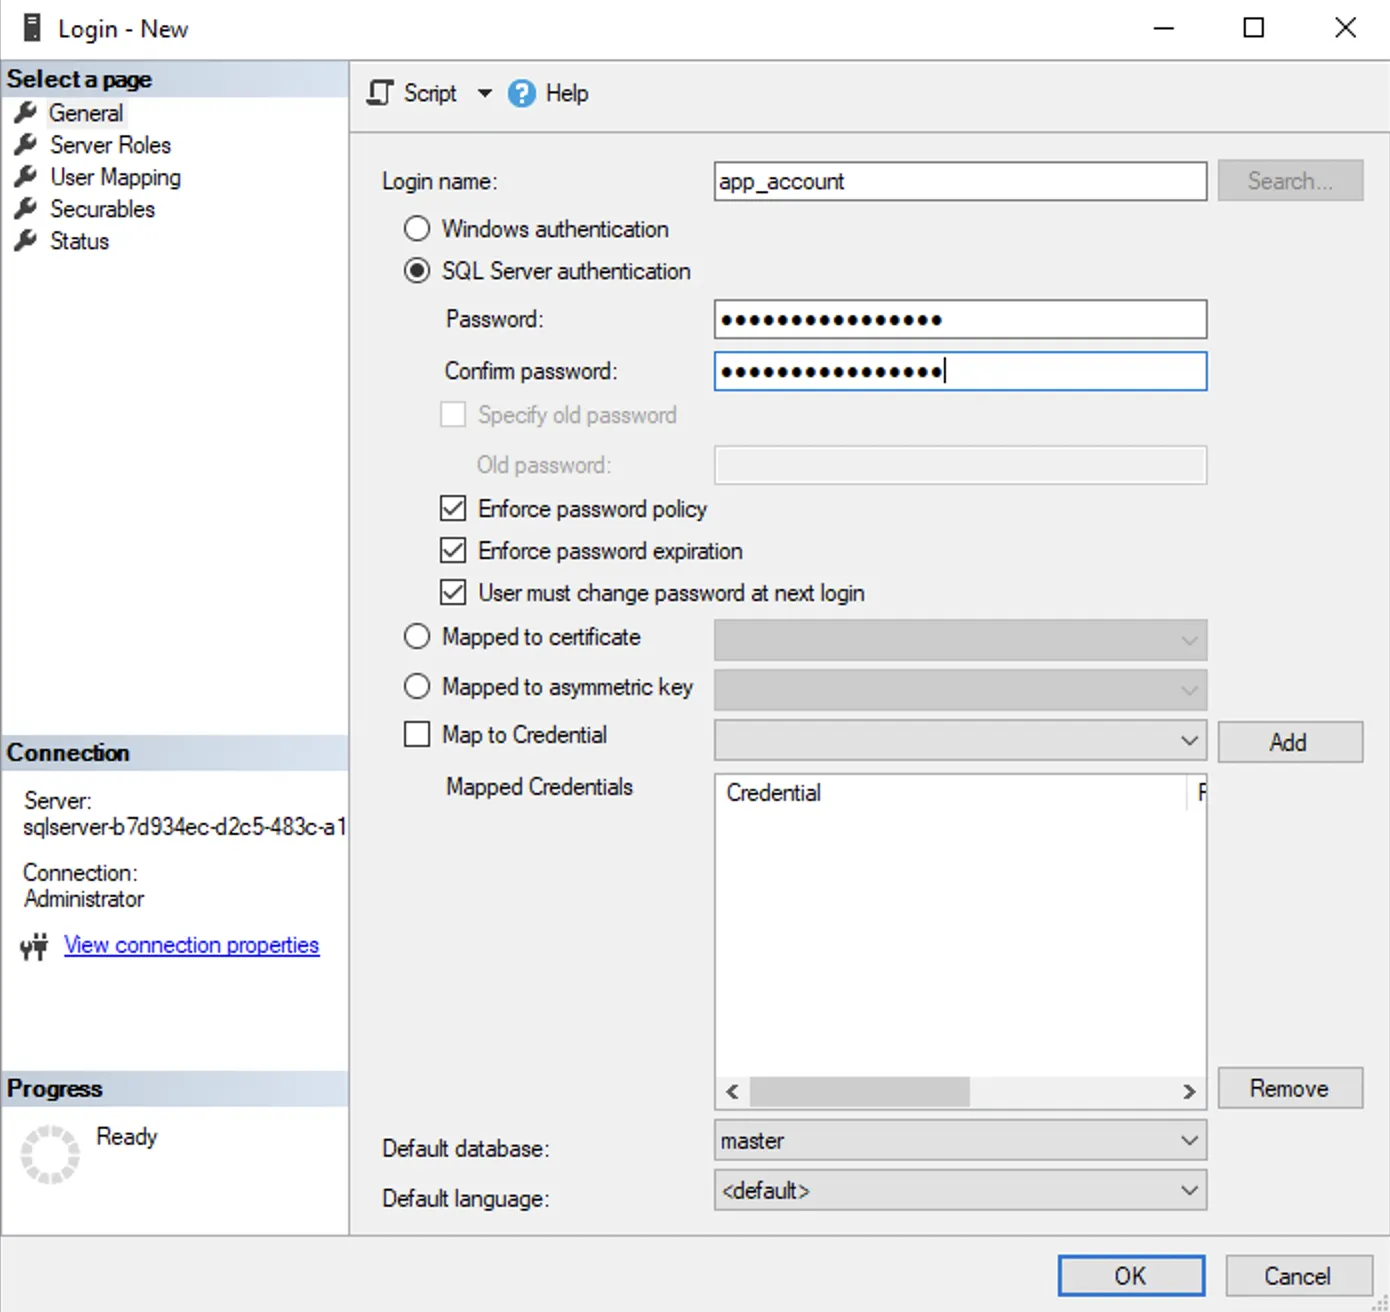
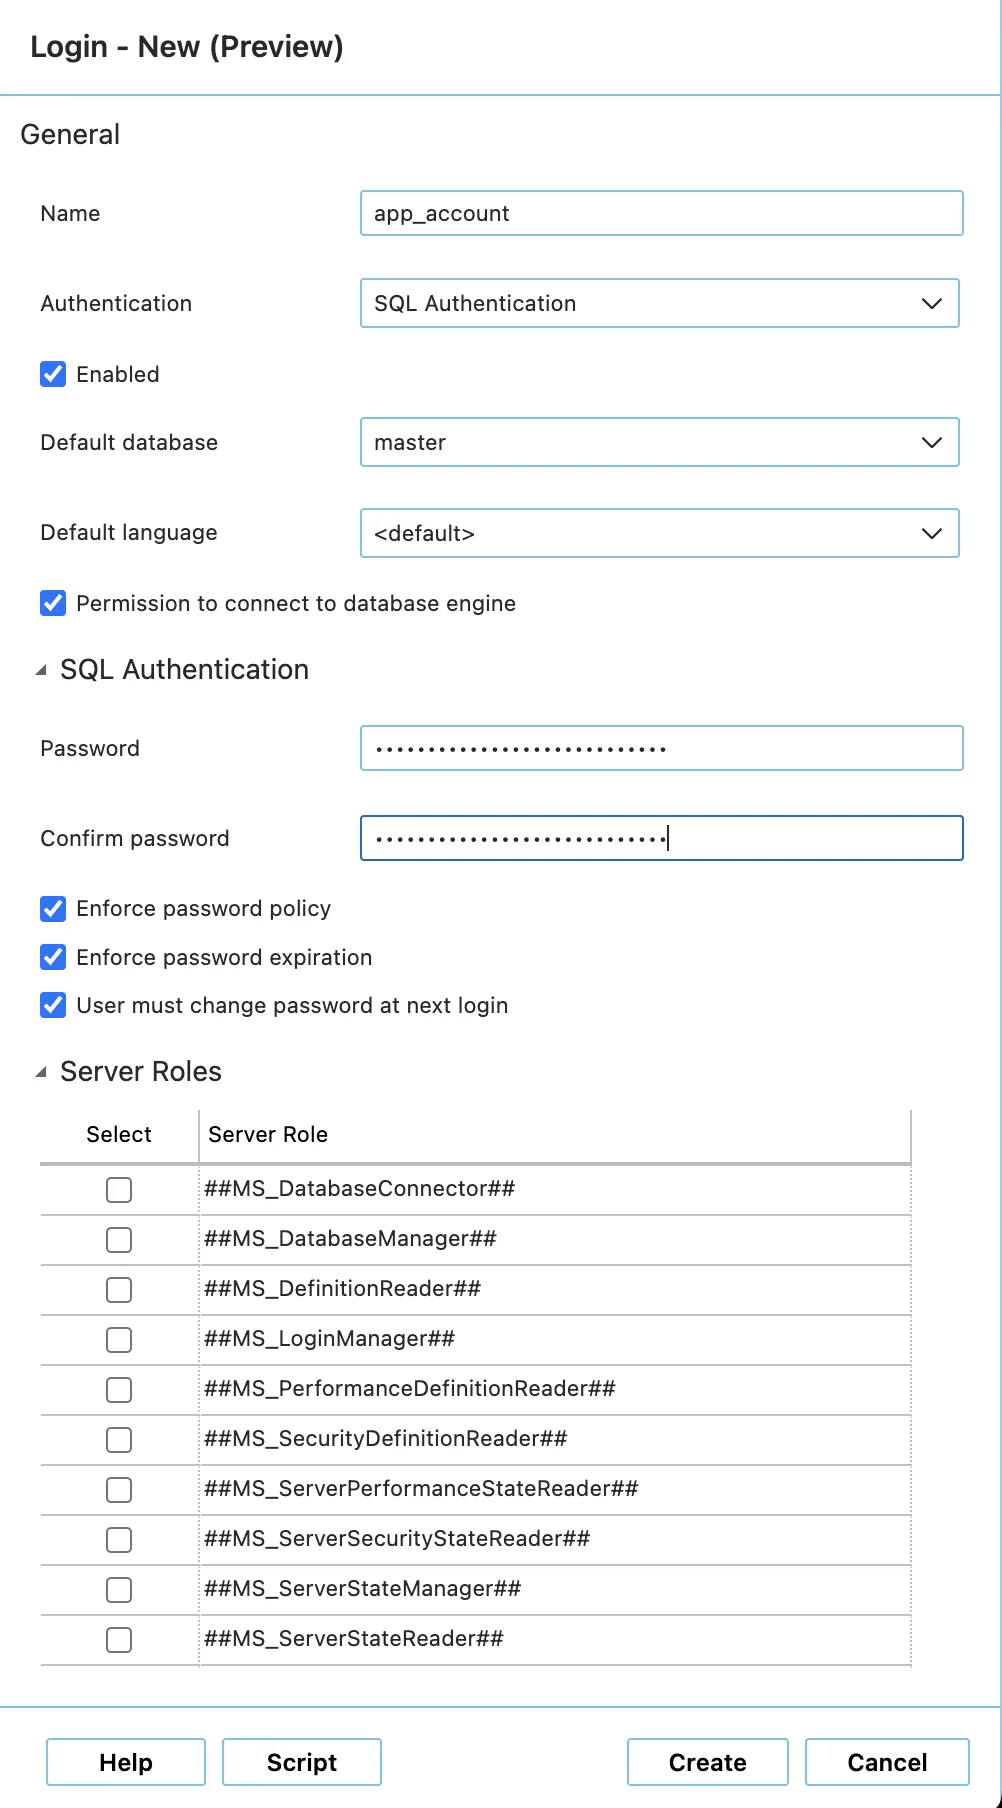
- Enter the login name and password of the new login. Currently SQL Server Authentication is the only authentication mode available. In the example below we are creating a new server login with name app_account and a strong password:
- Connect to the SQLServer Flex instance.
- Navigate to Security → Logins.
- Right click on Logins and select New Login.
- Enter the login name and password of the new login. Currently SQL Authentication is the only current authentication mode available. In the example below, we are creating a new server login with name app_account and a strong password:
You can use any SQL Server query run tool that can run T-SQL against an SQL Server, e. g. SQL Server Management Studio, Azure Data Studio, or PowerShell.
- Run the
CREATE LOGINT-SQL command.
For more insights about the CREATE LOGIN command and its options, please visit the Microsoft official documentation for SQL Server.
Creating Database Users in SQLServer Flex Instance
Section titled “Creating Database Users in SQLServer Flex Instance”After creating a normal server login, a database user has to be created to make this login able to connect to the database itself. The process of creating database users in SQLServer Flex instance is similar to the process of creating users in on-premises SQL Server.
The following methods can be used:
Database users can be created by connecting to one of SQL Server client tools, e.g. SQL Server Management Studio, Azure Data Studio or any other client tool that supports connection to SQL Server.
- Connect to the SQL Server Flex instance.
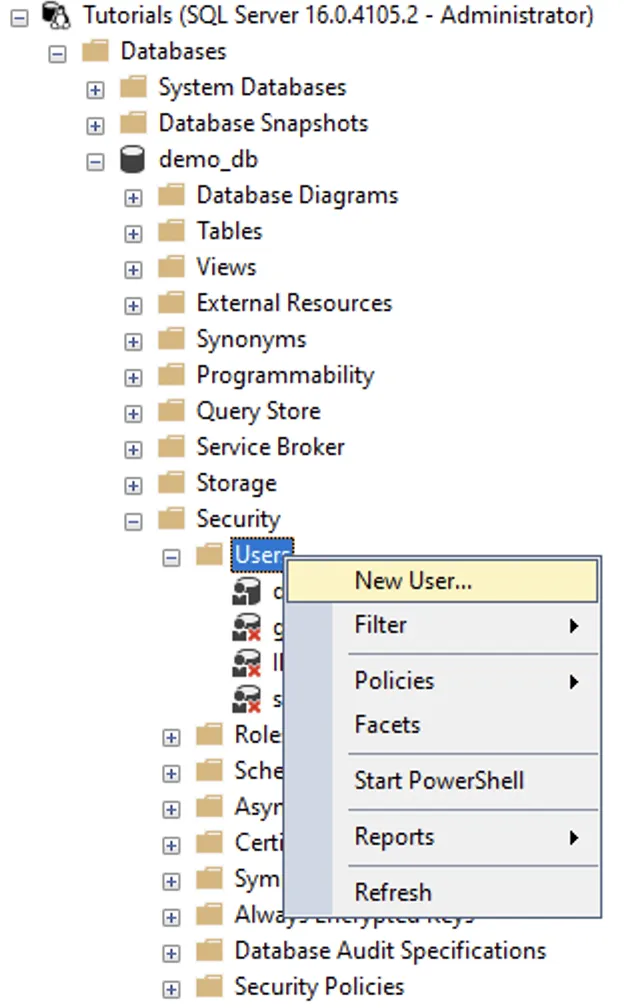
- Navigate to Databases → [database name] → Security → Users.
- Right-click on Users and select New User.
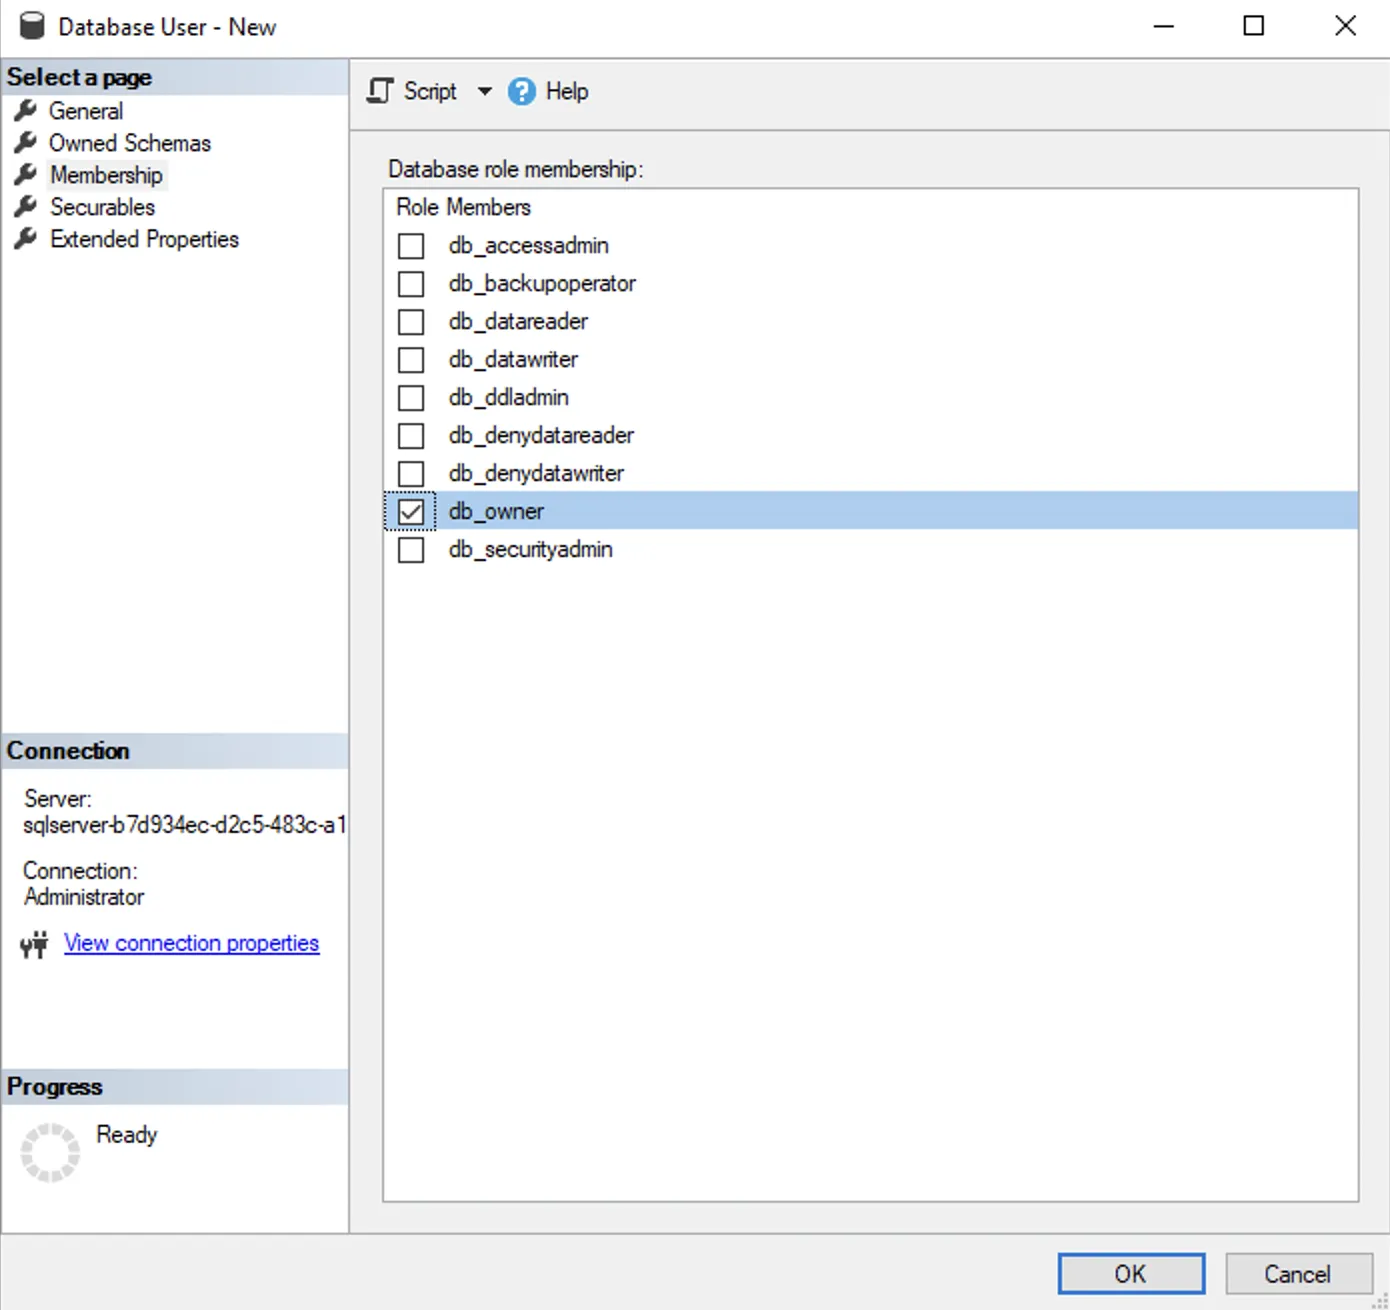
- In the window Database User - New go to the page General.
- Enter the user name for the database user.
- Select the server login name that will be mapped to the database user by clicking on … next to the input field.
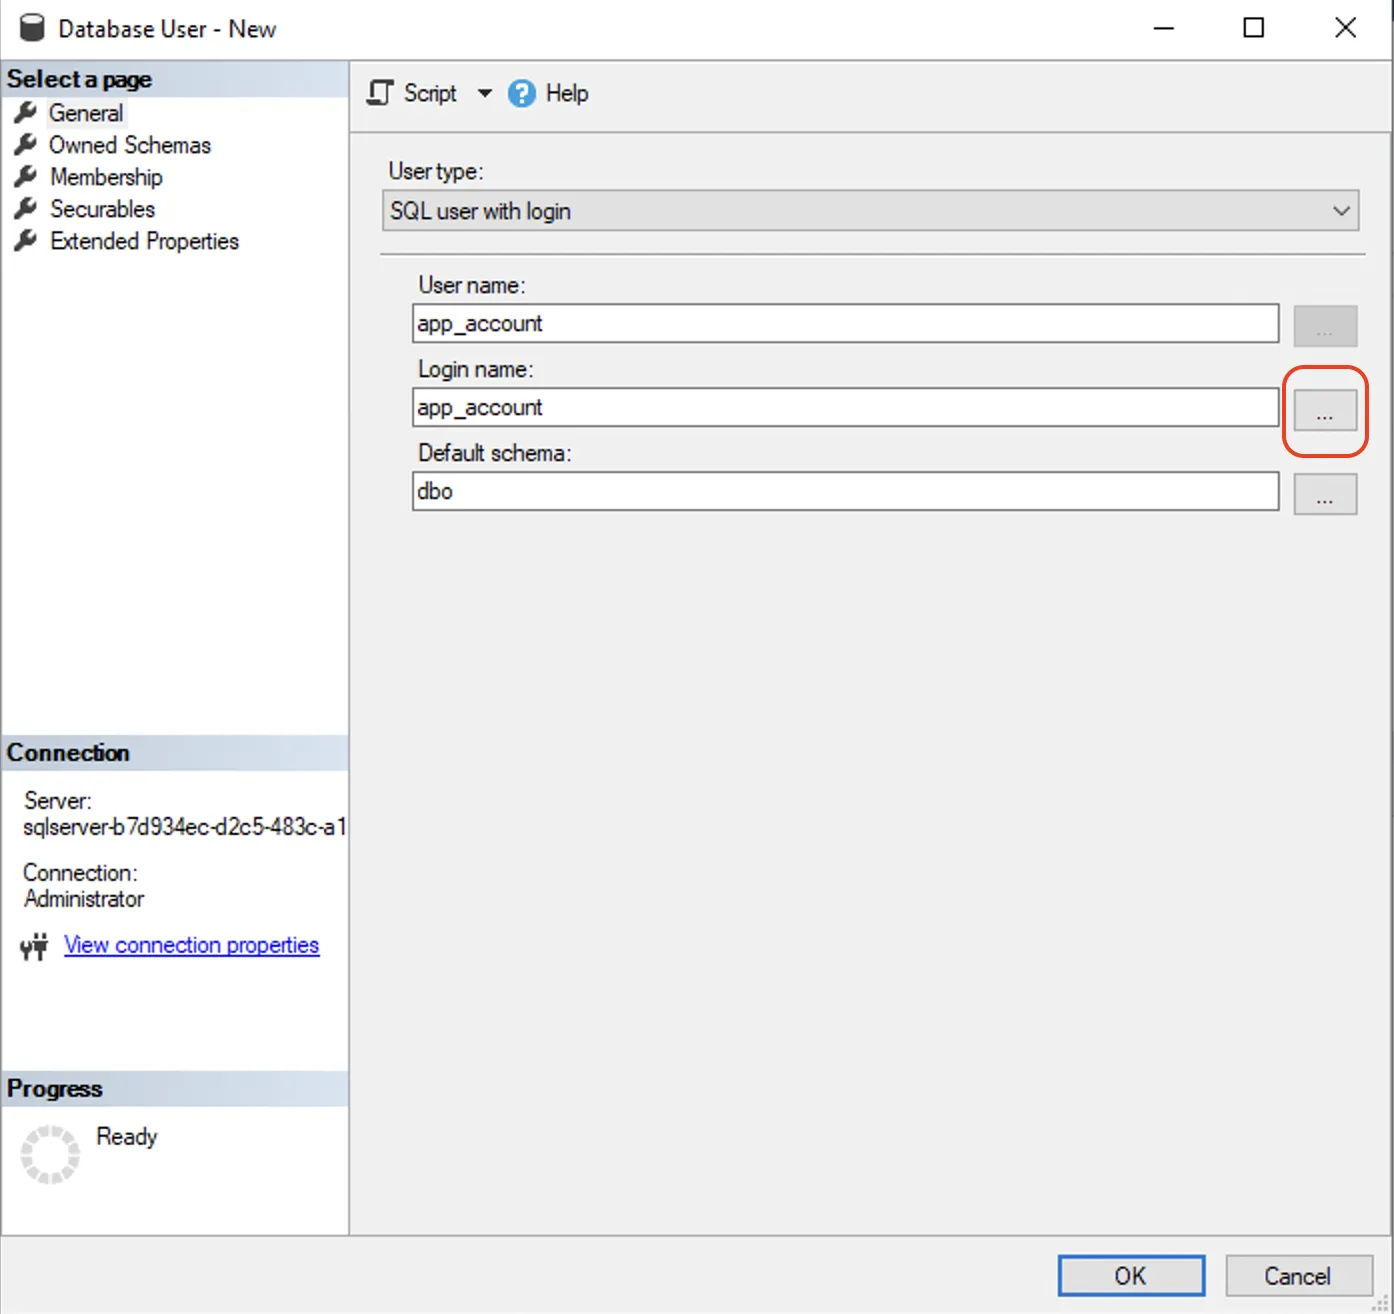
- Optional, but recommended: Define the default schema for the database user.
- Go to the page Membership and add the necessary permissions. In the following example the database user receives the permission db_owner which lets him perform all required activities against the database.
- Connect to the SQLServer Flex instance.
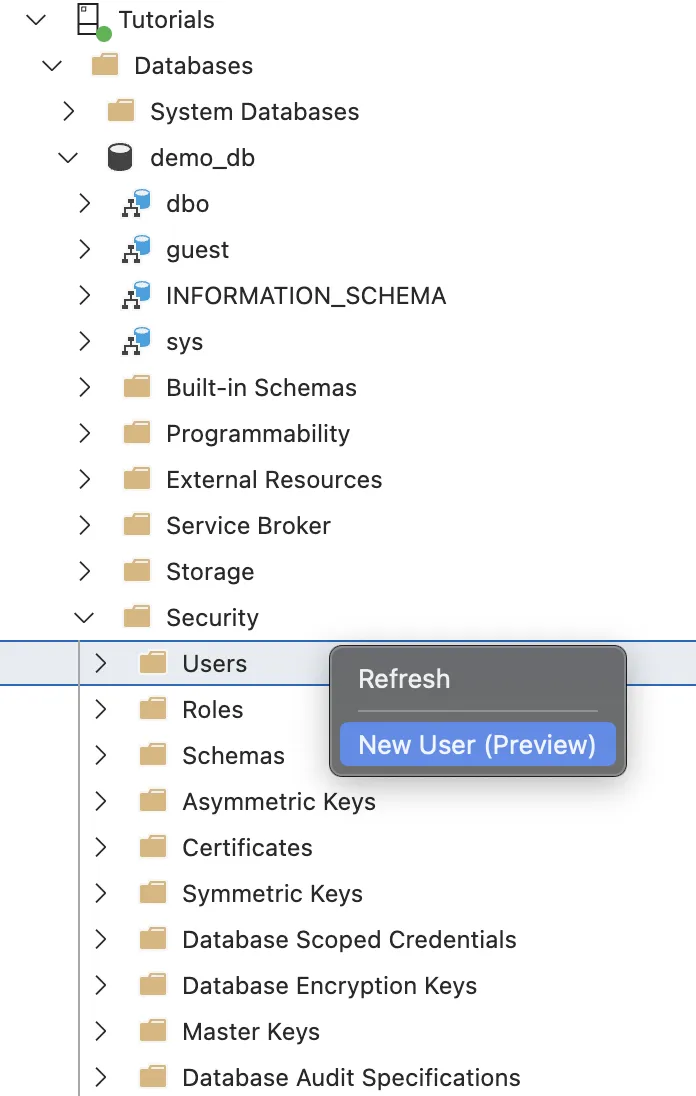
- Navigate to Databases → [database name] → Security → Users.
- Right click on Users and select New User.
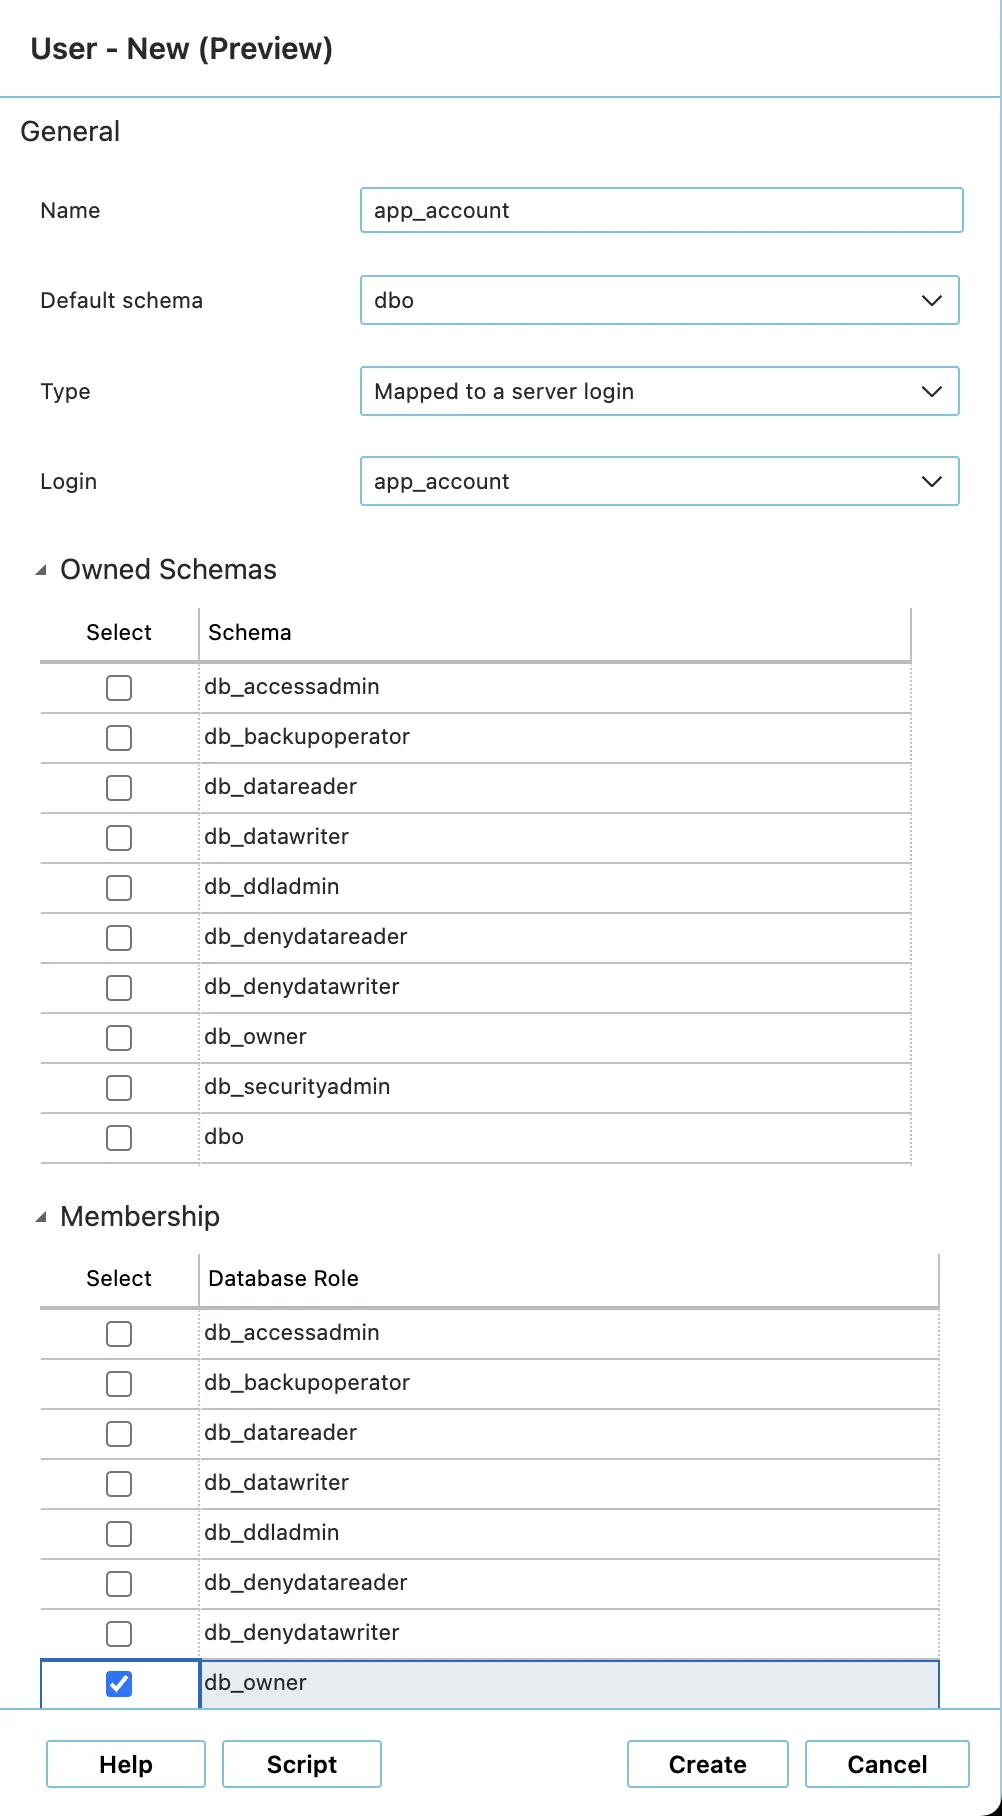
- In the User - New window, enter the user name for the database user.
- Select the server login name that will be mapped to the database user by clicking on … next to the input field.
- Optional, but recommended: Enter the default schema for the database user.
- Open the Membership section and add the necessary permissions. In the following example the database user receives the permission db_owner which lets him perform all required activities against the database.
You can use any SQL Server query run tool that can run T-SQL against an SQL Server, e. g. SQL Server Management Studio, Azure Data Studio, or PowerShell.
- Run the
CREATE USERT-SQL command.
For more insights about the CREATE USER command and its options, please visit the Microsoft official documentation for SQL Server.