Manage node pools
Zuletzt aktualisiert am
This tutorial guides you through the steps of how to modify the worker nodes of an existing Kubernetes cluster.
Overview
Section titled “Overview”Nodes form the underlying compute infrastructure for your containerized workloads and are mandatory for your Kubernetes cluster to function. SKE provides the option to individually configure so-called Node Pools for your cluster. A node pool describes a group of virtual machines (“nodes”) with the same configuration settings, for example, all allocating the same CPU cores or memory.
Add a New Node Pool to a Kubernetes Cluster
Section titled “Add a New Node Pool to a Kubernetes Cluster”In order to horizontally scale the cluster up or down based on changed workload demand, it is necessary to add or remove worker nodes to/from the cluster. To change the node pool of a cluster, open the Kubernetes section in the STACKIT Cloud Portal and select the particular cluster in the list. From the cluster overview page, head to the Node pool section and click on the button Create node pool.

First, you can specify a name for this set of nodes. Additionally, you can choose multiple availability zones (AZ) your nodes will be running in. Currently, SKE provides the option to choose between three single AZ and one metro AZ. To find out more about the STACKIT topology, please take a look at this article.
Configuring the Cluster Autoscaler
Section titled “Configuring the Cluster Autoscaler”Every SKE cluster includes a cluster autoscaler, it dynamically scales the node pools based on cluster utilization. It is configured using the minimum, maximum, maxSurge & maxUnavailable fields.
minimum & maximum are used to set the lower- and upper bound of the node pool:
minimumamount of nodes (of the pool) are always available in the cluster.maximumamount of nodes the pool can be scaled up to.
maxSurge & maxUnavailable are used to set the rolling update behavior. This concept maps to the RollingUpdate strategy of Kubernetes Deployments:
maxSurge: amount of nodes that can be added to the pool (in parallel / concurrently) to replace old nodes.- Can cause the amount of nodes in the pool to exceed
maximum.
- Can cause the amount of nodes in the pool to exceed
maxUnavailable: amount of nodes that can be removed from the pool (in parallel) to make room for replacement nodes.- Can cause the amount of nodes in the pool to go below
minimum. - Warning: if all nodes are fully utilized (by resource requests), using
maxUnavailable > 0andmaxSurge = 0can cause evicted Pods to be temporarily unschedulable until a replacement node joins the cluster. - Warning: it is not guaranteed that the cluster gets a previously deleted node back! For machine types with limited capacity
maxUnavailable > 0can cause the cluster to lose nodes until the machine type is available again.
- Can cause the amount of nodes in the pool to go below
Node Pools with Multiple Availability Zones
Section titled “Node Pools with Multiple Availability Zones”When a node pool has multiple availability zones configured, the values for minimum, maximum, maxSurge & maxUnavailable are distributed across the AZs. Therefore, it is highly recommended to use multiples of the amount of configured zones to ensure equal distribution.
Example: For a node pool with three AZs, it is advisable to set minimum, maximum and maxSurge/maxUnavailable to values that are multiples of three, for example, minimum to 3, maximum to 9 and maxSurge/maxUnavailable to 3.
Rollouts are carried out independently for each zone, e.g., if the operating system version is updated, the nodes of each zone are rolled out in parallel!
More Node Pool Fields
Section titled “More Node Pool Fields”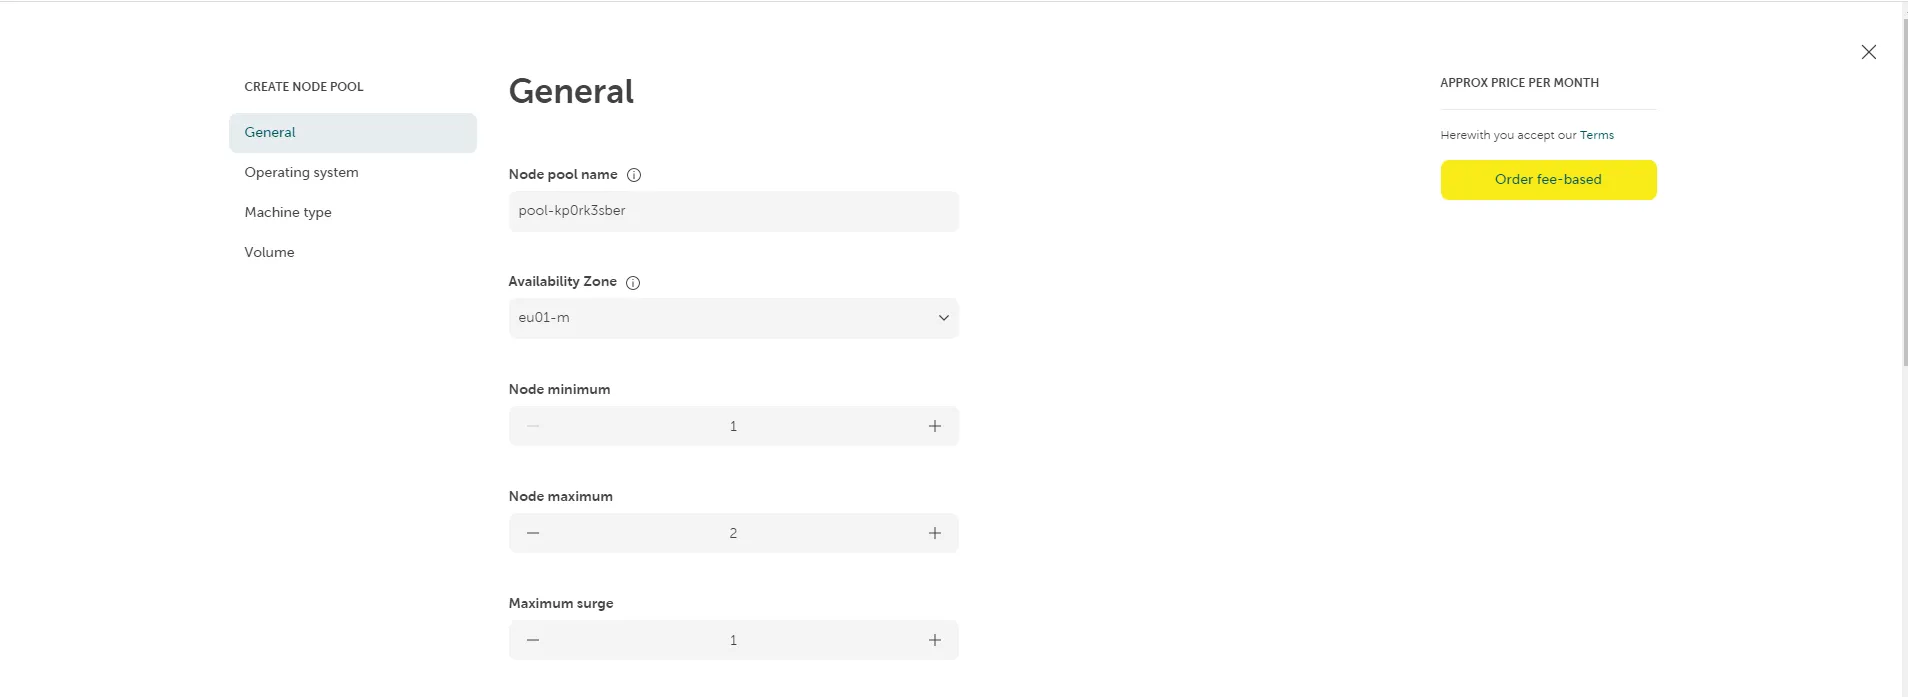
Next, define an operating system and its version. Additionally, a container runtime needs to be selected. Currently, only containerd is available for selection.
Define the compute resources of your virtual machines in the Machine Type panel. You can only select machine types which have a minimum of 2 CPU cores. Define the volume type and volume size that will be used for the virtual machines. Each VM will have one of these volumes, storing the operating system, your container images and ephemeral storage. You can see the performance of the volume types in the Service Details - Block Storage. We do not recommend to use Performance Class 0 as it results in slow download of container images, thus delaying the start of containers.
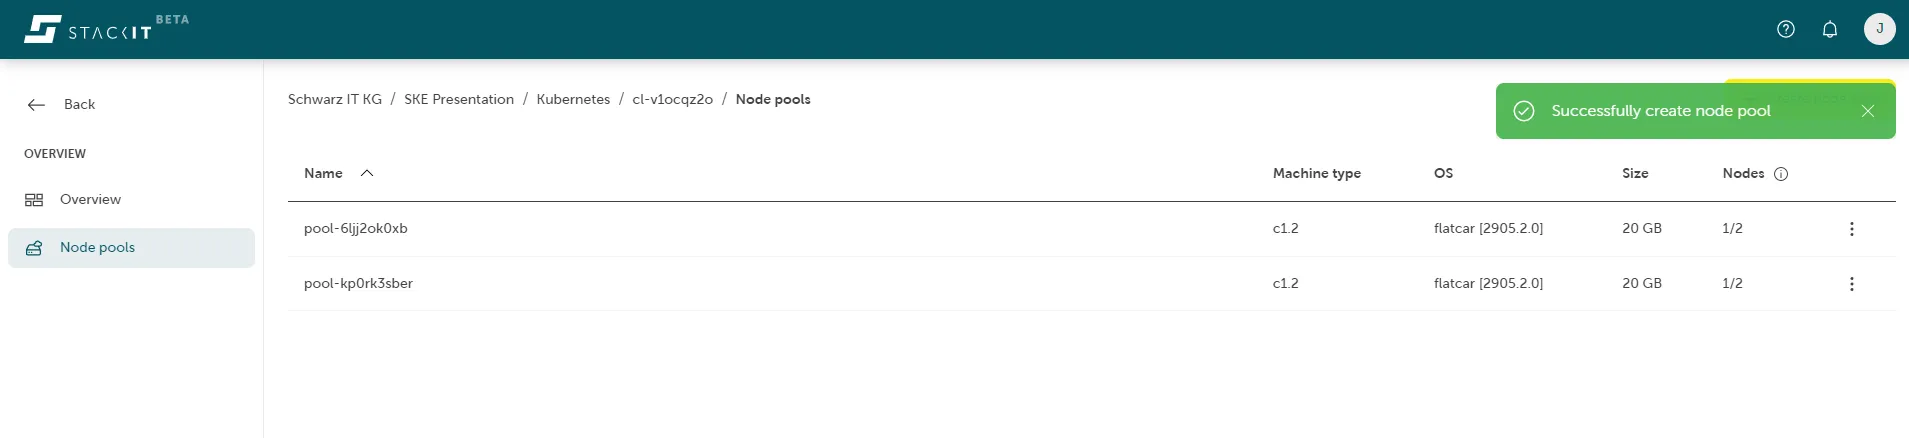
Lastly, click on Order fee-based to successfully complete the configuration process. A confirmation will be shown in the top right corner.
Delete a node pool of a Kubernetes cluster
Section titled “Delete a node pool of a Kubernetes cluster”In case you want to remove a node pool of your SKE cluster, click on the context menu in the node pool section and select Delete. This action will trigger a request to SKE, which will take approximately five minutes to delete your node pool.

Edit the configuration of a node pool
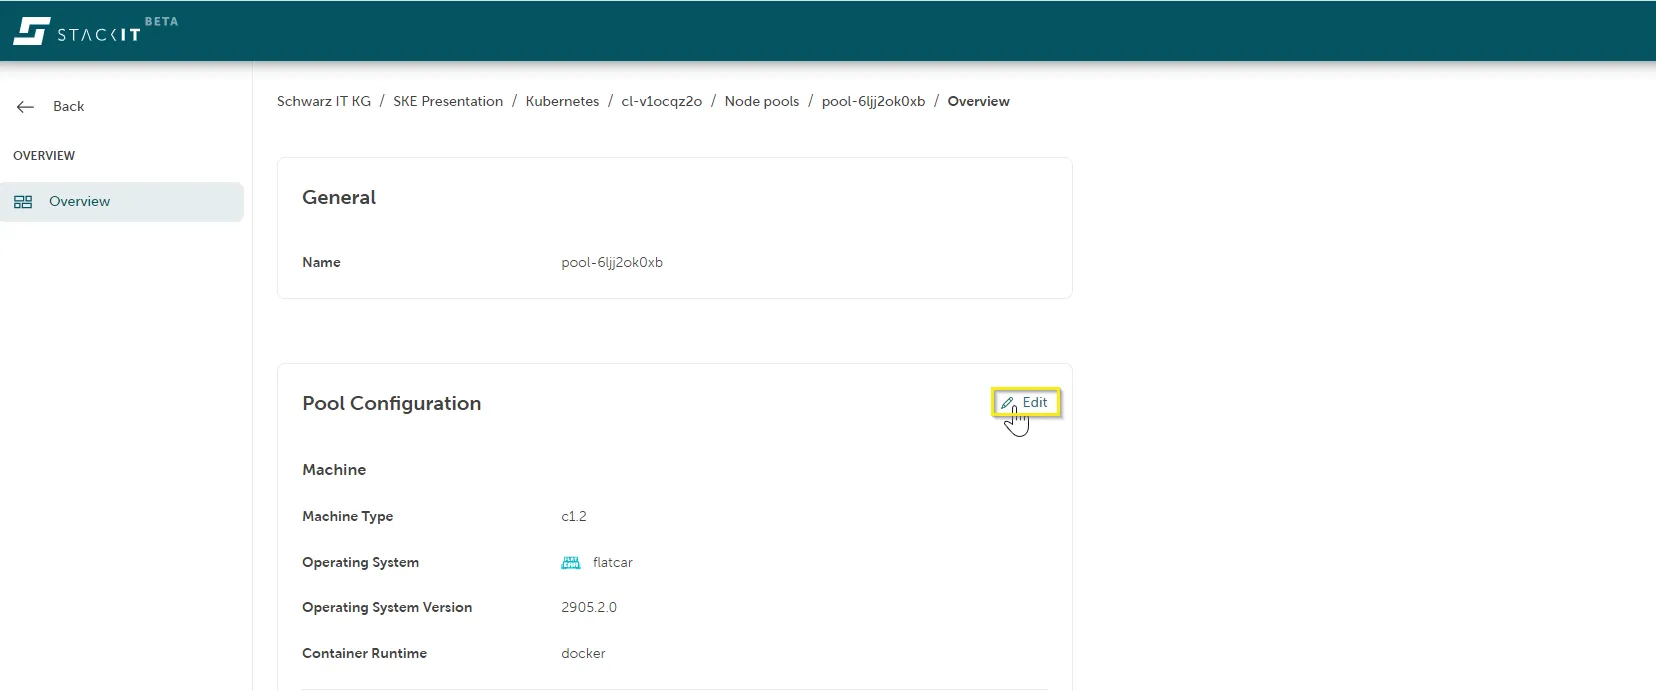
Section titled “Edit the configuration of a node pool”It is also possible to change the settings of a node pool afterwards. In this case, all nodes of this node pool will apply a rolling update, meaning new nodes join the cluster gradually, so no downtime will occur.
Editing a node pool can be done by clicking on the desired cluster in the Kubernetes section. Next, click on Node Pools on the left side of your screen and choose the specific node pool you want to adjust. This will open a new overview page for this node pool to adapt its configuration.
Disable system components on node pools
Section titled “Disable system components on node pools”System components are SKE-managed control-plane and infrastructure pods that keep a cluster functional and healthy. In SKE, they are the pods that appear with the label gardener.cloud/role=system-component in the kube-system namespace (except those created by a DaemonSet):
kubectl get pods -n kube-system -l gardener.cloud/role=system-componentSystem components provide cluster-wide services such as networking, DNS, control-plane connectivity, and maintenance tasks. The cluster depends on them, so at least one node pool must allow these components. If no node pool allows them, the cluster cannot operate correctly.
If a node pool allows system components, SKE may schedule these pods onto its nodes. That means:
- Some CPU, memory, and disk I/O are reserved for the system pods.
- Workloads can see different utilization or performance on those nodes.
- Capacity planning for application workloads needs to account for the system pods.
Disabling system components on selected node pools helps you keep nodes dedicated to user workloads and avoid undesirable side effects, such as:
- Reduced performance headroom for latency-sensitive apps.
- Uneven resource usage when system pods concentrate on a subset of nodes.
- Less predictable node utilization across pools.
To disable system components for a specific node pool, set allowSystemComponents to false, but ensure that at least one node pool keeps it enabled:
nodepools: - name: "pool-1" allowSystemComponents: true # ...more configuration options - name: "pool-2" allowSystemComponents: false # ...more configuration options - name: "pool-3" allowSystemComponents: false # ...more configuration optionsIn the future, this configuration option will become available in the STACKIT Portal as well.