Create your first MongoDB Flex instance and connect to it
Last updated on
Prerequisites
Section titled “Prerequisites”- You have a STACKIT customer account: Create a customer account
- You have a STACKIT user account: Create a user account
- You have a STACKIT project: Create a project
Prepare, order and create an instance
Section titled “Prepare, order and create an instance”In this guide you will create an instance and configure it. This guide shows the most common settings for a small developer environment. When following this guide, you will work with the STACKIT Portal. There are many other ways to manage instances. For a deeper understanding, please consult Create and manage instances of MongoDB Flex, Manage MongoDB Flex with Terraform and Manage MongoDB Flex with Cloud Foundry.
- Visit the STACKIT Portal.
- On the sidebar click on MongoDB Flex.
- On the bar on the top click on Create MongoDB Flex.
After completing the steps, you see an overlay with three sections (General information, Flavors and Setup).
General information
Section titled “General information”- Either leave the name for the instance as it is or insert a custom one.
- Select single (1 node) as instance type.
Flavors
Section titled “Flavors”- Leave the flavor settings as they are (1-4 CPUs and 1-4 GB RAM), unless you know in advance how much resources you’ll need. You can change the flavor anytime.
-
Select
premium-perf2-mongodbas Performance class.In a single (1 node) instance type you can not change the performance class after creating the instance. Nevertheless,
premium-perf2-mongodbis sufficient for a small developer instance. -
Adjust the Disk size according to you needs. It is safe to start with 10 GB. You can enlarge it anytime.
-
Select the MongoDB version you want to use. For new projects we recommend to use the newest available version.
-
Add your clients IPv4 address to the list of ACLs.
If you want to connect with the computer, with which you are browsing the Docs, use Cloudflare’s IP trace tool to determine your IPv4 address. Open your browser of choice and visit the Cloudflare Trace Tool . Copy the value behind
ip. It should look likexxx.xxx.xxx.xxx. Now append/32to it and add it as ACL entry. To do so, click on Add ACL IP and paste it in the field. For a deeper understanding of ACL entries, visit Create and manage instances of MongoDB Flex.
After reviewing every setting, click on Order fee-based to create your new instance. Then you will see a confirmation that your instance is created. Your new instance will be added to the list of instances. After a few minutes it will switch from Processing to Active.
Configure your instance
Section titled “Configure your instance”To make any changes to your instance, you need to select it. In the sidebar click on MongoDB Flex and then on your newly created instance. Then the overview page of your instance will be displayed.
Create a user and copy the credentials
Section titled “Create a user and copy the credentials”- On the sidebar click on Users.
- Click on Create user.
- In the popup you can optionally enter a username.
- As Role select Read and Write.
- You can leave the Database name untouched or set a name. For this guide we use
books. - Click on Create.
- Copy the connection string, the username and the password to a safe location.
Connect to your new instance
Section titled “Connect to your new instance”To connect to your new instance, you need a client software. In this guide we use MongoDB Compass. You can download it on the Official MongoDB Download Page.
To learn more about MongoDB Compass and alternatives for connecting to an instance, read Connect to a MongoDB Flex instance.
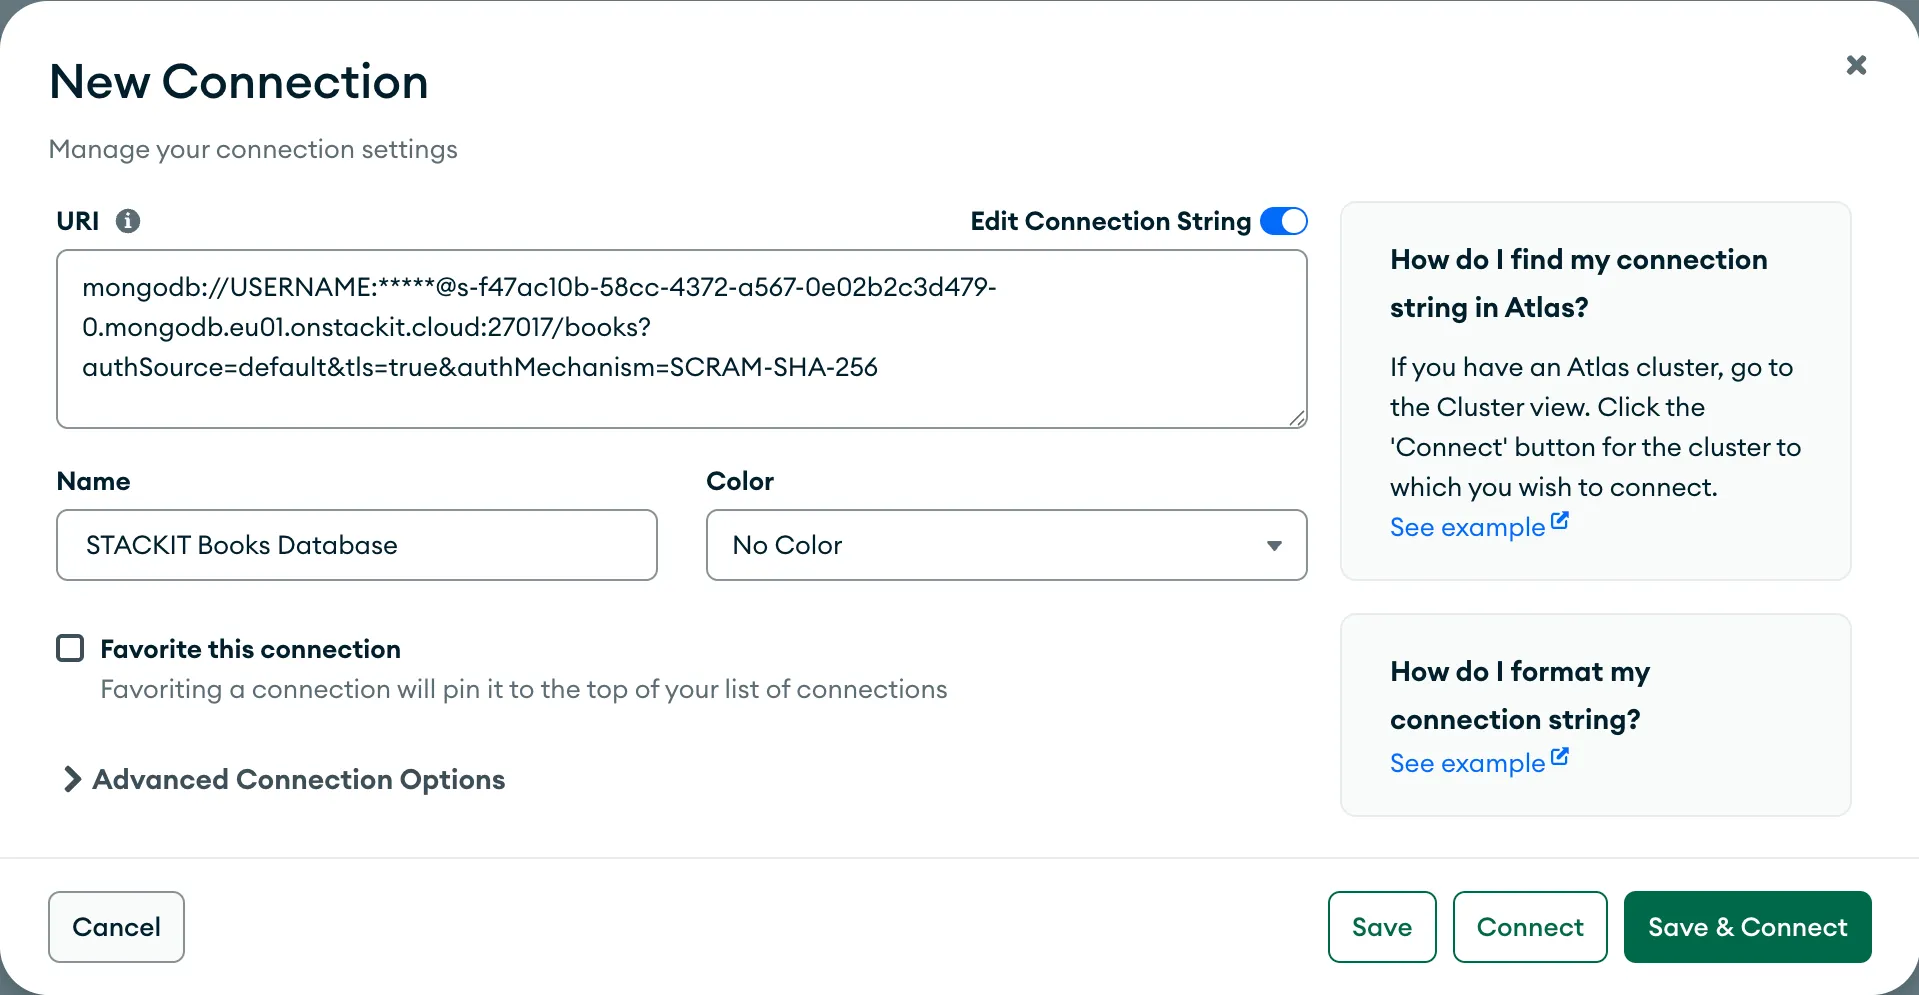
Now, open MongoDB Compass and enter the connection URI from the previous step.
After your client has established a connection, you can run the db command to verify that the connection has been established correctly. Click on Open MongoDB shell. The new window acts like a shell. You need to paste the commands into it and run them with pressing Enter. Now start with entering the example commands:
dbThe answer should be:
booksNow your instance is set up and ready to use for your first client application.
Insert and query data
Section titled “Insert and query data”To get familiar with MongoDB Flex, you can insert and query some sample data.
At first, insert a small dataset:
db.books.insertMany( [ { title: "The White Lioness", genres: [ "Thriller", "Detective Story" ], year: 1993, authors: [ "Henning Mankell" ], type: "novel" }, { title: "1984", genres: ["Dystopian Fiction", "Political Fiction"], year: 1949, authors: ["George Orwell"], type: "novel" }, { title: "The Hobbit", genres: ["Fantasy", "Adventure"], year: 1937, authors: ["J.R.R. Tolkien"], type: "novel" } ])The database should answer with a reply which is similar to:
{ acknowledged: true, insertedIds: { '0': ObjectId('6888930ea4fb7c7c24d4c0af'), '1': ObjectId('6888930ea4fb7c7c24d4c0b0'), '2': ObjectId('6888930ea4fb7c7c24d4c0b1') }}Now you can search for one entry in the dataset. This corresponds with a use case where a user searches in the frontend for a specific book:
db.books.find({title: {'$regex': '.*Hobbit*'}})You get the following output:
[ { _id: ObjectId('6888930ea4fb7c7c24d4c0b1'), title: 'The Hobbit', genres: [ 'Fantasy', 'Adventure' ], year: 1937, authors: [ 'J.R.R. Tolkien' ], type: 'novel' }]Now you ran some basic commands with the database. From here on you may start one of the tutorials in the Tutorials section or dig deeper with the How-tos.