Create your first instance and connect to it
Last updated on
Prerequisites
Section titled “Prerequisites”- You have a STACKIT customer account: Create a customer account
- You have a STACKIT user account: Create a user account
- You have a STACKIT project: Create a project
Prepare, order and create an instance
Section titled “Prepare, order and create an instance”In this guide, you will create an instance and configure it. This guide shows the most common settings for a small developer environment. When following this guide, you will work with the STACKIT Portal. There are many other ways to manage instances. For a deeper understanding, please consult Create and manage instances for PostgreSQL Flex, and Manage PostgreSQL Flex with Terraform.
- Visit the STACKIT Portal.
- On the sidebar, click on PostgreSQL Flex.
- On the bar on the top, click on Create PostgreSQL Flex.
After completing the steps, you see an overlay with three sections (General information, Flavors and Setup).
General information
Section titled “General information”- Either leave the name for the instance as it is or insert a custom one.
- Select Single (1 node) as instance type.
Flavors
Section titled “Flavors”- Leave the flavors settings as they are (1-4 CPUs and 1-4 GB RAM), unless you know in advance how many resources you’ll need. You can change the flavor anytime.
-
Select premium-perf6-stackit as Performance class.
In a single (1 node) instance type, you can not change the performance class after creating the instance. Nevertheless, premium-perf2-stackit is sufficient for a small developer instance.
-
Adjust the Disk size according to you needs. It is safe to start with 5 GB. You can enlarge it anytime.
-
Select the PostgreSQL version you want to use. For new projects, we recommend to use the newest available version.
-
Add your client’s IPv4 address to the list of ACLs.
If you want to connect with the computer, with which you are browsing the Docs, use Cloudflare’s IP trace tool to determine your IPv4 address. Open your browser of choice and visit the Cloudflare Trace Tool. Copy the value behind
ip. It should look likexxx.xxx.xxx.xxx. Now append/32to it and add it as ACL entry. To do so, click on Add ACL IP and paste it in the field. For a deeper understanding of ACL entries, visit Create and manage instances for PostgreSQL Flex.
After reviewing every setting, click on Order fee-based to create your new instance. Then you will see a confirmation that your instance has been created. Your new instance will be added to the list and after a few minutes, it will switch from Processing to Active.
Configure your instance
Section titled “Configure your instance”To make any changes to your instance, you need to select it. In the sidebar, click on PostgreSQL Flex and then select your newly created instance. This will open the overview page of your instance.
Create a user and copy the credentials
Section titled “Create a user and copy the credentials”-
In the sidebar, click on Users.
-
Click on Create user.
-
Fill out the information needed in the popup dialog.
Enter a username and in the Role dropdown select
CreateDBandLogin. -
Click on Create.
-
Copy the Connection string, the Username and the Password to a safe location.
-
Click on Done. Select the new user entry, then copy Hostname and Port as well.
Create a database
Section titled “Create a database”-
In the sidebar, click on Databases.
-
Click on Create Database.
-
Fill out the information needed in the popup dialog.
Enter a Database name and in the Database owner dropdown, select the previously created user. For this guide, we use
crm. -
Click on Create.
Connect to your new instance
Section titled “Connect to your new instance”To connect to your new instance, you need a client software. In this guide, we use pgAdmin 4. It’s a GUI client available for all major operating systems. You can download it on the Official pgAdmin Download Page or install it with the package manager of your operating system.
-
Open pgAdmin 4 and on Quick Links, click on Add New Server.
-
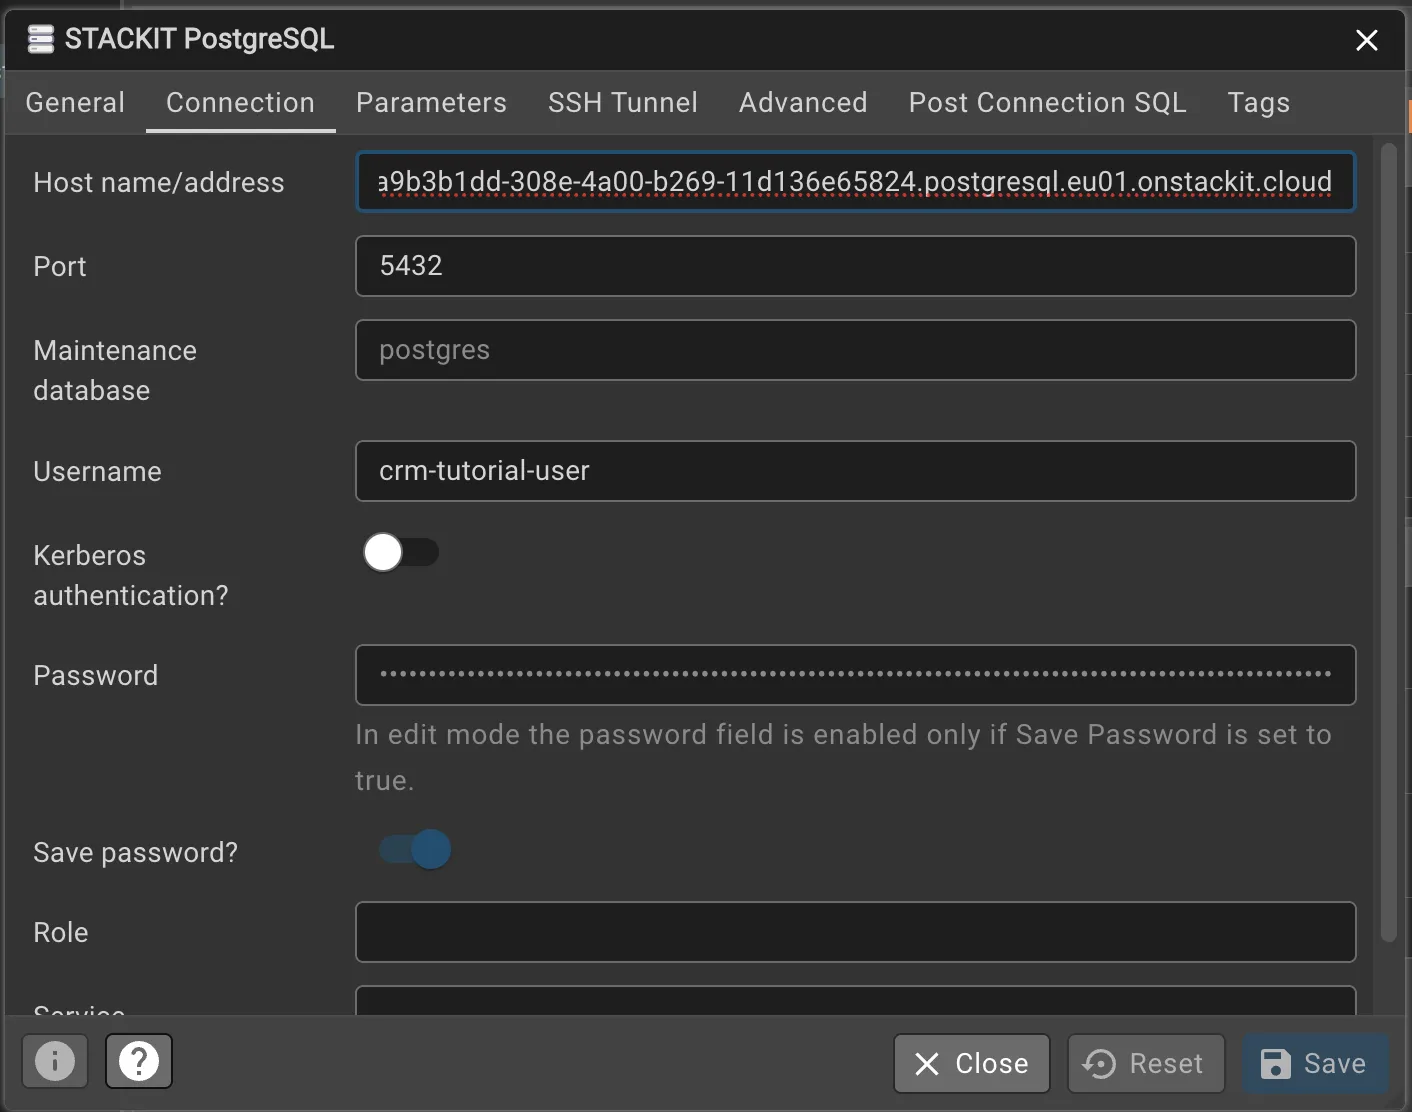
A new overlay opens in the General tab. In the Name field, enter a name of your choice.
-
Change to the Connection tab and enter the hostname and credentials: On Host name/address, paste the Hostname that you copied in Create a user and copy the credentials.
Do the same with the Port, Username and Password field. Leave everything else untouched.
Click on Save.
-
Once you successfully connected to your instance, a dashboard will open.
-
After your client has established a connection, open the Query Tool Workspace on the left and configure the connection: On Existing Server, select the server you created.
On Database, paste the Database Name that you have chosen in Create a database.
You may need to reenter the password. Click on Connect & Open Query Tool. A query window will open.
Insert and query data
Section titled “Insert and query data”To get familiar with PostgreSQL Flex, you can insert and query some sample data.
At first, create a single table with a primary key:
CREATE TABLE customers ( id SERIAL PRIMARY KEY, first_name TEXT, last_name TEXT, email TEXT);To run the command, press either F5 or the Play button on the top of the query window.
The database should answer with:
CREATE TABLE
Query returned successfully in 48 msec.
Now insert some data:
INSERT INTO customers (first_name, last_name, email) VALUES('Max', 'Mustermann', 'max@example.com'),('Erika', 'Musterfrau', 'erika@example.com'),('Hans', 'Huber', 'hans@example.com');The database should answer with:
INSERT 0 3
Query returned successfully in 43 msec.
Now you can query for one entry in the table. This corresponds with a use case where a user searches for a specific customer by its mail:
SELECT * FROM customers WHERE email = 'max@example.com';You get the following output:
id | first_name | last_name | email----+------------+------------+----------------- 1 | Max | Mustermann | max@example.com(1 row)Now you ran some basic commands with the database. From here on, you can deepen your knowledge with the How-tos.