Create a service instance
Zuletzt aktualisiert am
In this document we want to take a look on how you can create a service instance. With those services you can enrich your cloud experience with a persistence layer, a message queue or other useful tools. The Cloud Foundry makes this process especially easy with its integrated marketplace and service brokers. Here you will learn how to use them.
This is a First Steps Overview on the topic of services within the Cloud Foundry. You can get more detailed information in the service overview of the Cloud Foundry docs.
In this tab you will learn how to use the Cloud Foundry CLI to:
Explore the marketplace via CLI
Section titled “Explore the marketplace via CLI”You can create and bind data services to your application on the Cloud Foundry with the integrated Cloud Foundry Marketplace. For this you have to login via the Cloud Foundry Command Line Interface to your organization and space (see Interact with Cloud Foundry). Afterwards you can navigate to the marketplace via the command:
cf marketplaceGetting all service offerings from marketplace in org <ORG_NAME> / space <SPACE_NAME> as <USER_NAME>...offering plans description brokerappcloud-redis40 redis-cluster-medium, redis-cluster-small, redis-single-small, redis-cluster-big, redis-single-medium This is a service creating and managing dedicated Redis service instances, powered by the anynines Service Framework a9s-redisCloud Foundry-logme logme-cluster-big, logme-cluster-medium, logme-cluster-small, logme-single-small, logme-single-medium Dedicated ELK stacks to monitor applications and service instances powered by the anynines Service Framework a9s-logme...You can get more details about the individual services and their service plans by adding the flag -e and the service name you want to know more about. For example:
cf marketplace -e appcloud-mysql101Getting service plan information for service offering Cloud Foundry-mysql101 in org Cloud Foundry Demo / space dev as admin...broker: a9s-mysql plan description free or paid costs available mysql-cluster-medium a medium replica set paid yes mysql-cluster-small a small replica set paid yes mysql-single-medium a medium single instance paid yes mysql-single-small a small single instance free yes mysql-cluster-big a large replica set paid yesHere you can see the different service plans available for the data service. You can find the detailed information about sizes and numbers behind a service plan in the Service Descriptions of the individual service.
Create a new service instance via CLI
Section titled “Create a new service instance via CLI”You can easily create a new service instance of a service through the Cloud Foundry CLI as well by just using the following command:
cf create-service SERVICE_NAME SERVICE_PLAN SERVICE_INSTANCE_NAME [-c PARAMETERS_AS_JSON] [-t TAGS]Here you can select the type and plan of your service, as listed in the marketplace above and can name your service instance. The name of your service instance is the unique identifier of that instance within your space and therefore has to be unique in your space. All service instances you create over the cf CLI have to be assigned to a space, which you have to select earlier with the cf target command.
The instance creation is done asynchronously. After you have triggered the process you can get the state of your data service via the cf services command like in the following example:
cf servicesGetting the services in organization MyFirstOrg / space dev as <USERNAME>...
Name Service Plan Bound Apps Last operation Broker upgrade availablemydb Cloud Foundry-postgresql11 postgresql-single-small create in progress a9s-postgresqlYou can also get more details about a specific service by using the following command:
cf service <INSTANCE_NAME>The output will give you more useful information like the description, dashboard URL, start and update dates and more.
After the asynchronous operation of the instance creation is done and it is in state create succeeded you can start working with the data service.
Delete a service instance via CLI
Section titled “Delete a service instance via CLI”You can delete your service instances again if you no longer need them. You can do a deletion with the following command:
cf delete-service SERVICE_INSTANCE_NAMEIn this tab you will learn how to use the Stratos UI to:
Explore the marketplace via Stratos
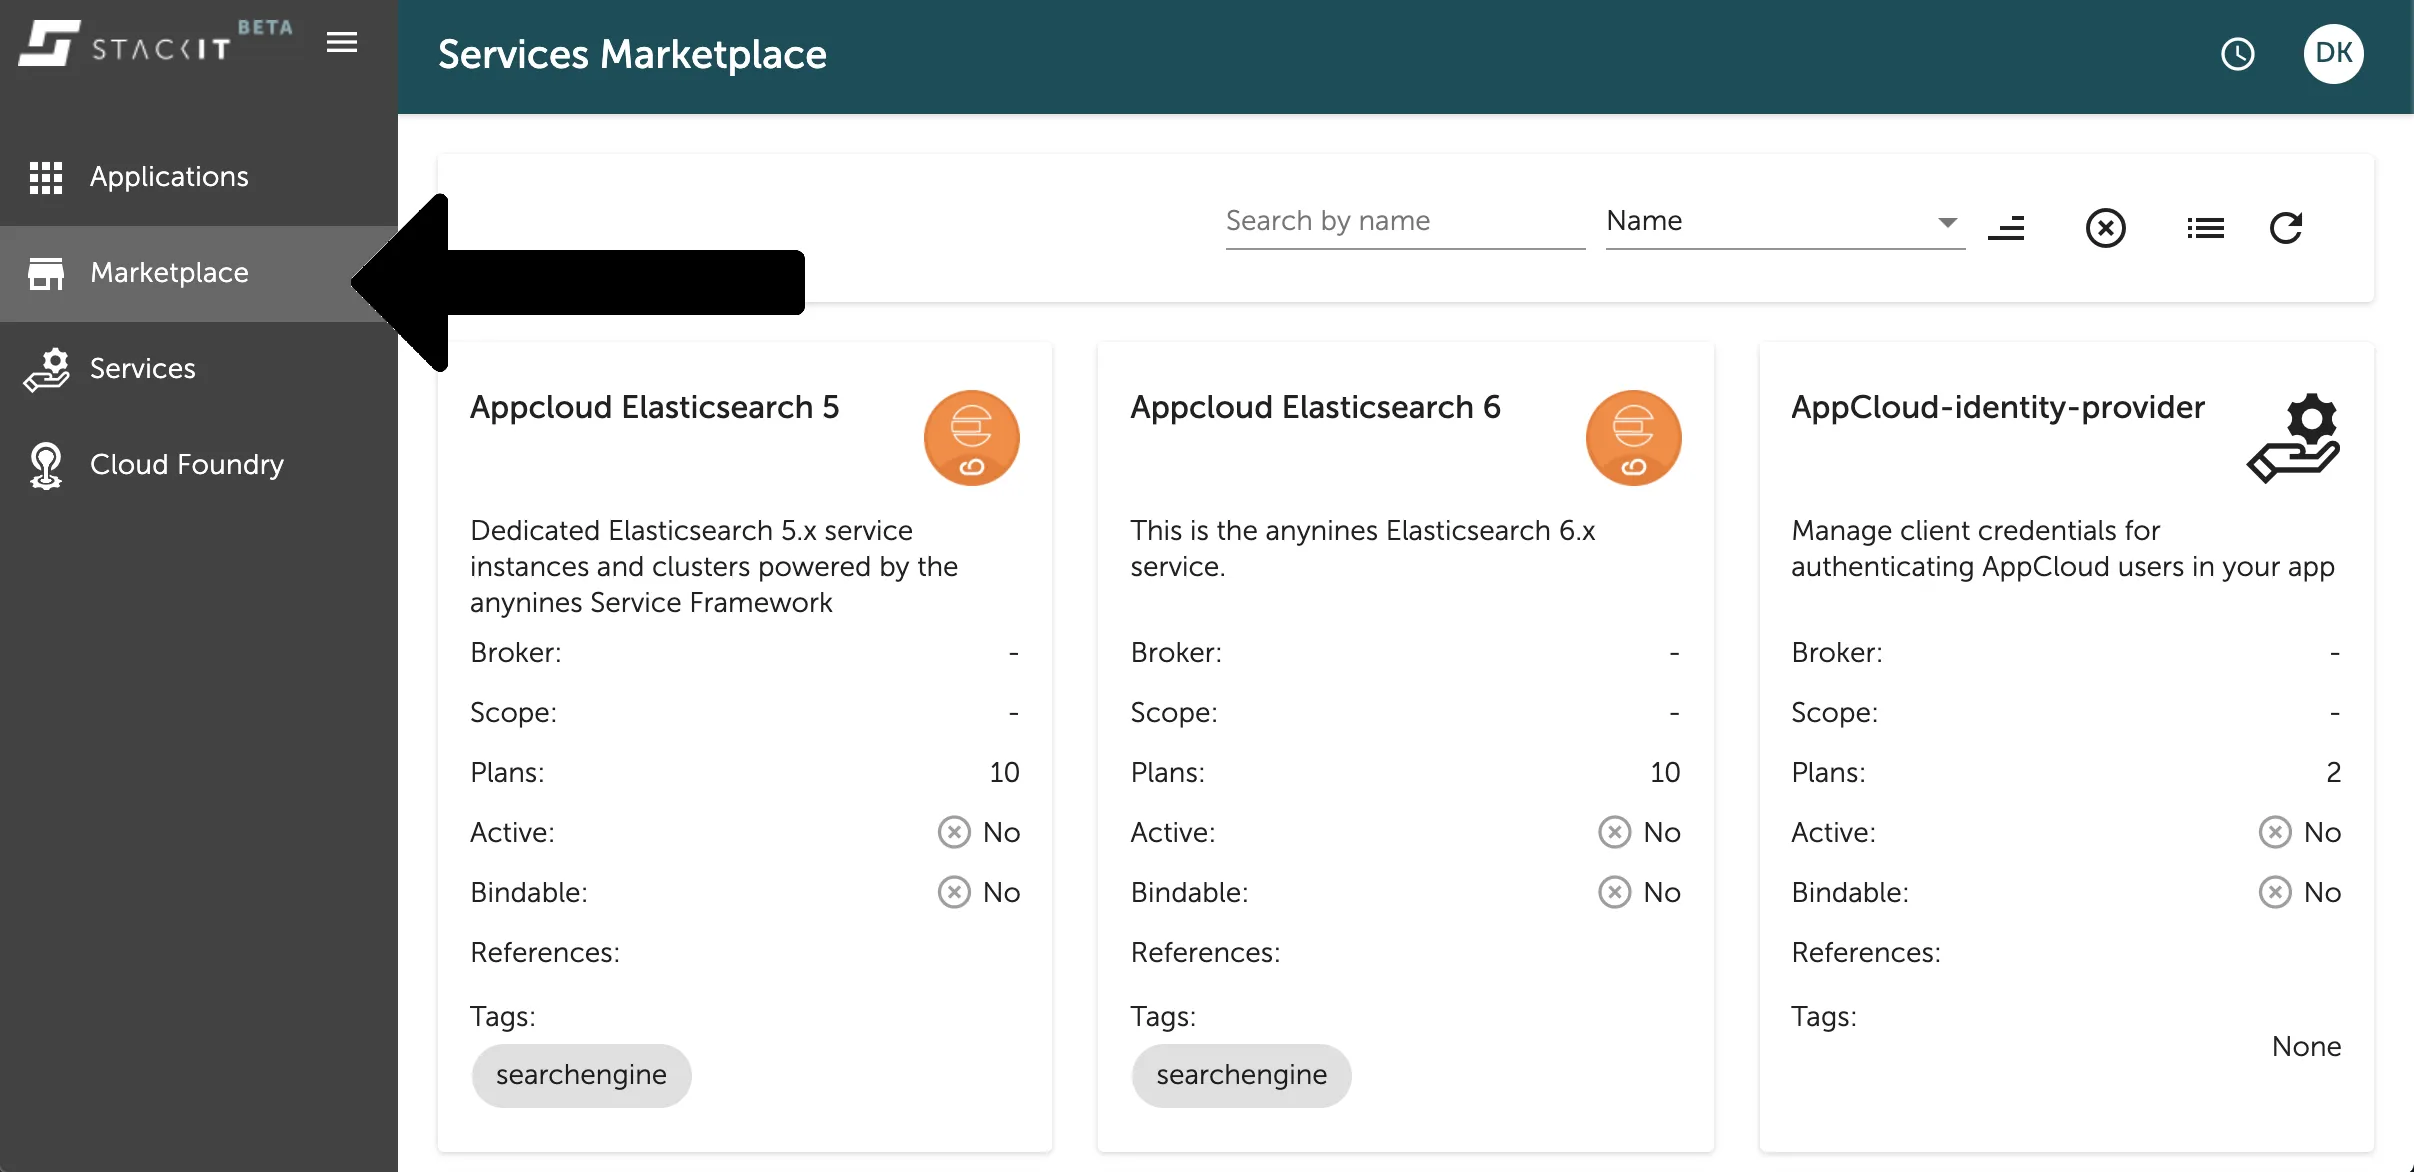
Section titled “Explore the marketplace via Stratos”In the Console UI you can find an overview of the existing services you can create instances from in the Marketplace Tab on the left side navigation. There you can see the available services listed with the description and other useful information in a panel list as seen in the image below.
Clicking on one of those panels will directly lead you to a more detailed view of the selected data service. Here you can also find the list existing instances or the available plans of the data service as seen in the image below in the Plans-Tab on the views left side navigation.
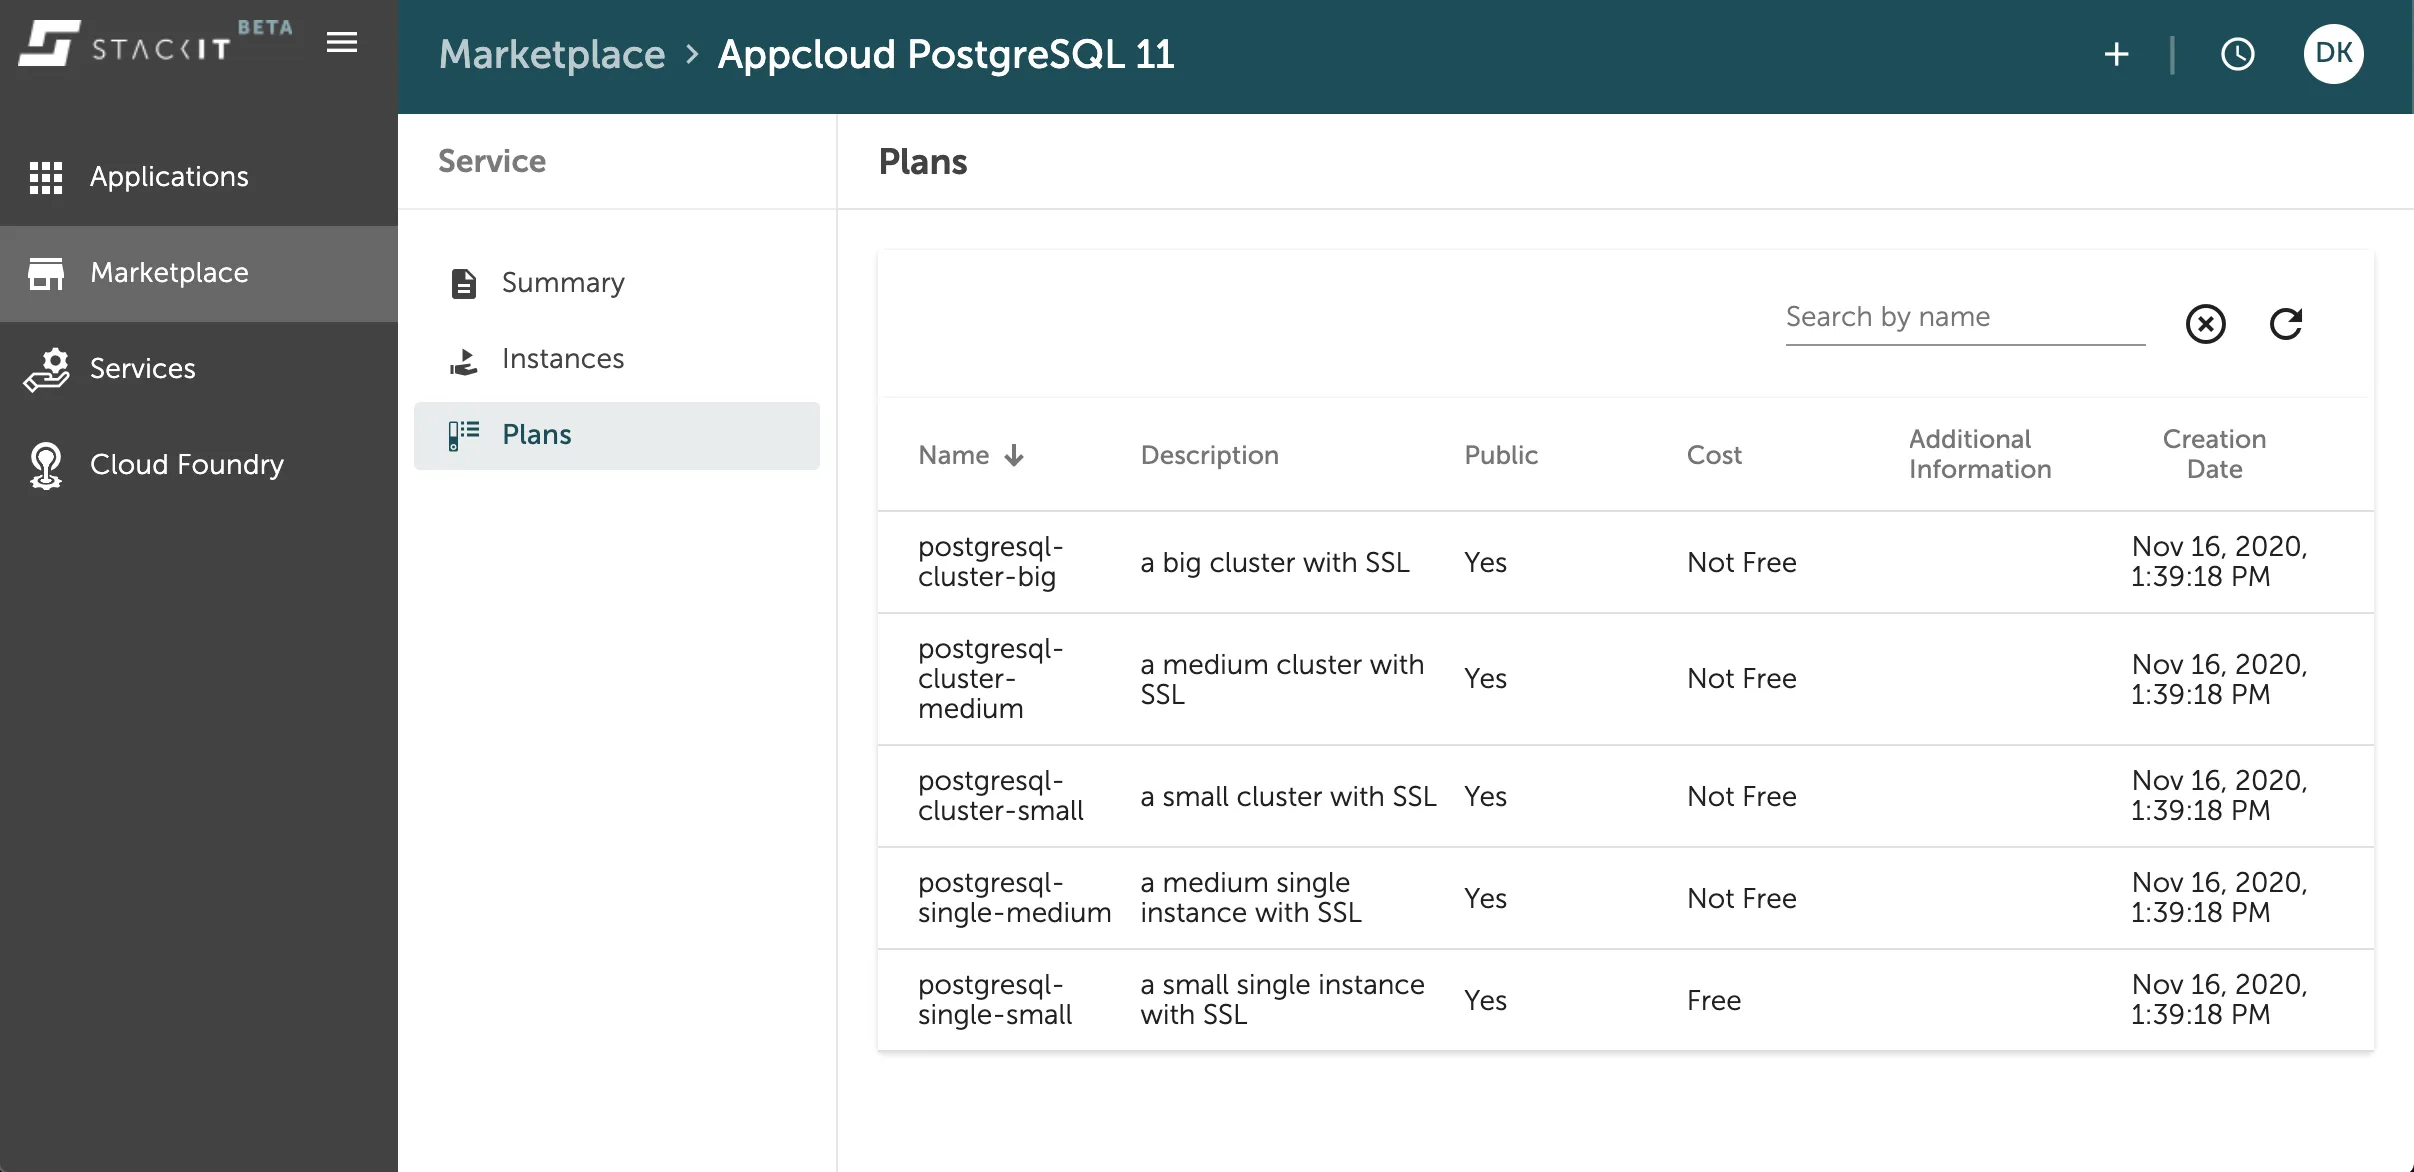
You can find the detailed information about sizes and numbers behind a service plan in the Service Descriptions of the individual service.
Create a new service instance via Stratos
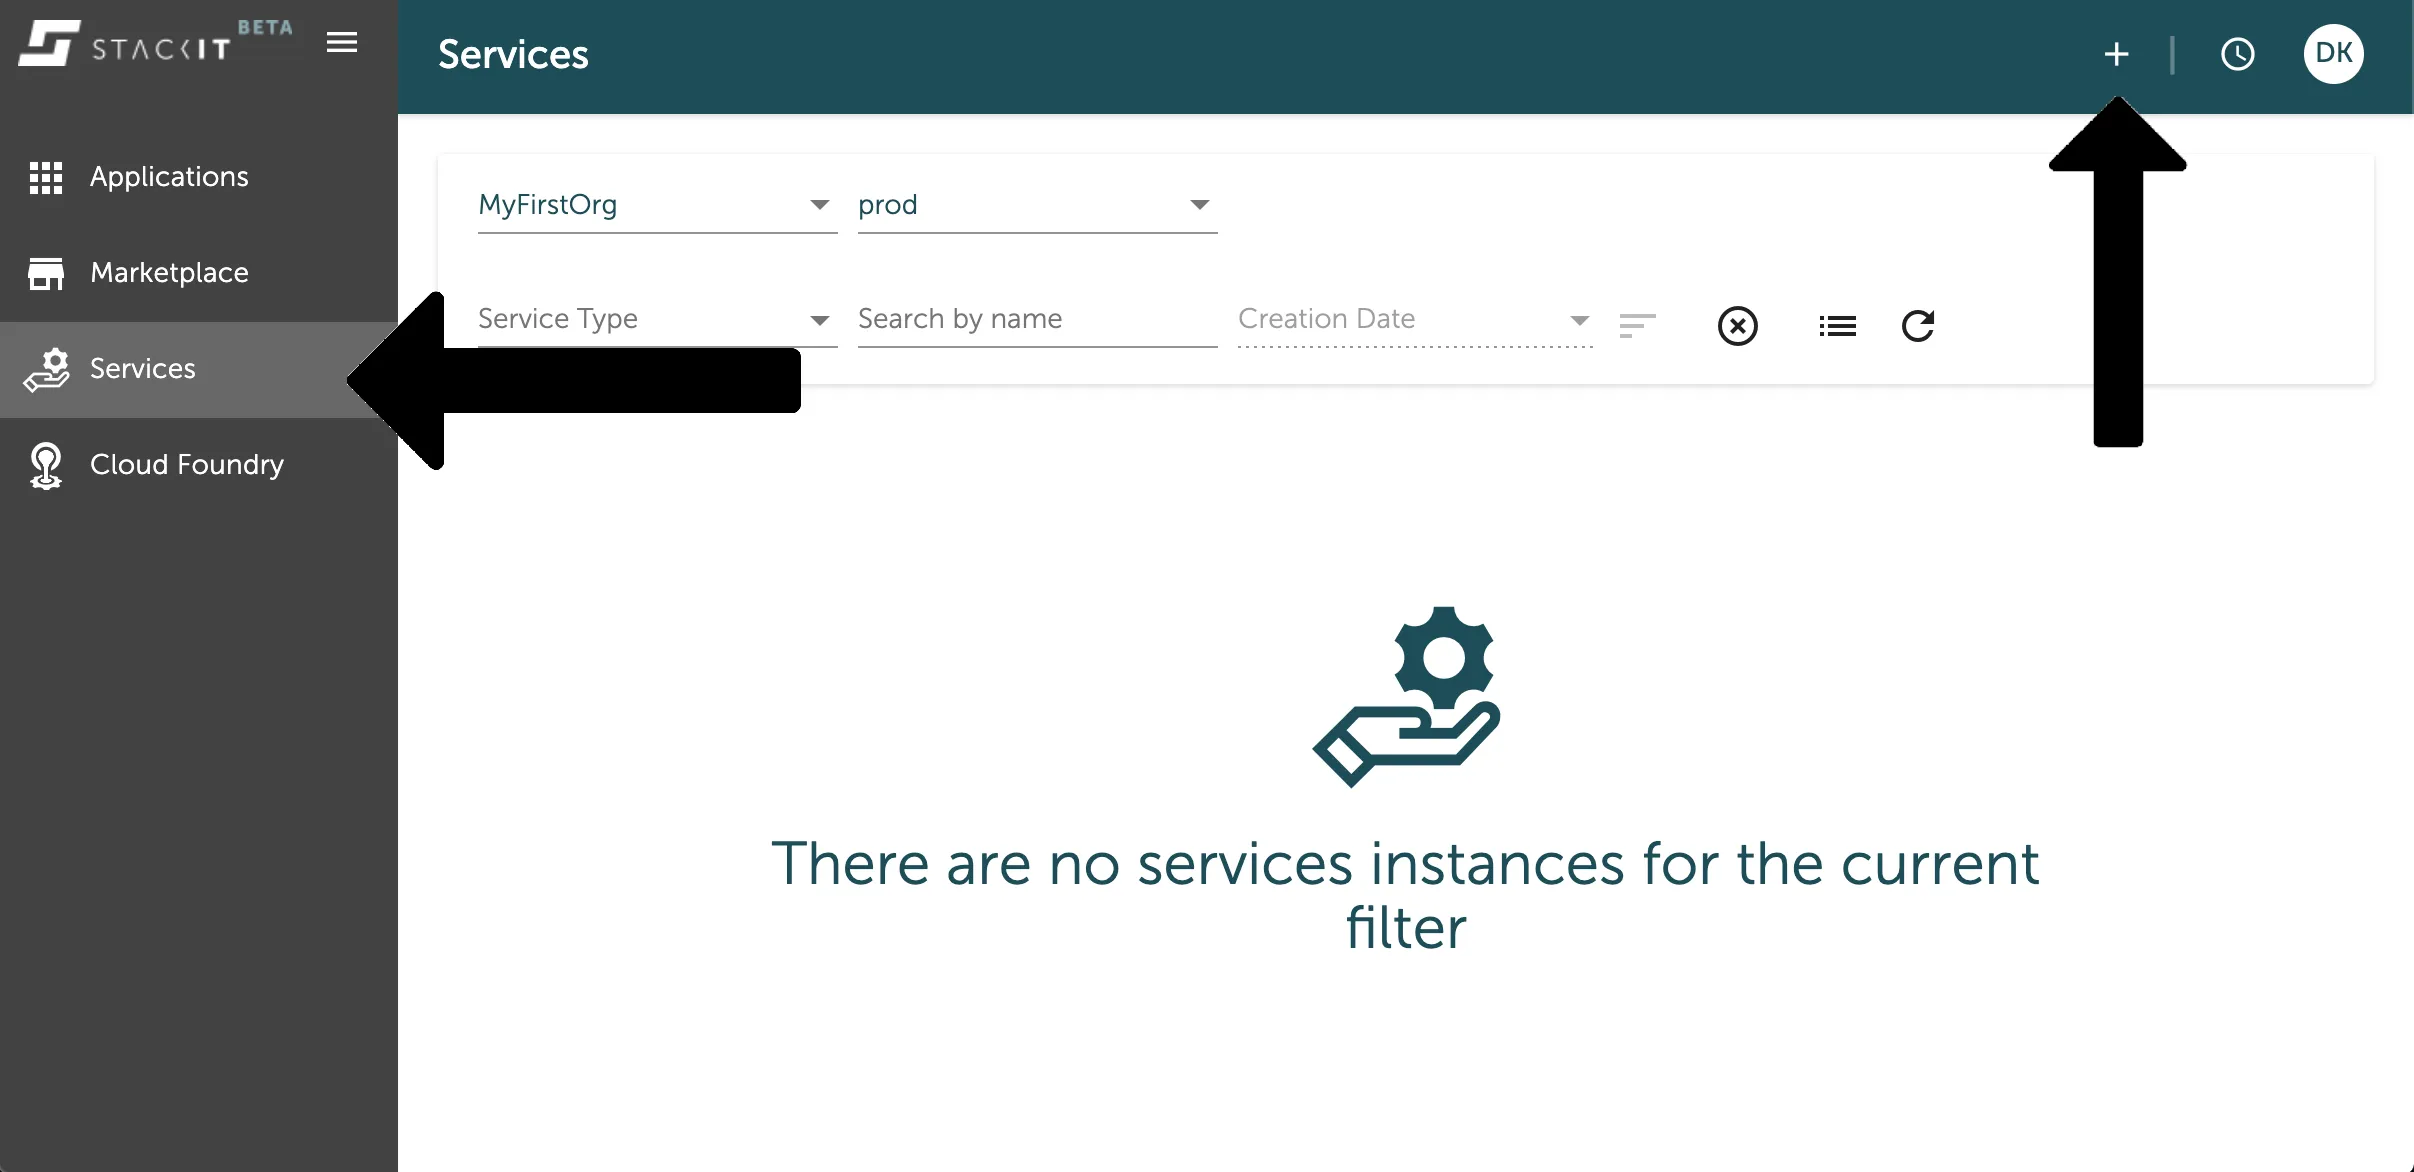
Section titled “Create a new service instance via Stratos”You can easily create a new service instance in the service overview you can find in the service tab of the left side navigation. Here you can see your existing service instances or create new ones with pressing the + button on the top bar as marked in the image below.
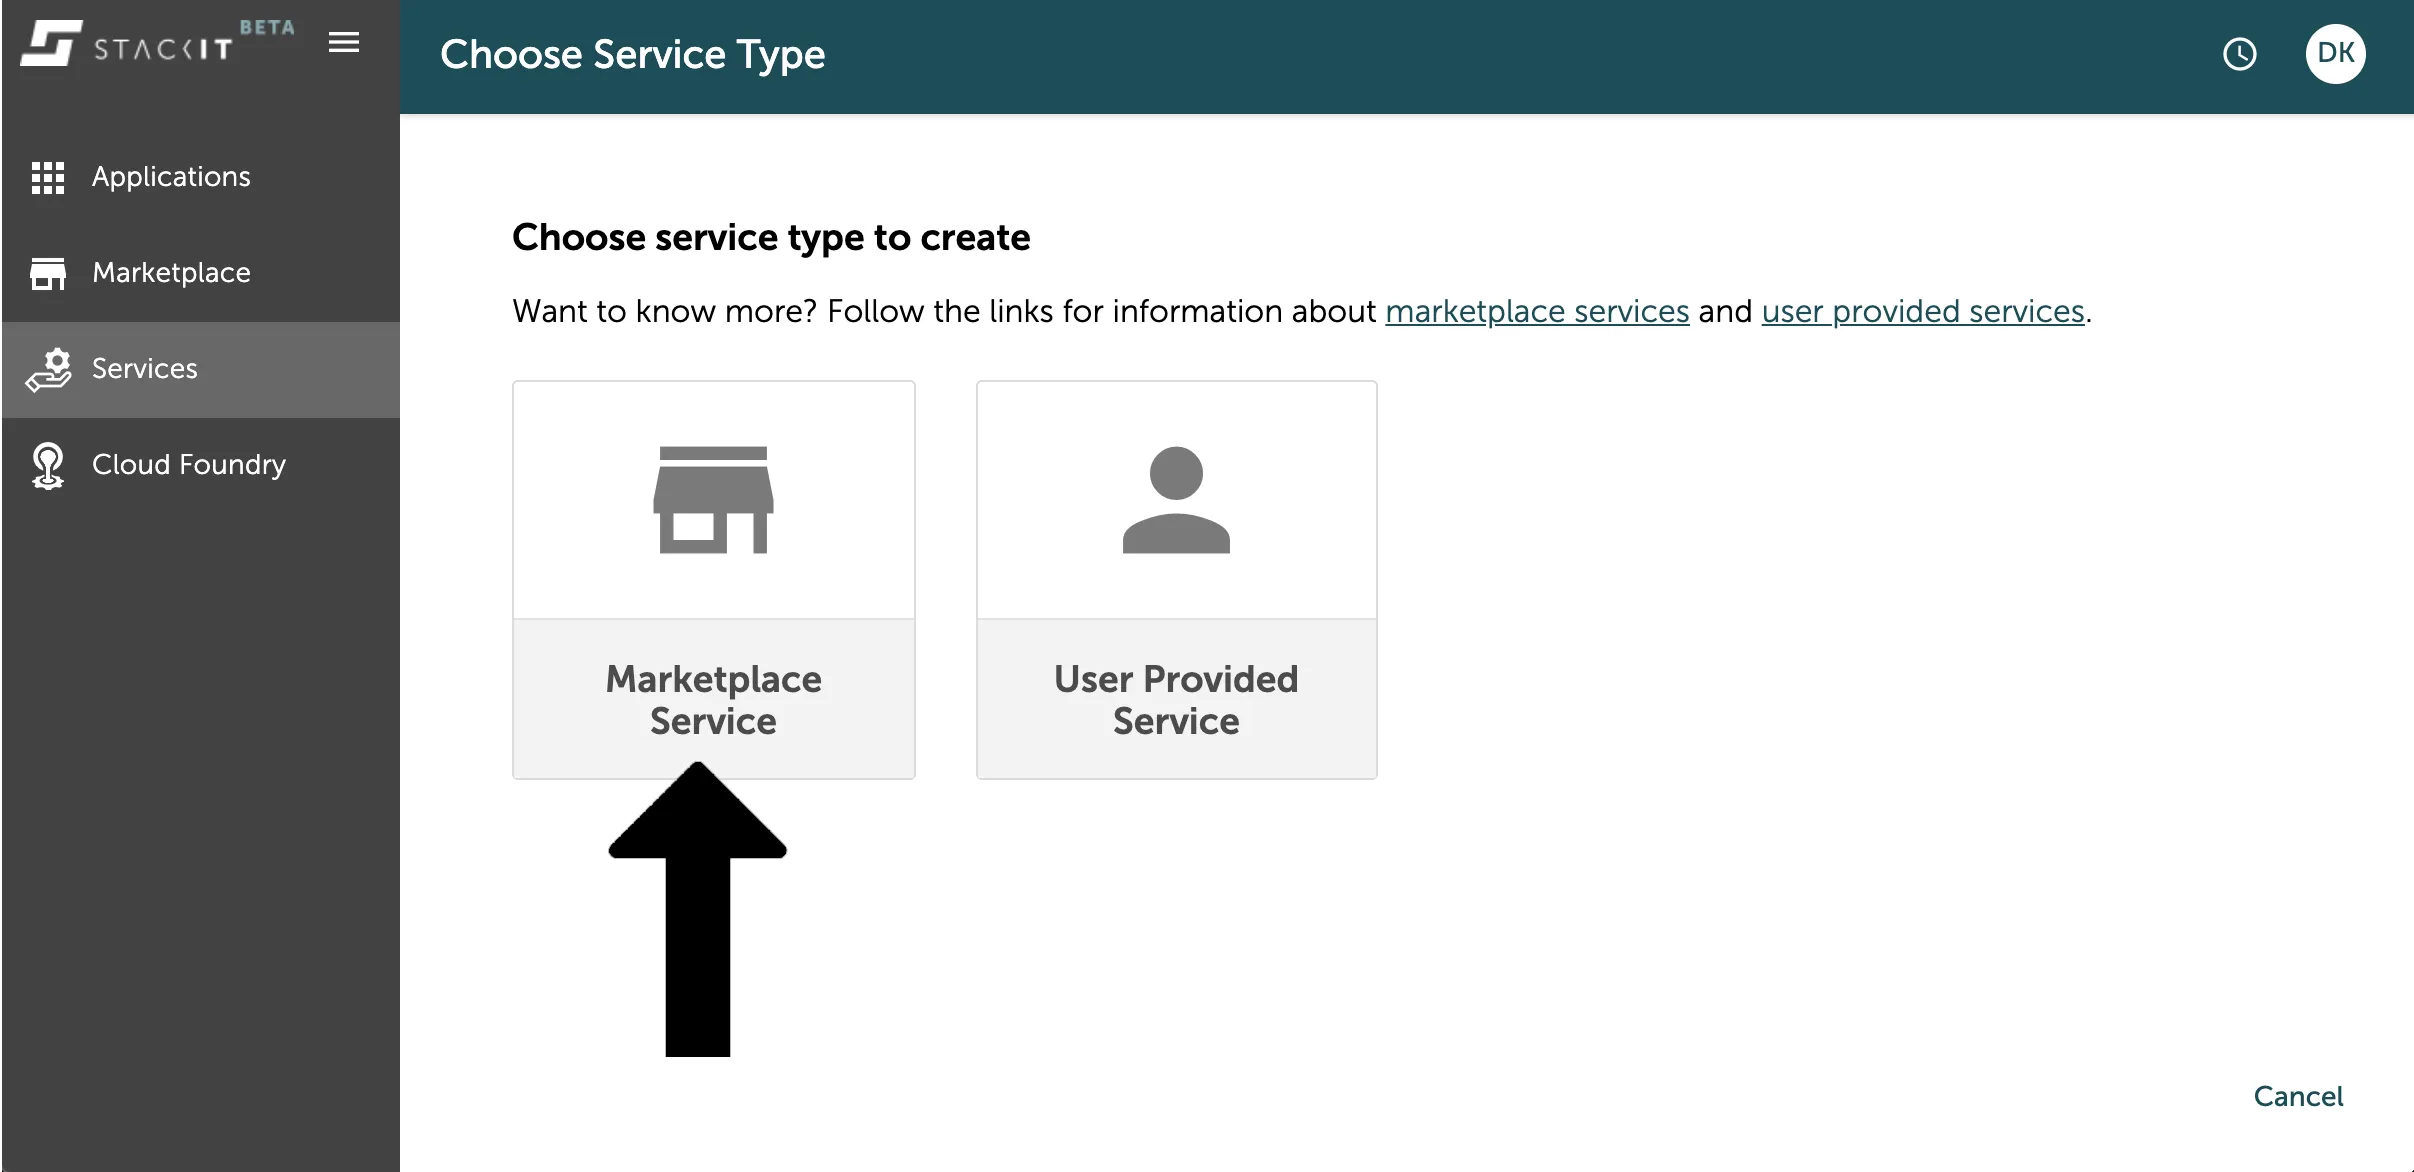
Afterwards you will be asked, if you want to create an instance of a marketplace service or a user provided service. Marketplace services are all data services you can find in the platforms marketplace, as seen in the chapter above. User Provided Services are services you create and deploy on the Cloud Foundry on your own, like for example a routing service.
Since we want to create a data service in this example, you have to select the marketplace service by just clicking on the panel.
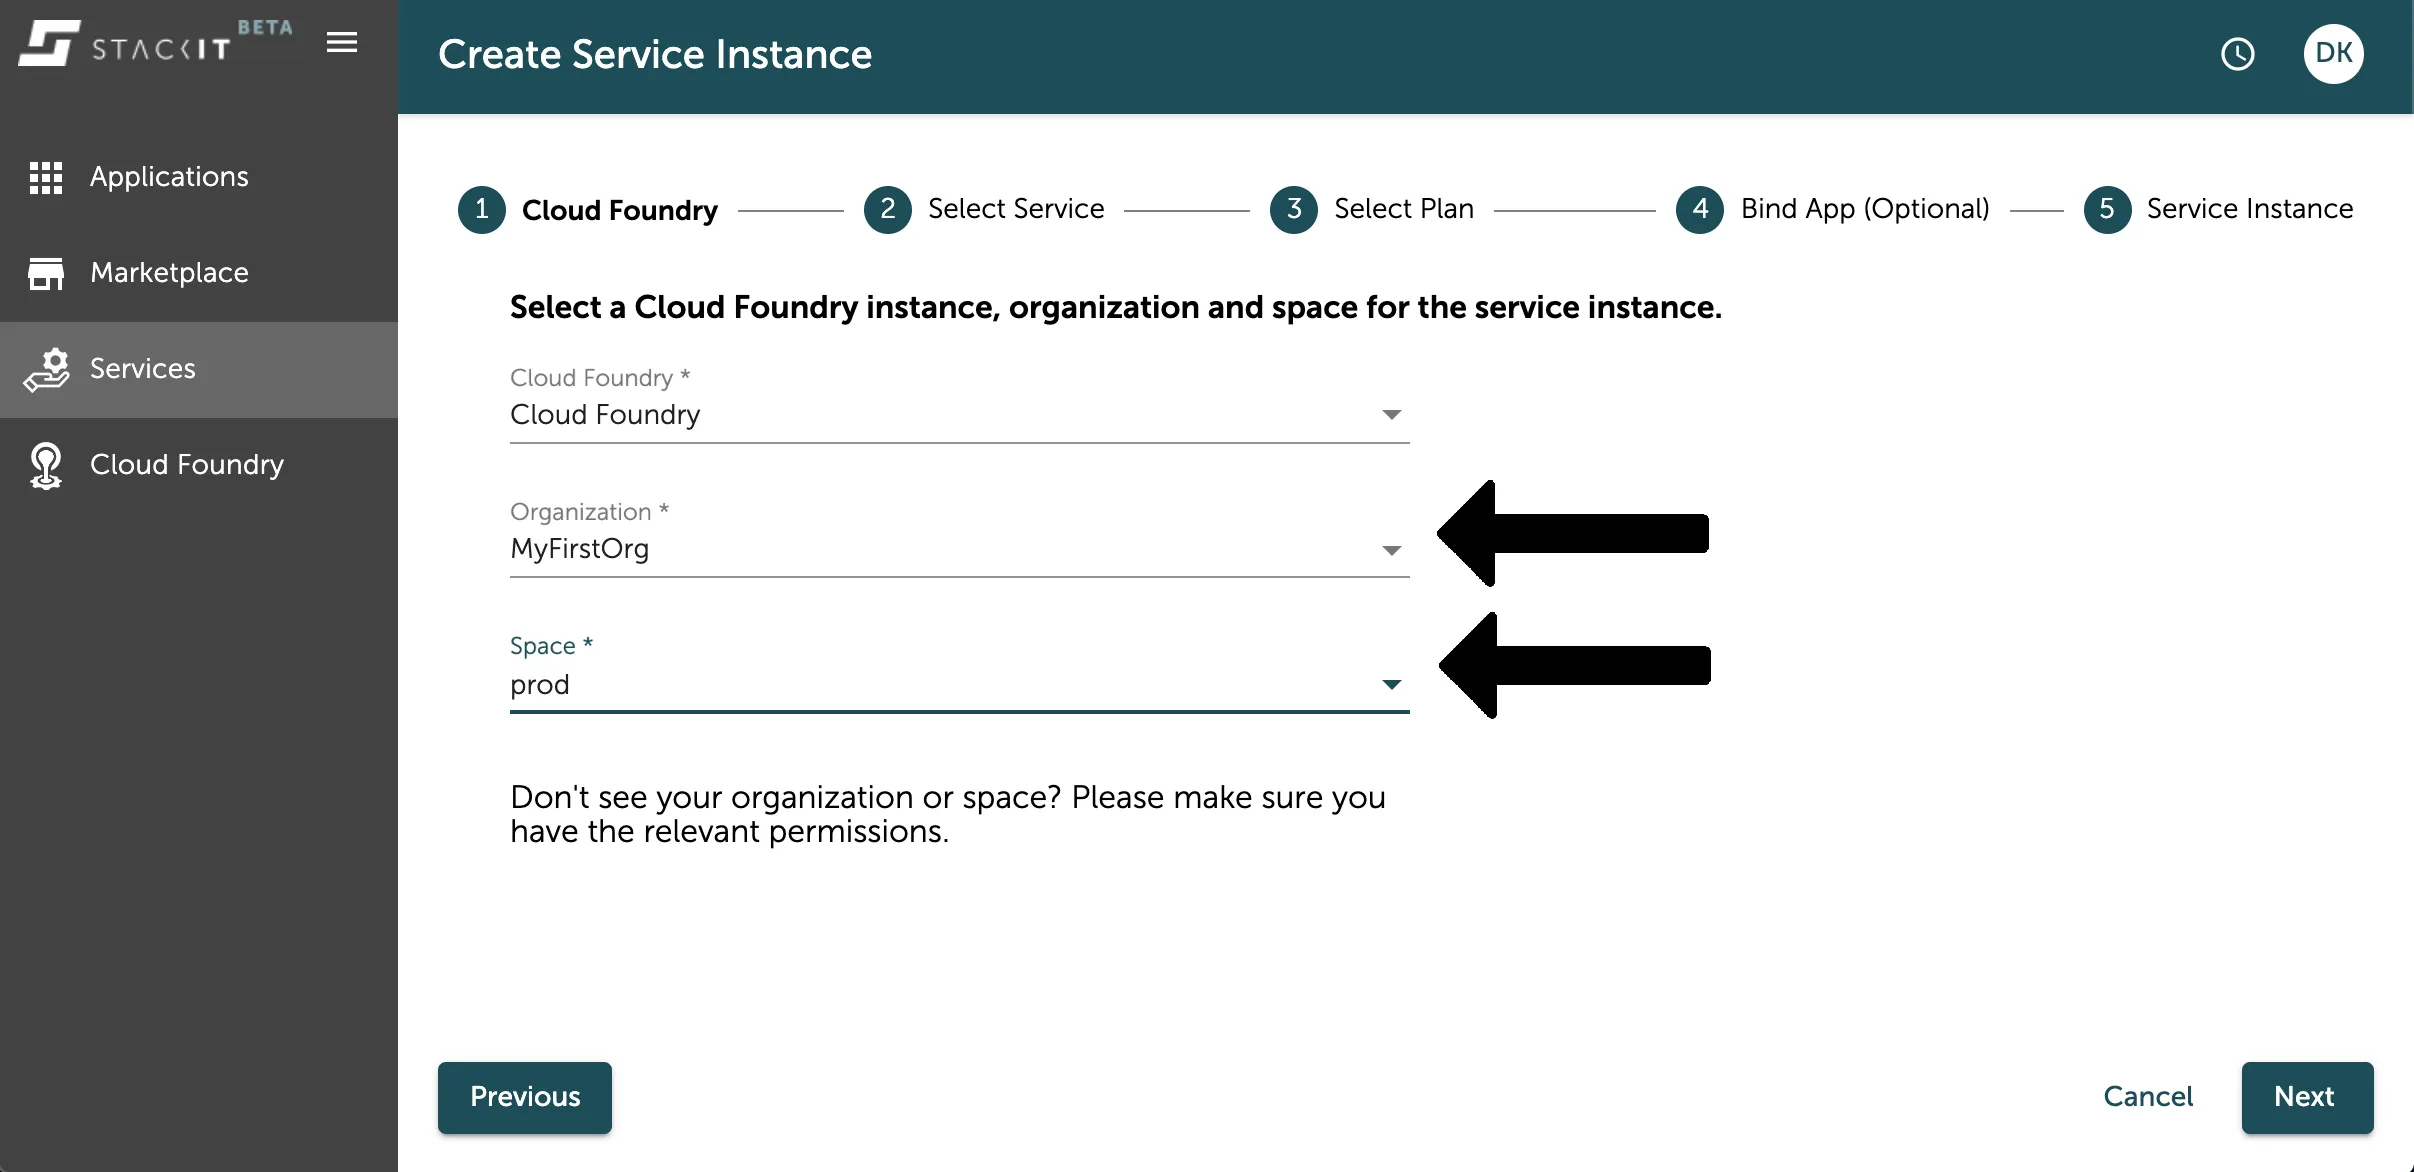
Now the instance creation process for marketplace services starts. As a first step you have to select the platform, your org and space you want that service instance to be available in.
If you already filtered the service overview to your org and space, this will already be selected for you. If not, please select the org and space from the dropdown selection as seen in the image below.
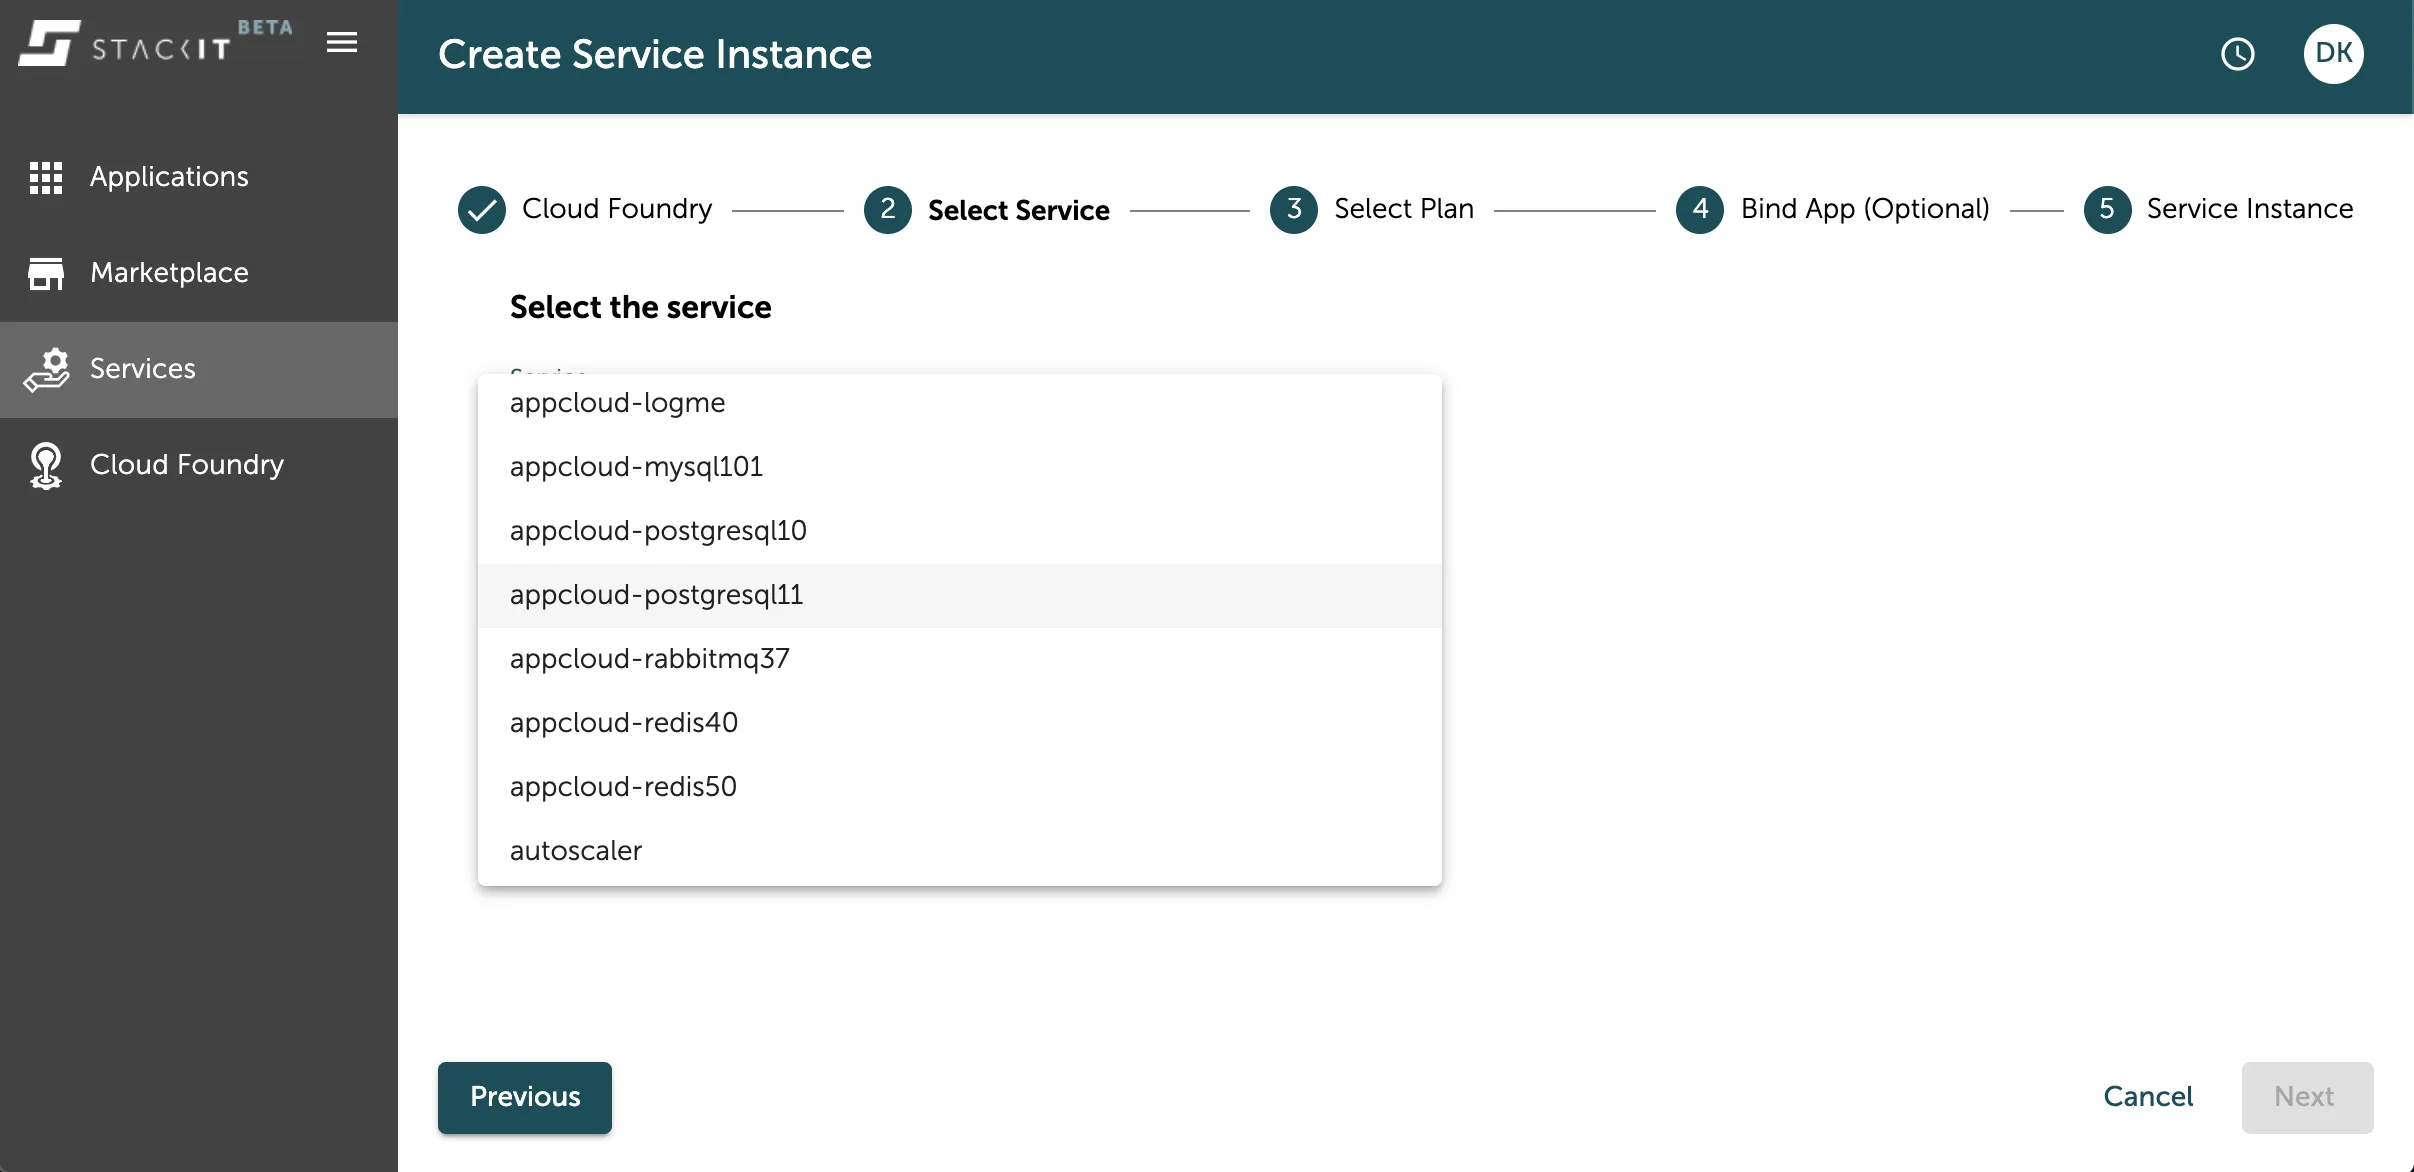
In the next step you have to select the service you want to instantiate. You have the selection of available services in the dropdown menu. Select the one that you want to create. If you want to see more details about the services, you can checkout the marketplace as seen in the previous chapter for more information.
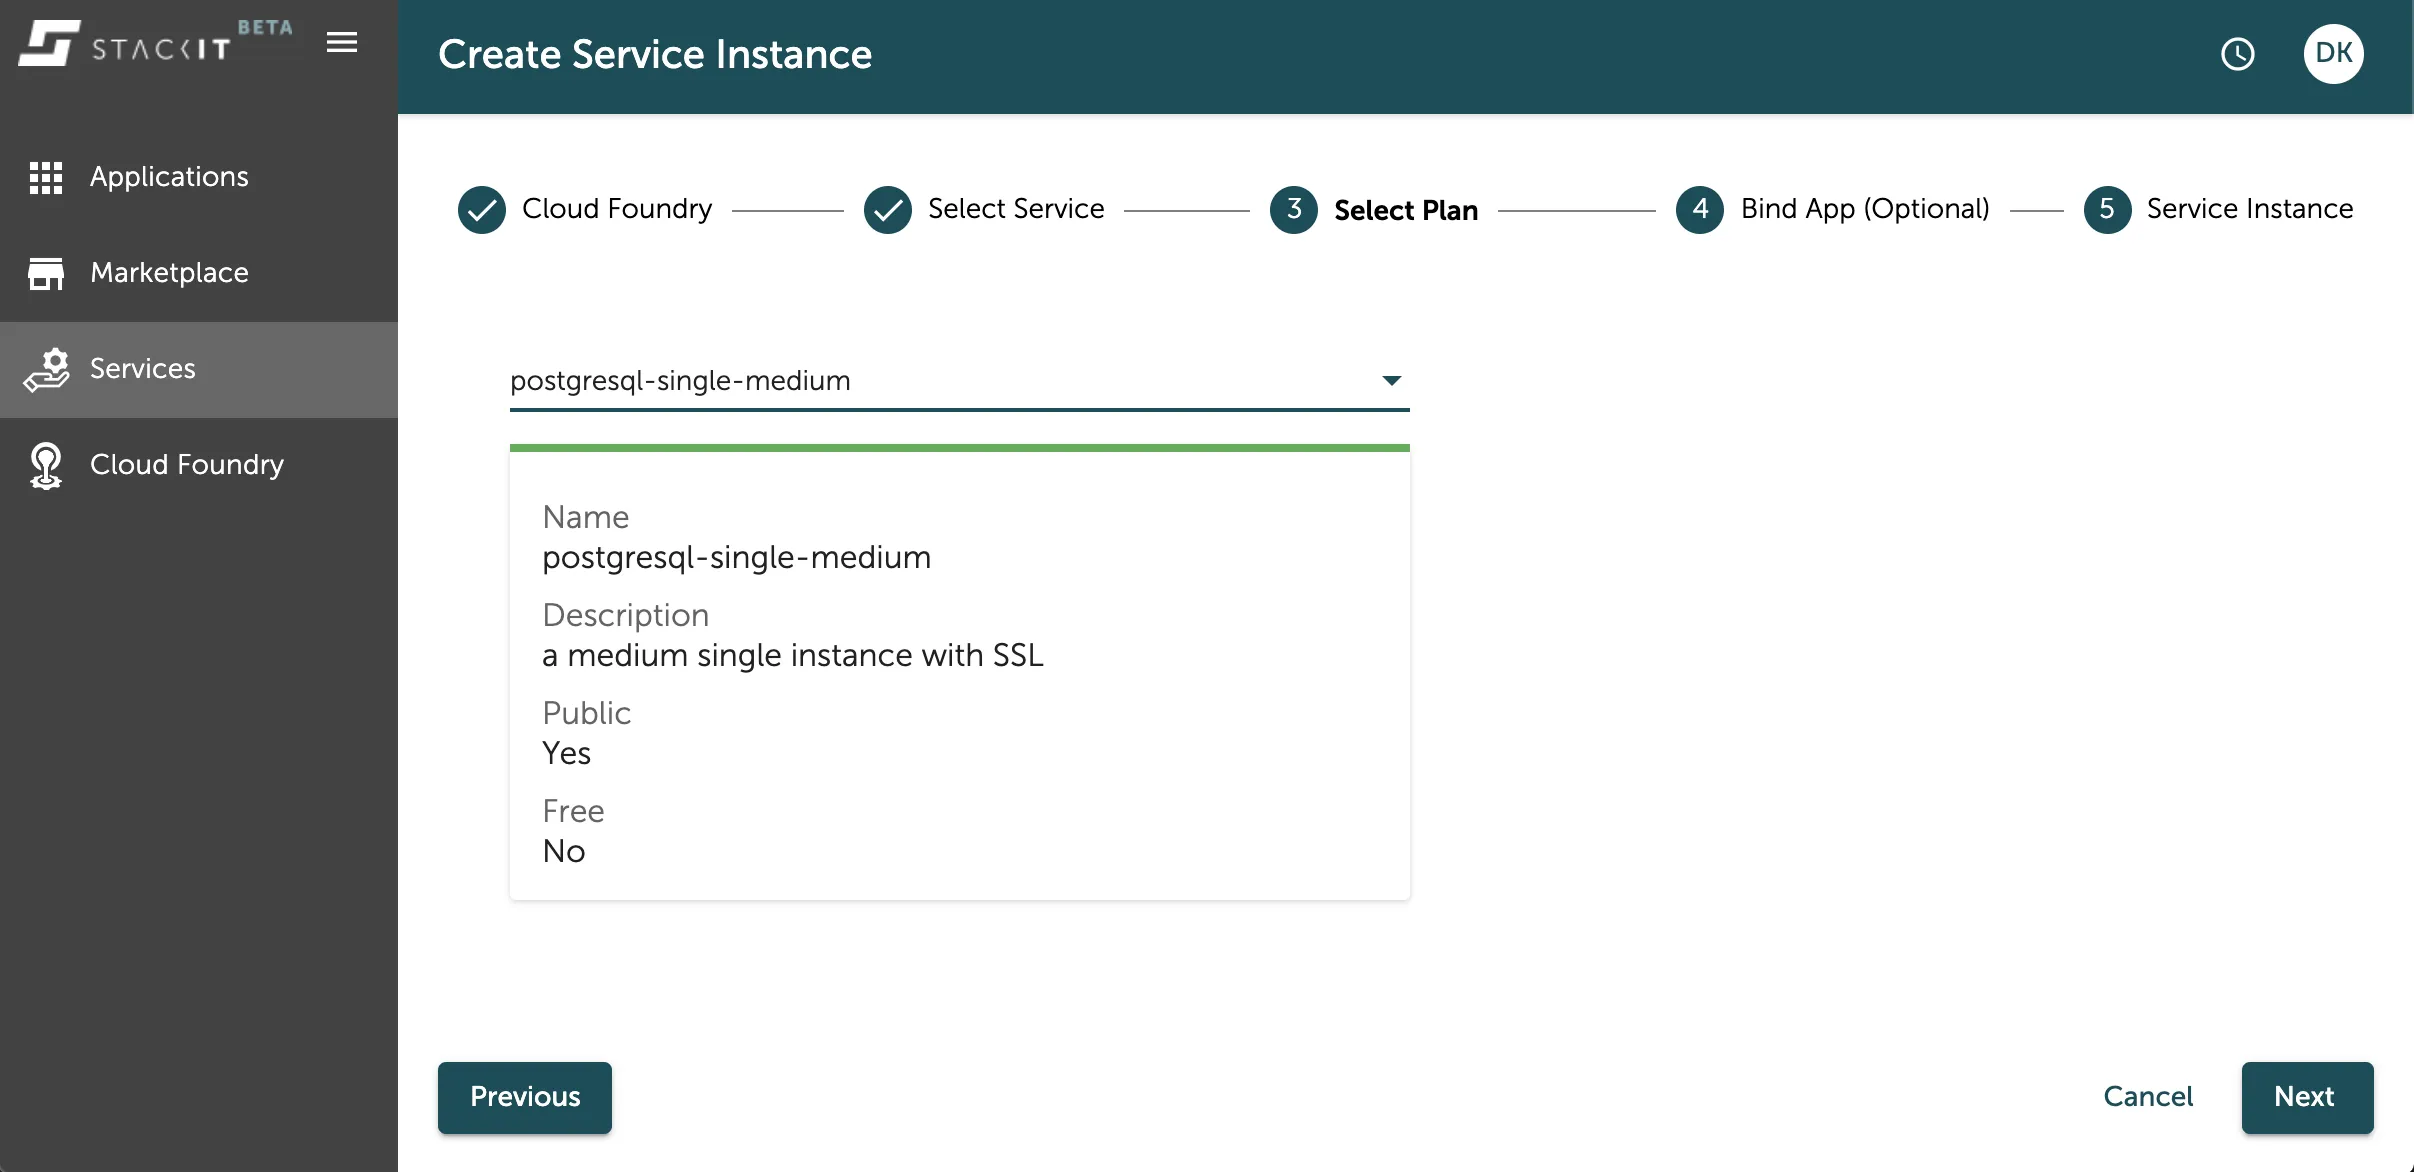
As a follow up you also have to select the service plan of the instance you want to create. A dropdown menu lists the options you can choose from. You can find more information about the available service plans directly below the selected option or in the service description of the data service of your choice.
Select the service plan that best suits your use case.
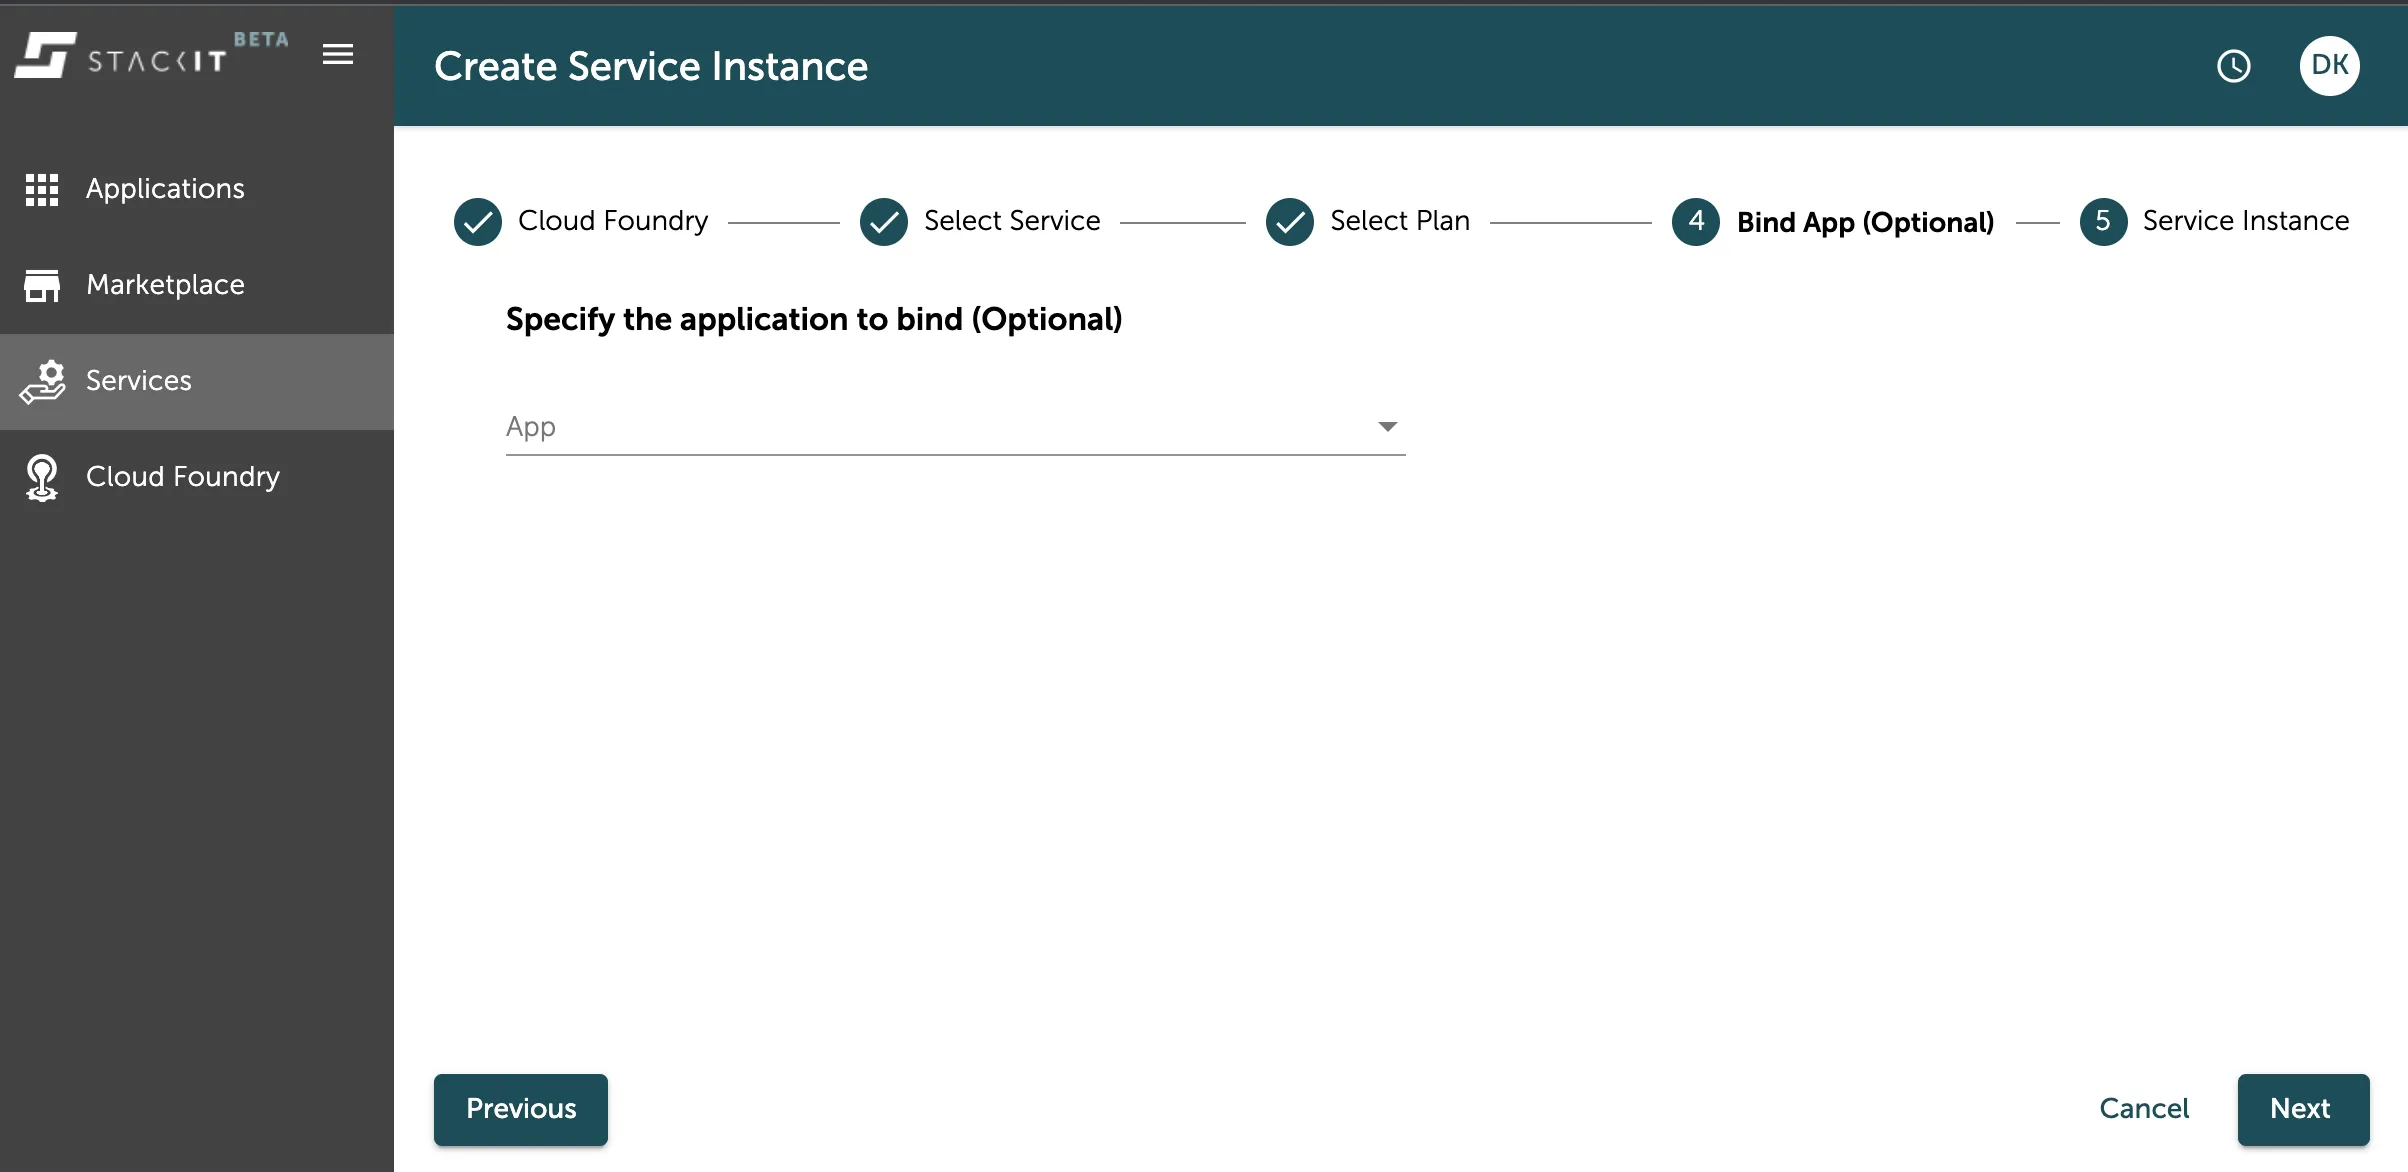
In the next step you can choose an application to directly bind your service instance too. This leads to the service instance connection credentials being directly after its creation injected to the applications environment variables.
In the last step you have to select a name for your data service instance. This name is a unique identifier for your data service within your space. Additionally you can add tags or other arguments as a JSON object.
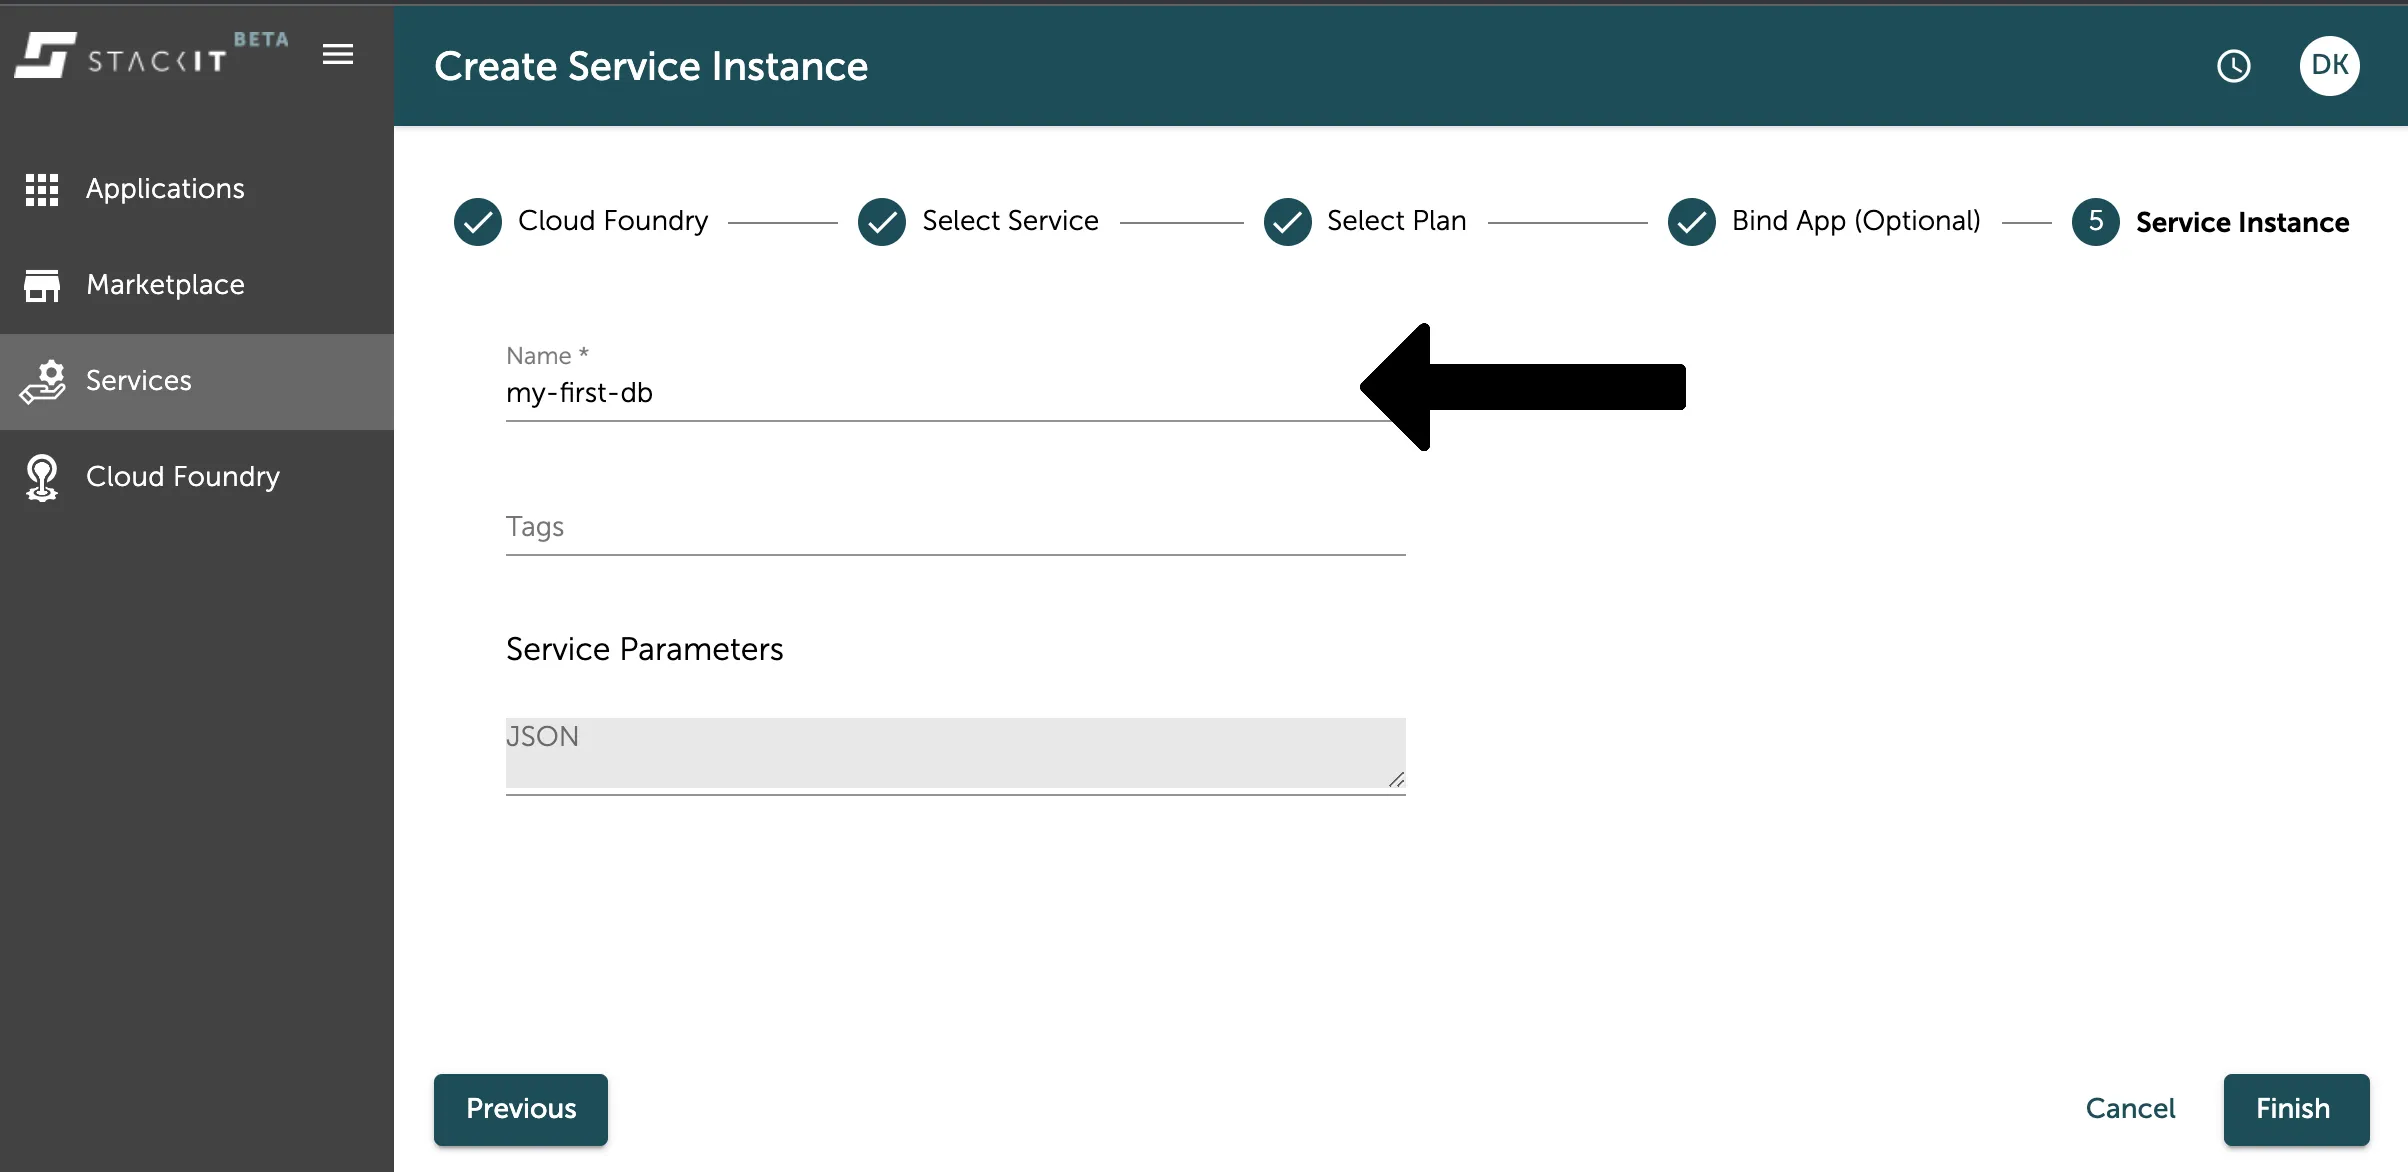
Press the Finish button to start the process of your instance creation. After this your instance will be created and you can see it in the service overview as seen in the image below.
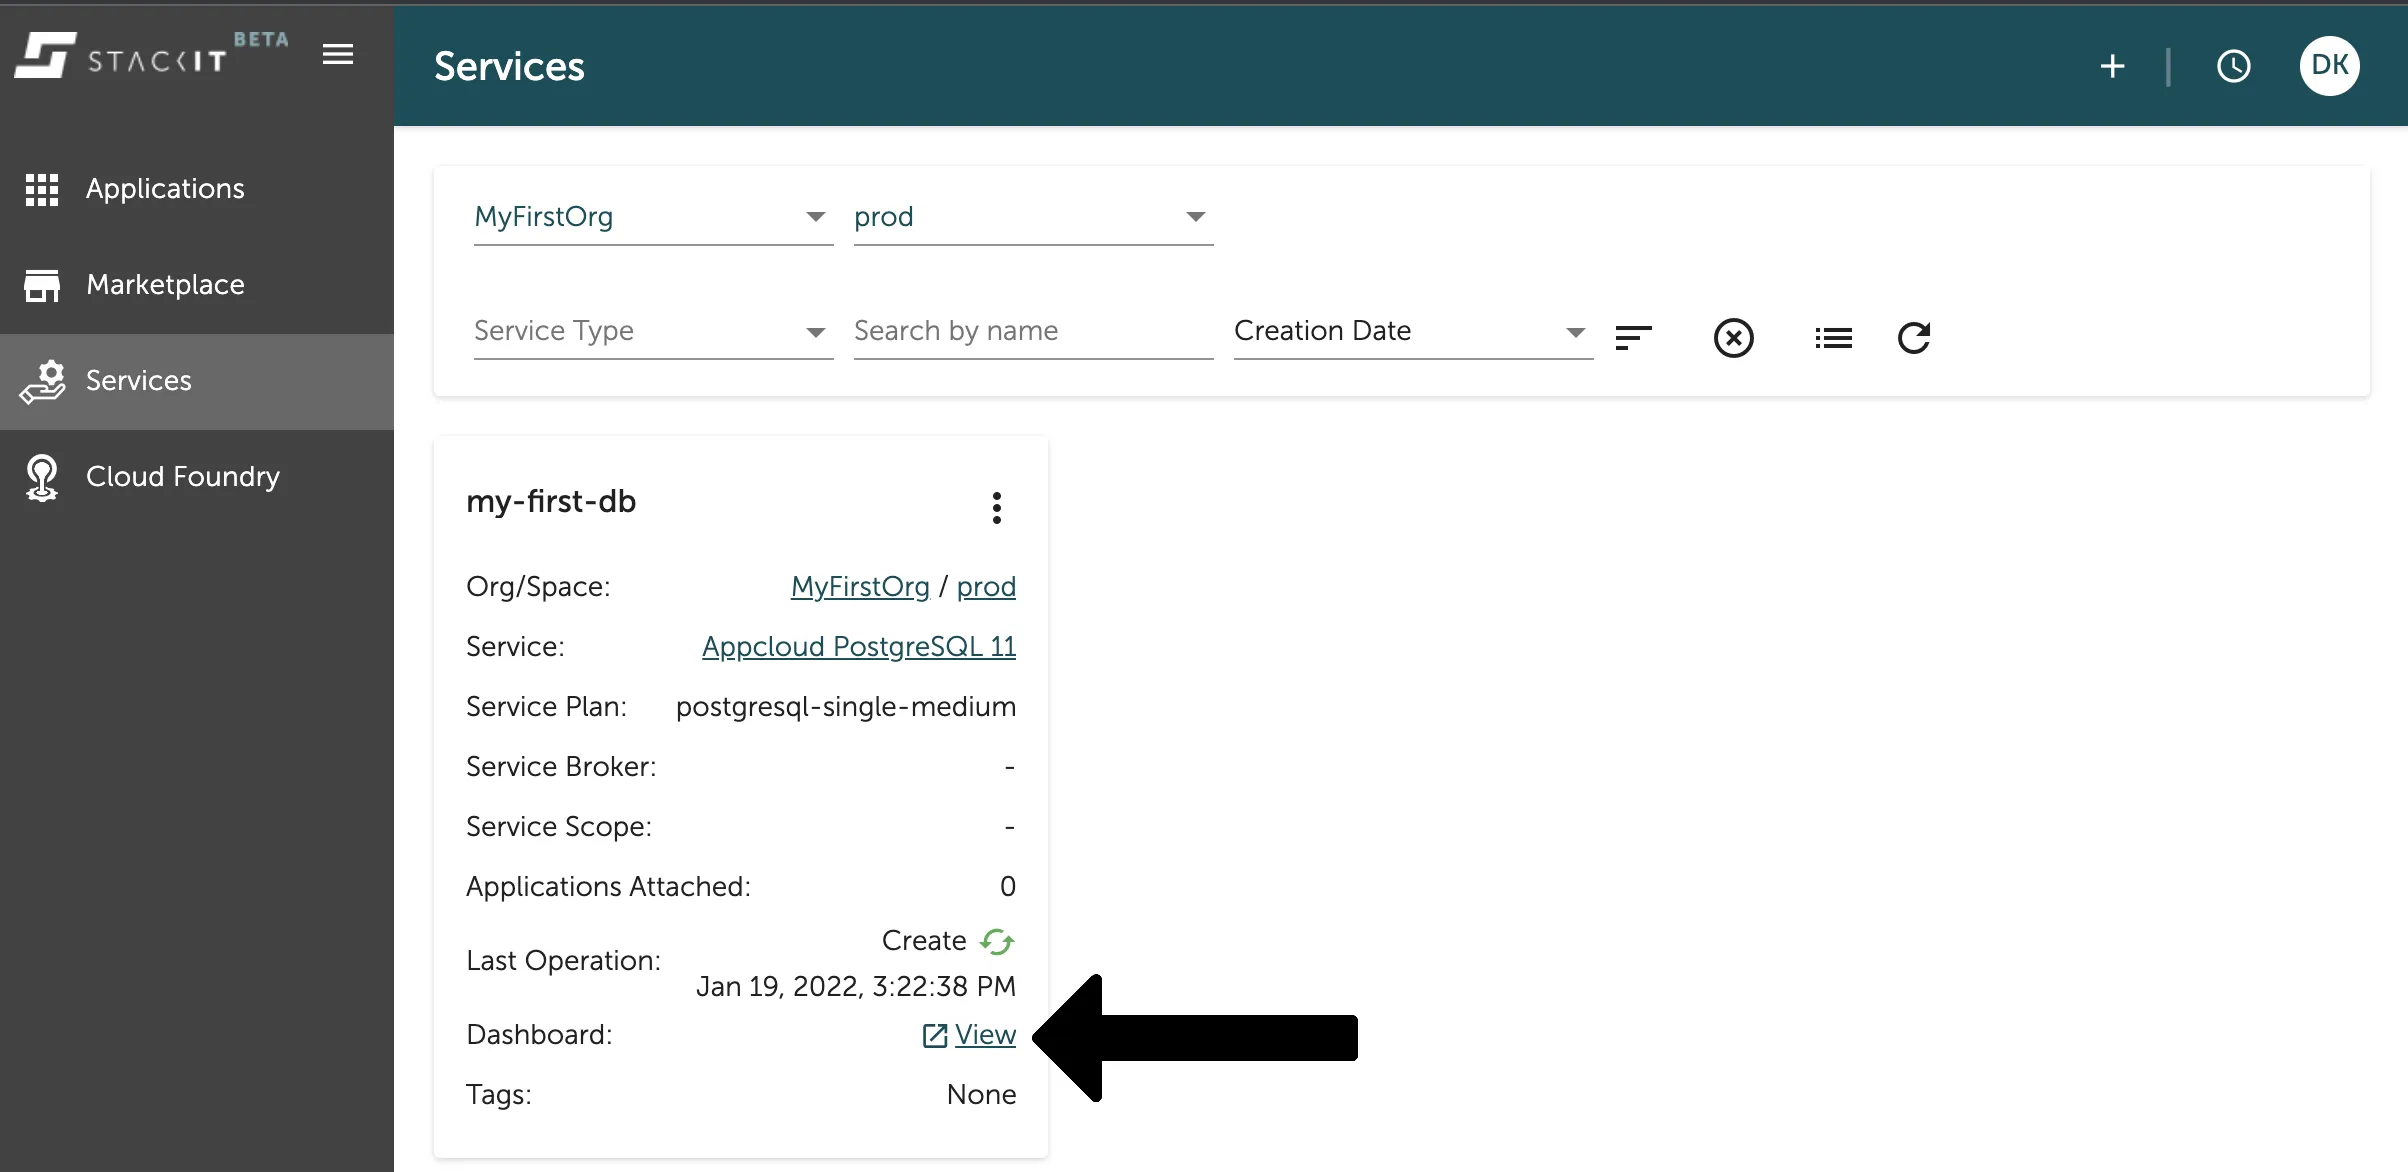
Here you can get details of your application, like the current state - which is Create when still being created and Create Successful when you can start working with it. You can also directly go to the service instance dashboard with a click on the marked link as seen on the image above.
Delete a service instance via Stratos
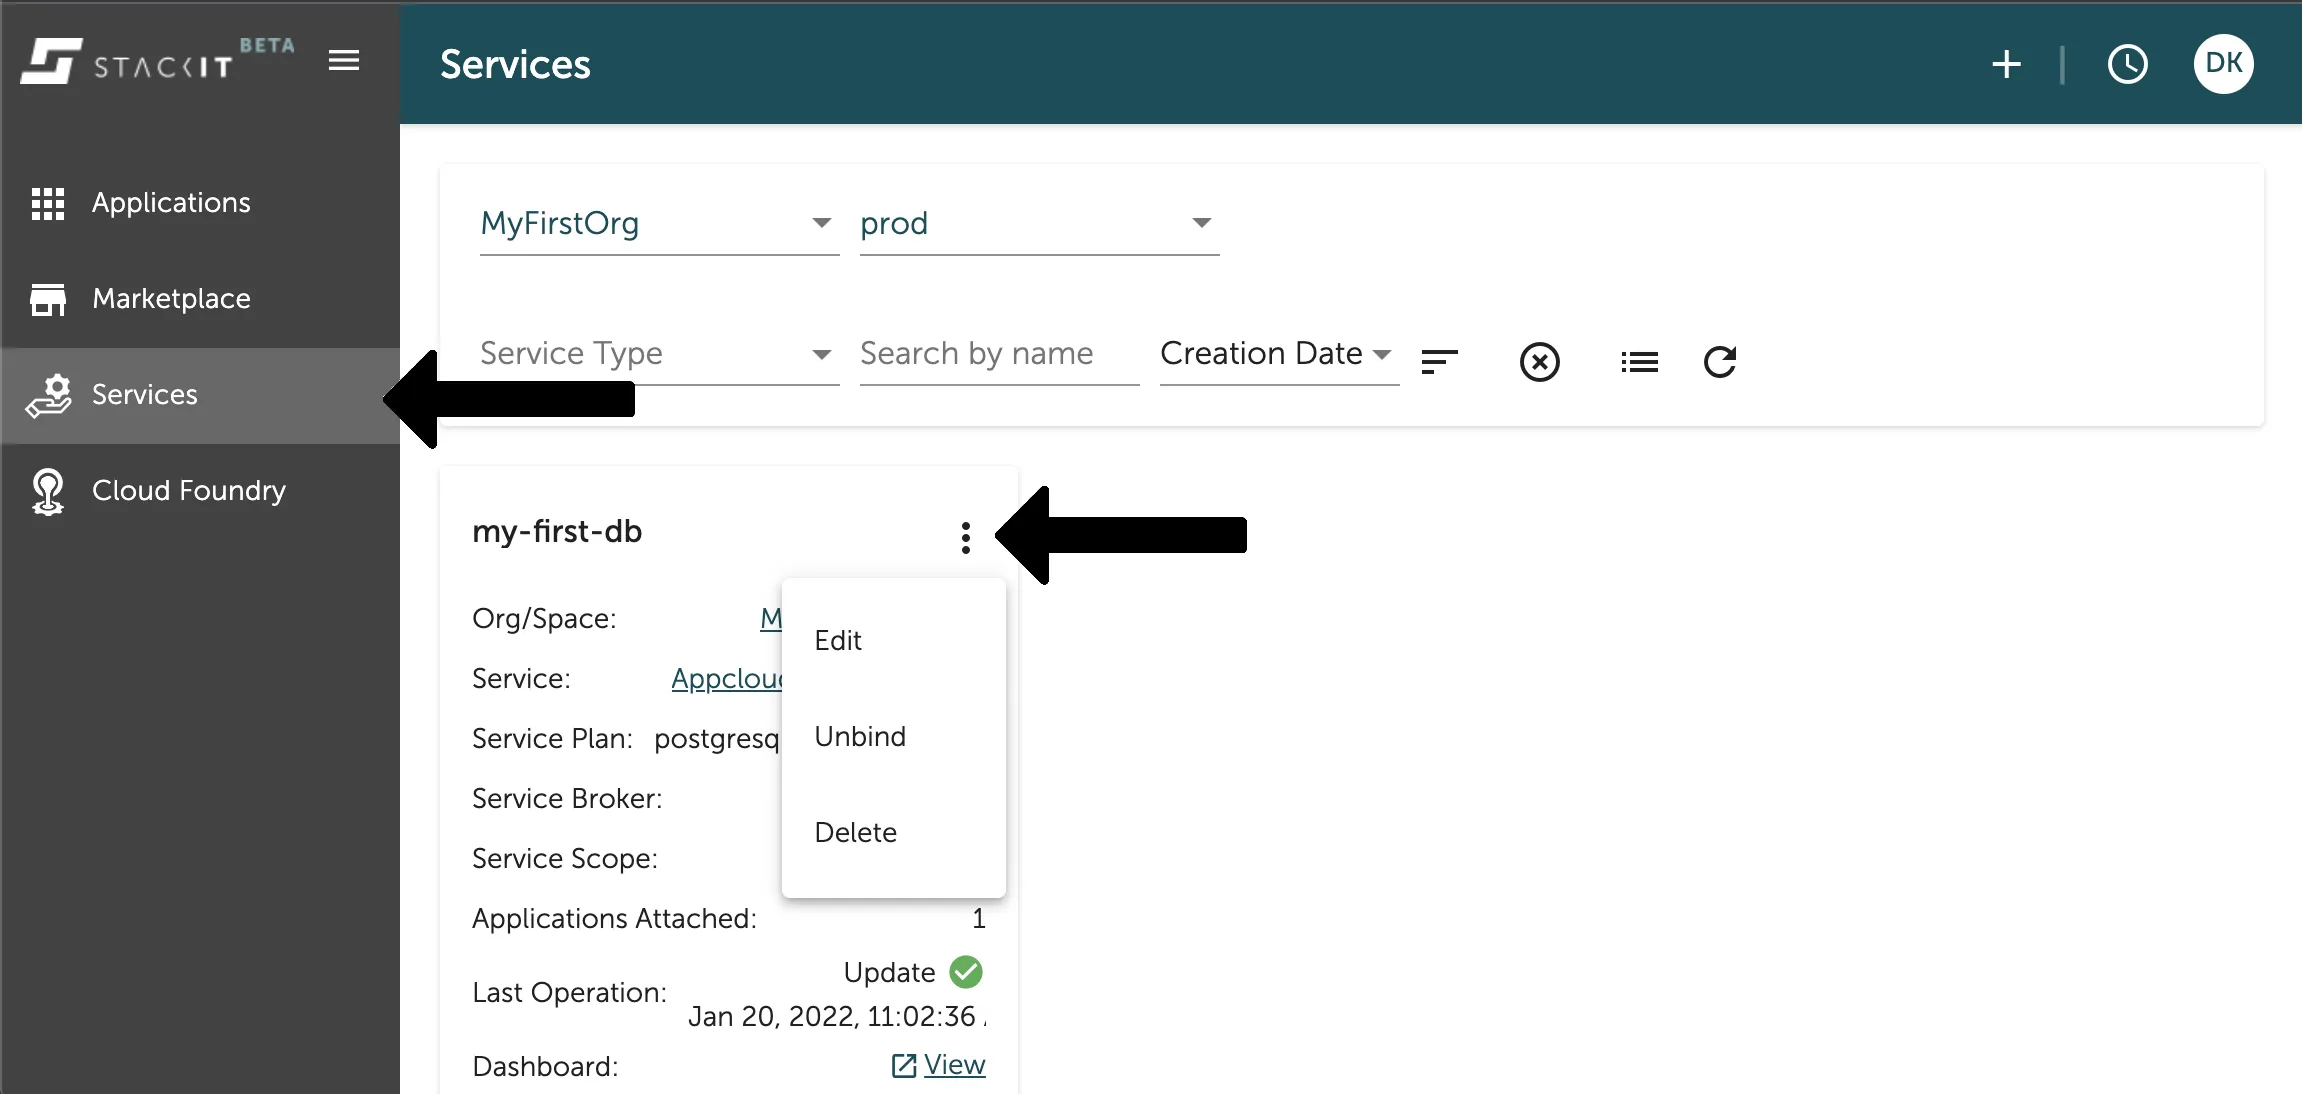
Section titled “Delete a service instance via Stratos”You can easily delete your data service instance in the Service Overview of the Console UI. Filter for the space your instance is created in and then select the context menu (three dots) in the panel of the service instance you want to delete. As seen in the image below.
If you want to delete the instance you have to type its name in the pop up confirmation. Afterwards the asynchronous deletion is started and you can no longer use it.