Set up a Git Repository
Last updated on
Almost everything on STACKIT Git happens in a repository. Think of a repository as a home for your project, where all of its source code can be organized using Git, as well as where you can track issues and read and write in the wiki.
This article will guide you through the process of setting up a repository on STACKIT Git, connecting your local development environment and making your first commit.
Creating a Repository
Section titled “Creating a Repository”-
Click the +-sign on the top right of the page and select New repository from the menu.
This will lead you to the form below.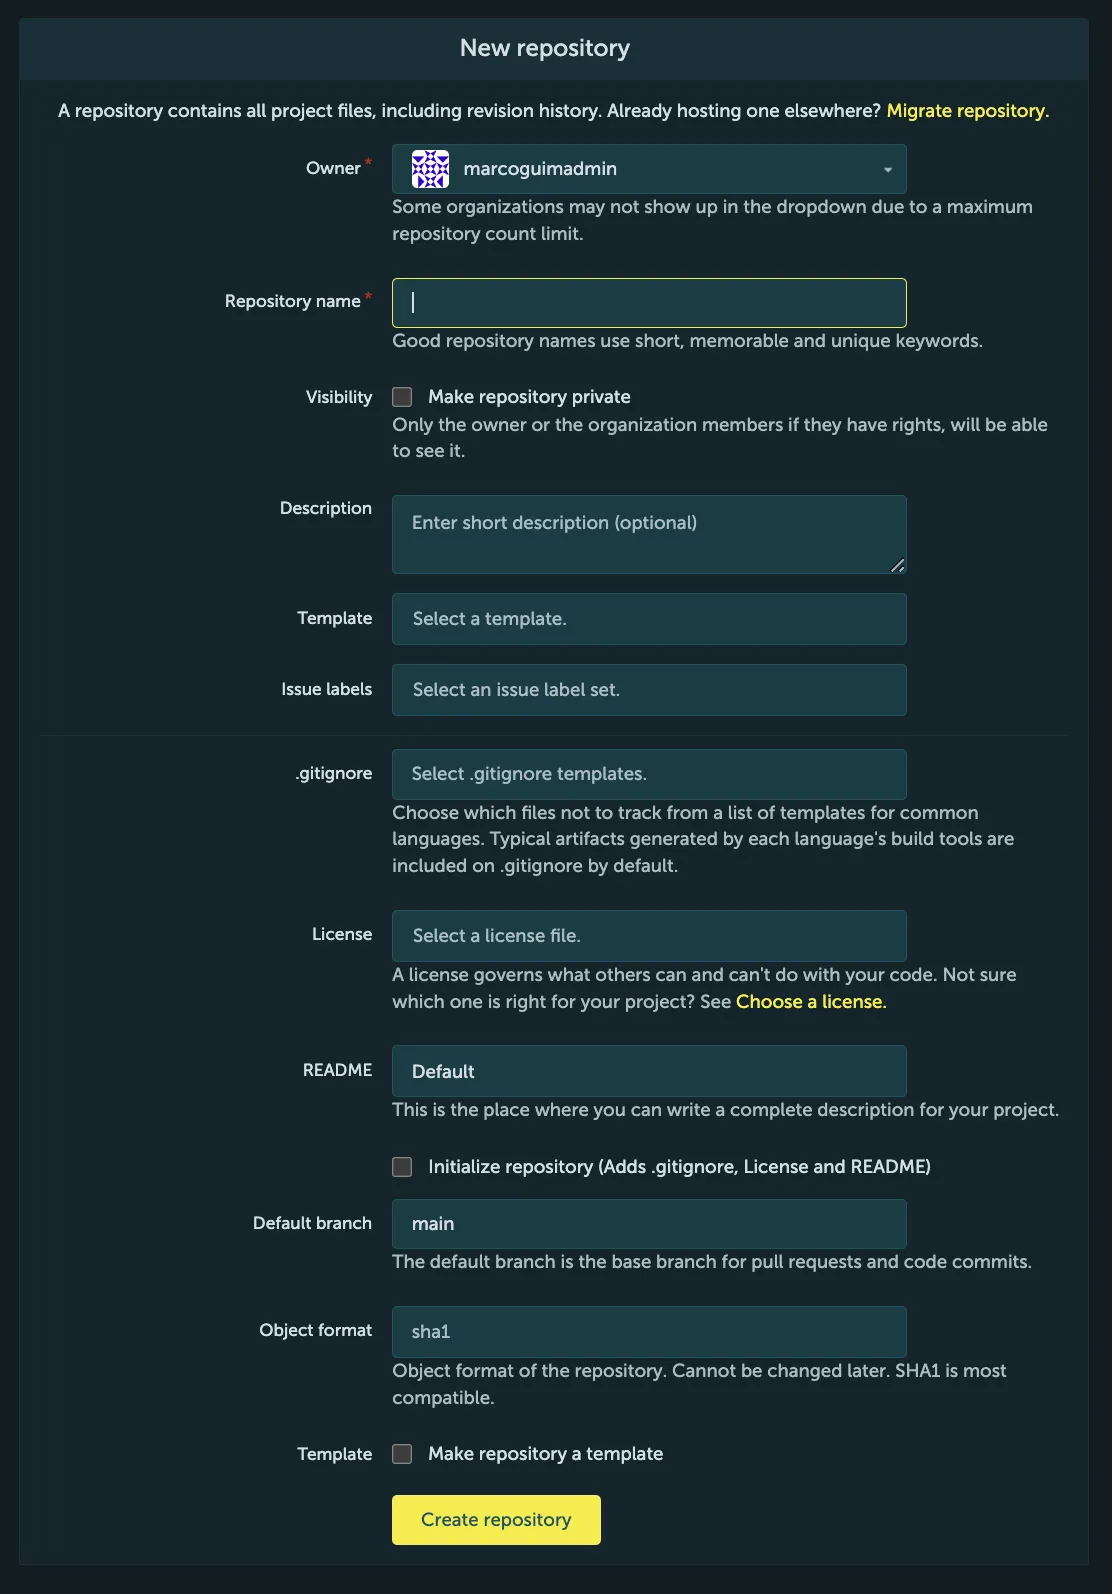
-
Enter the details of your new repository.
Form field Explanation Owner Here, you can specify whether you want this to be your own personal project or whether you want it to be part of an organization that you’re a part of Repository name A name for your repository (which will also be part of its path) Visibility Repositories are either public or private, where public means that everyone will be able to access your repository, while your private repositories can only be accessed by you and your collaborators Description A short description that appears next to your repository’s name where appropriate Template Occasionally you may want to generate your repository from an existing template. In that case, you can specify that template here. Otherwise, simply leave this field empty. Issue Labels If you want to initialize your project’s issue tracker with a set of labels that you can use to categorize issues, you can choose one here. You don’t have to choose this right away though, as you can choose and modify issue labels at a later time as well. See also: Using Labels. .gitignore A .gitignorefile defines which files Git should not keep track of. This is useful, for example to prevent configuration files or binaries to be tracked in version control. You can choose to add a pre-defined file matching the programming language you use now, or add one manually later. License Here, you can choose from a list of FSF/OSI approved licenses. A LICENSE file will then be added to the repository. README Is the first file one should read when accessing a repository. It’s also the first file displayed when accessing a repository. You can think of it as the “homepage” of your repository. Initialize repository In order to add the LICENSE, README and .gitignorefiles mentioned above to your new repository, make sure you tick this box. Default branch Using this field, you can choose how to name the default branch of your Git repository. We recommend you use the predefined default. Object format Is the repository’s object format. We recommend SHA1 as it’s the most compatible. It cannot be changed later once the repository has been created. For a quick start, specify only Owner and Repository name and use default values or fill the fields later for all other entries. -
Click Create Repository.
You should now see a screen similar to the one below.
If you haven’t chosen to generateLICENSE,READMEand.gitignorethe screen might show instructions instead, which will vanish after your first commit.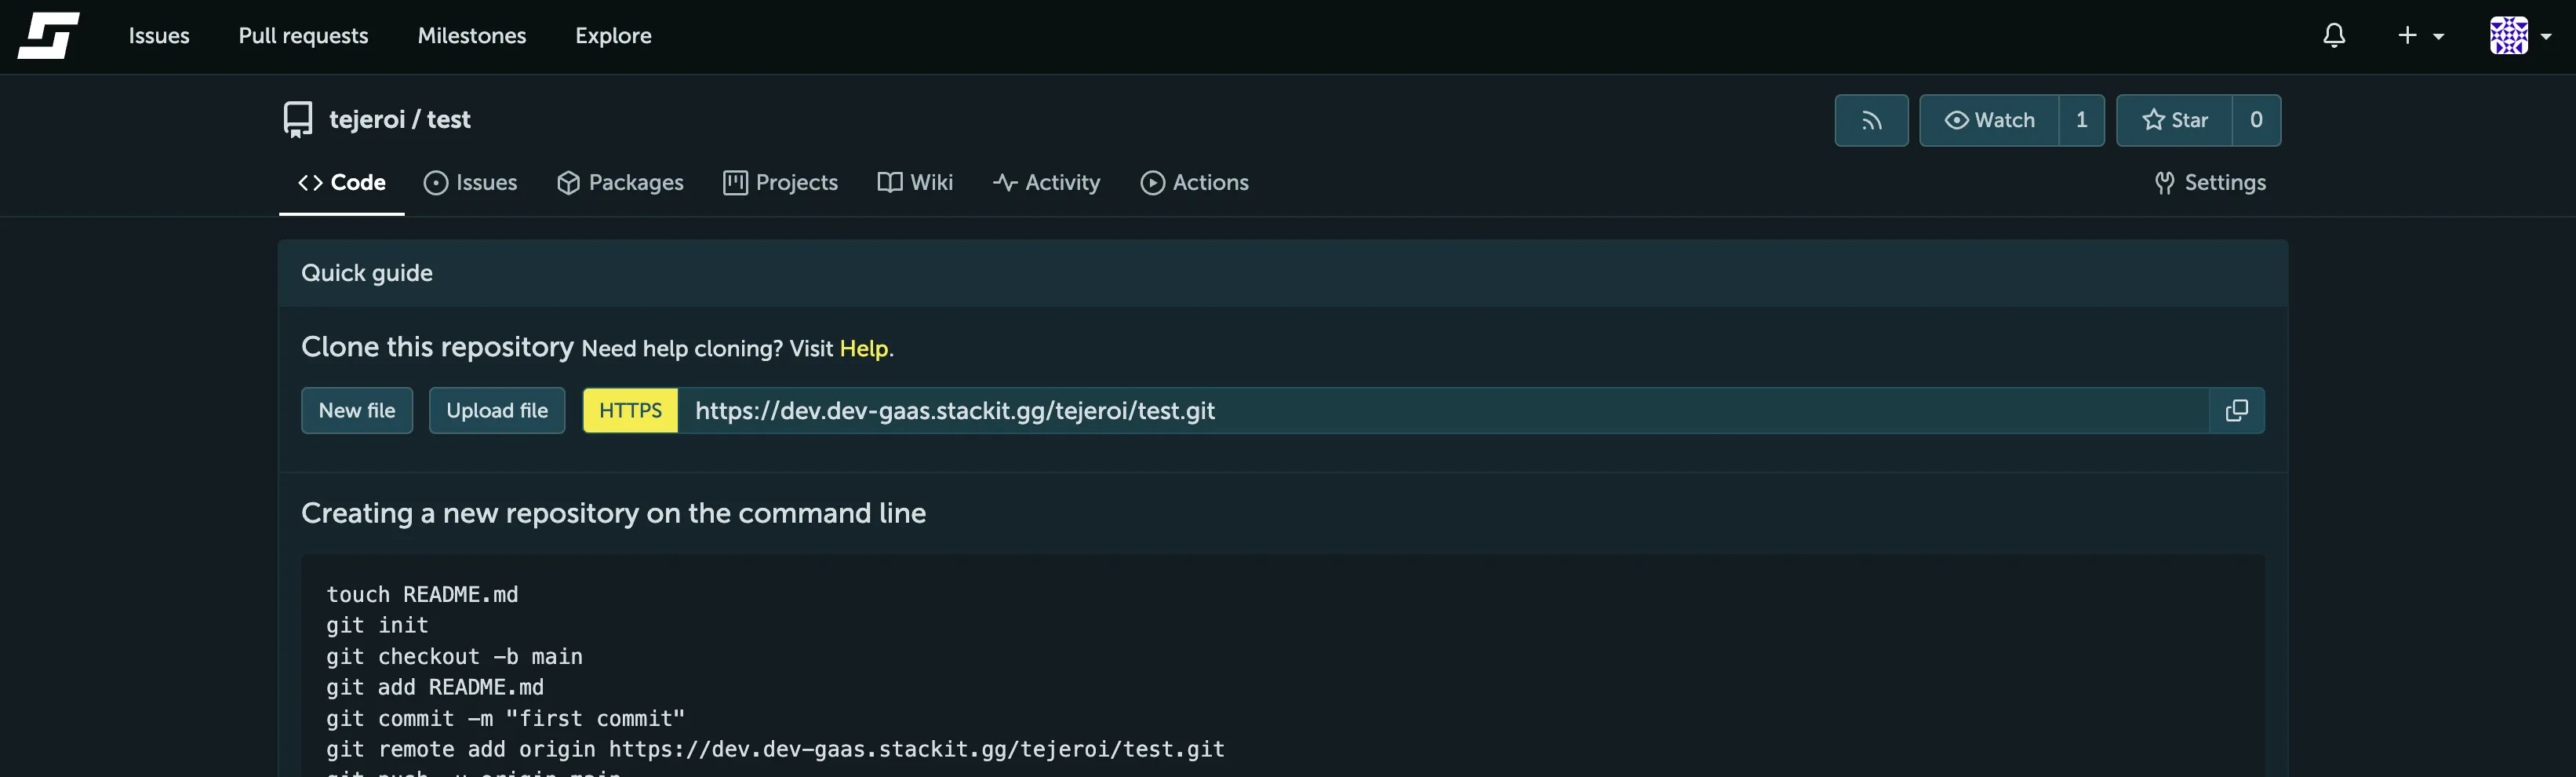
In the tabs you can control the features of the repository (some may not be visible by default):- Code lets you browse through all versions of this repository’s code.
- Repository’s Git URLs - use these to let Git know where to find this repository.
- Issues is a very important communication tool between the author, their users and their contributors. Think of it as part bug-tracker, part forum.
- Pull Requests is where other users can ask the author to “pull” in code, from a fork into the author’s program.
- Wiki is a basic wiki feature built into STACKIT Git.
- Code lets you browse through all versions of this repository’s code.
-
Click Settings and adjust the repository settings as required.
You can define a project website, change the repository description, enable/disable the Wiki and the Issue Tracker and delete the repository.
Connecting a local repository to STACKIT GIT
Section titled “Connecting a local repository to STACKIT GIT”After creating a new repository you can connect the repository with your local development copy.
In this guide, we’ll focus on connecting to STACKIT Git via HTTP using Git on the command line, but note that there are multiple other ways to connect to STACKIT Git.
Option A: Clone the newly created, empty repository
Section titled “Option A: Clone the newly created, empty repository”If you want to start a fresh project (that is, if you do not already have source code that you want to upload to STACKIT Git), the quickest way to get started is to clone your newly created repository like this:
-
Optional, but recommended: Create a dedicated directory for your new project and navigate to it on the command line.
-
Clone the repository by executing the command
git clone <url>.
Use the URL shown in your repository:
-
Navigate to the cloned repository.
The repository should now be in a new directory with the same name as your repository.
Option B: Connect an existing local source tree
Section titled “Option B: Connect an existing local source tree”If you already have written source code that you now would like to upload to STACKIT Git, follow these steps:
- Initialize a Git Repository: Unless you already have a Git Repository initialized in your local source tree, run
git initin your project’s directory. - Add STACKIT Git as the repository’s origin.
You need to tell Git where to push your changes. You would do that by specifying STACKIT Git as a remote. When you clone a repository from the Internet, the URL that you got your copy of the repository from will be automatically used for the origin remote.
If your local copy of the repository is missing some commits that exist in the remote repository, pushing will result in an error. There are two ways to fix this:
- Run
git pullto combine your local changes with the changes that exist in the remote repository. If this does not work, please follow the instructions in your terminal. - If you know what you are doing, you can also overwrite the remote repository using
git -f push. This action willpermanently alter your remote repository and is not suitable if you are working on a project together with other people.
How to Create a Commit
Section titled “How to Create a Commit”Now that you’ve connected your repository to your local development copy, it’s time to make commits.
- Optional, but recommended: If you didn’t generate the
LICENSEandREADME.mdfiles when creating the repository, add them now. Put them in your local development copy’s directory and add them to your commit, as shown below. - Create or edit one or multiple files.
If this is your first commit, you can create or modifyREADME.mdto practice. - Add each modified file to your commit with
git add:If you want to add all modified files in your source tree, you can runTerminal window git add README.mdgit add ., but be careful as this might add unwanted files as well.
You can check the commit by runninggit statusbefore committing.
Thegit addcommand should output nothing. - Commit your changes: Run
git commit.
You can also add a commit message containing information about the content of the commit:git commit -m My first commit.
By committing your changes, you create a new step in the version history of your program. They act like snapshots of your program’s state at a given point of time, and you will later be able to jump back and forth between them.
It is recommended to keep commits small and focused, so that, if necessary, they can be reverted or easily adapted into another context without too many side-effects. - Push your changes to STACKIT Git.
If you’re happy with the changes you made, the next step is to present them to the world by pushing them to STACKIT Git:
git pushWhen connecting via HTTPS, Git will ask you for your username and password, which you can enter interactively.
After refreshing the repository page, you should be able to see your changes in the repository.