Create your first DNS zone and query it
Last updated on
Prerequisites
Section titled “Prerequisites”- You have a STACKIT customer account: Create a customer Account
- You have a STACKIT user account: Create a user account
- You have a STACKIT project: Create a project
- You either own a domain name that you want to manage with STACKIT DNS or you want to use a STACKIT free subdomain.
In this getting-started guide you will create a DNS zone and configure DNS records for it. This guide shows the most common settings for a basic DNS setup. When following this guide, you will work with the STACKIT Portal. There are many other ways to manage DNS zones and records. For a deeper understanding, please consult Manage DNS zones, Manage DNS records and API Reference.
Prepare, create and configure a DNS zone
Section titled “Prepare, create and configure a DNS zone”At first create a new zone:
- Visit the STACKIT portal.
- On the sidebar click on DNS.
- On the bar on the top click on Create DNS zone.
- Fill out all needed inputs in the wizard.
-
Zone name: Enter a name of your choosing.
-
Leave the Type-selector on Primary.
-
Fill out the Domain-field. If you own a domain, enter it here. If you don’t own a domain, activate the Use free STACKIT subdomain-select, enter a desired subdomain and choose a domain part in the dropdown.
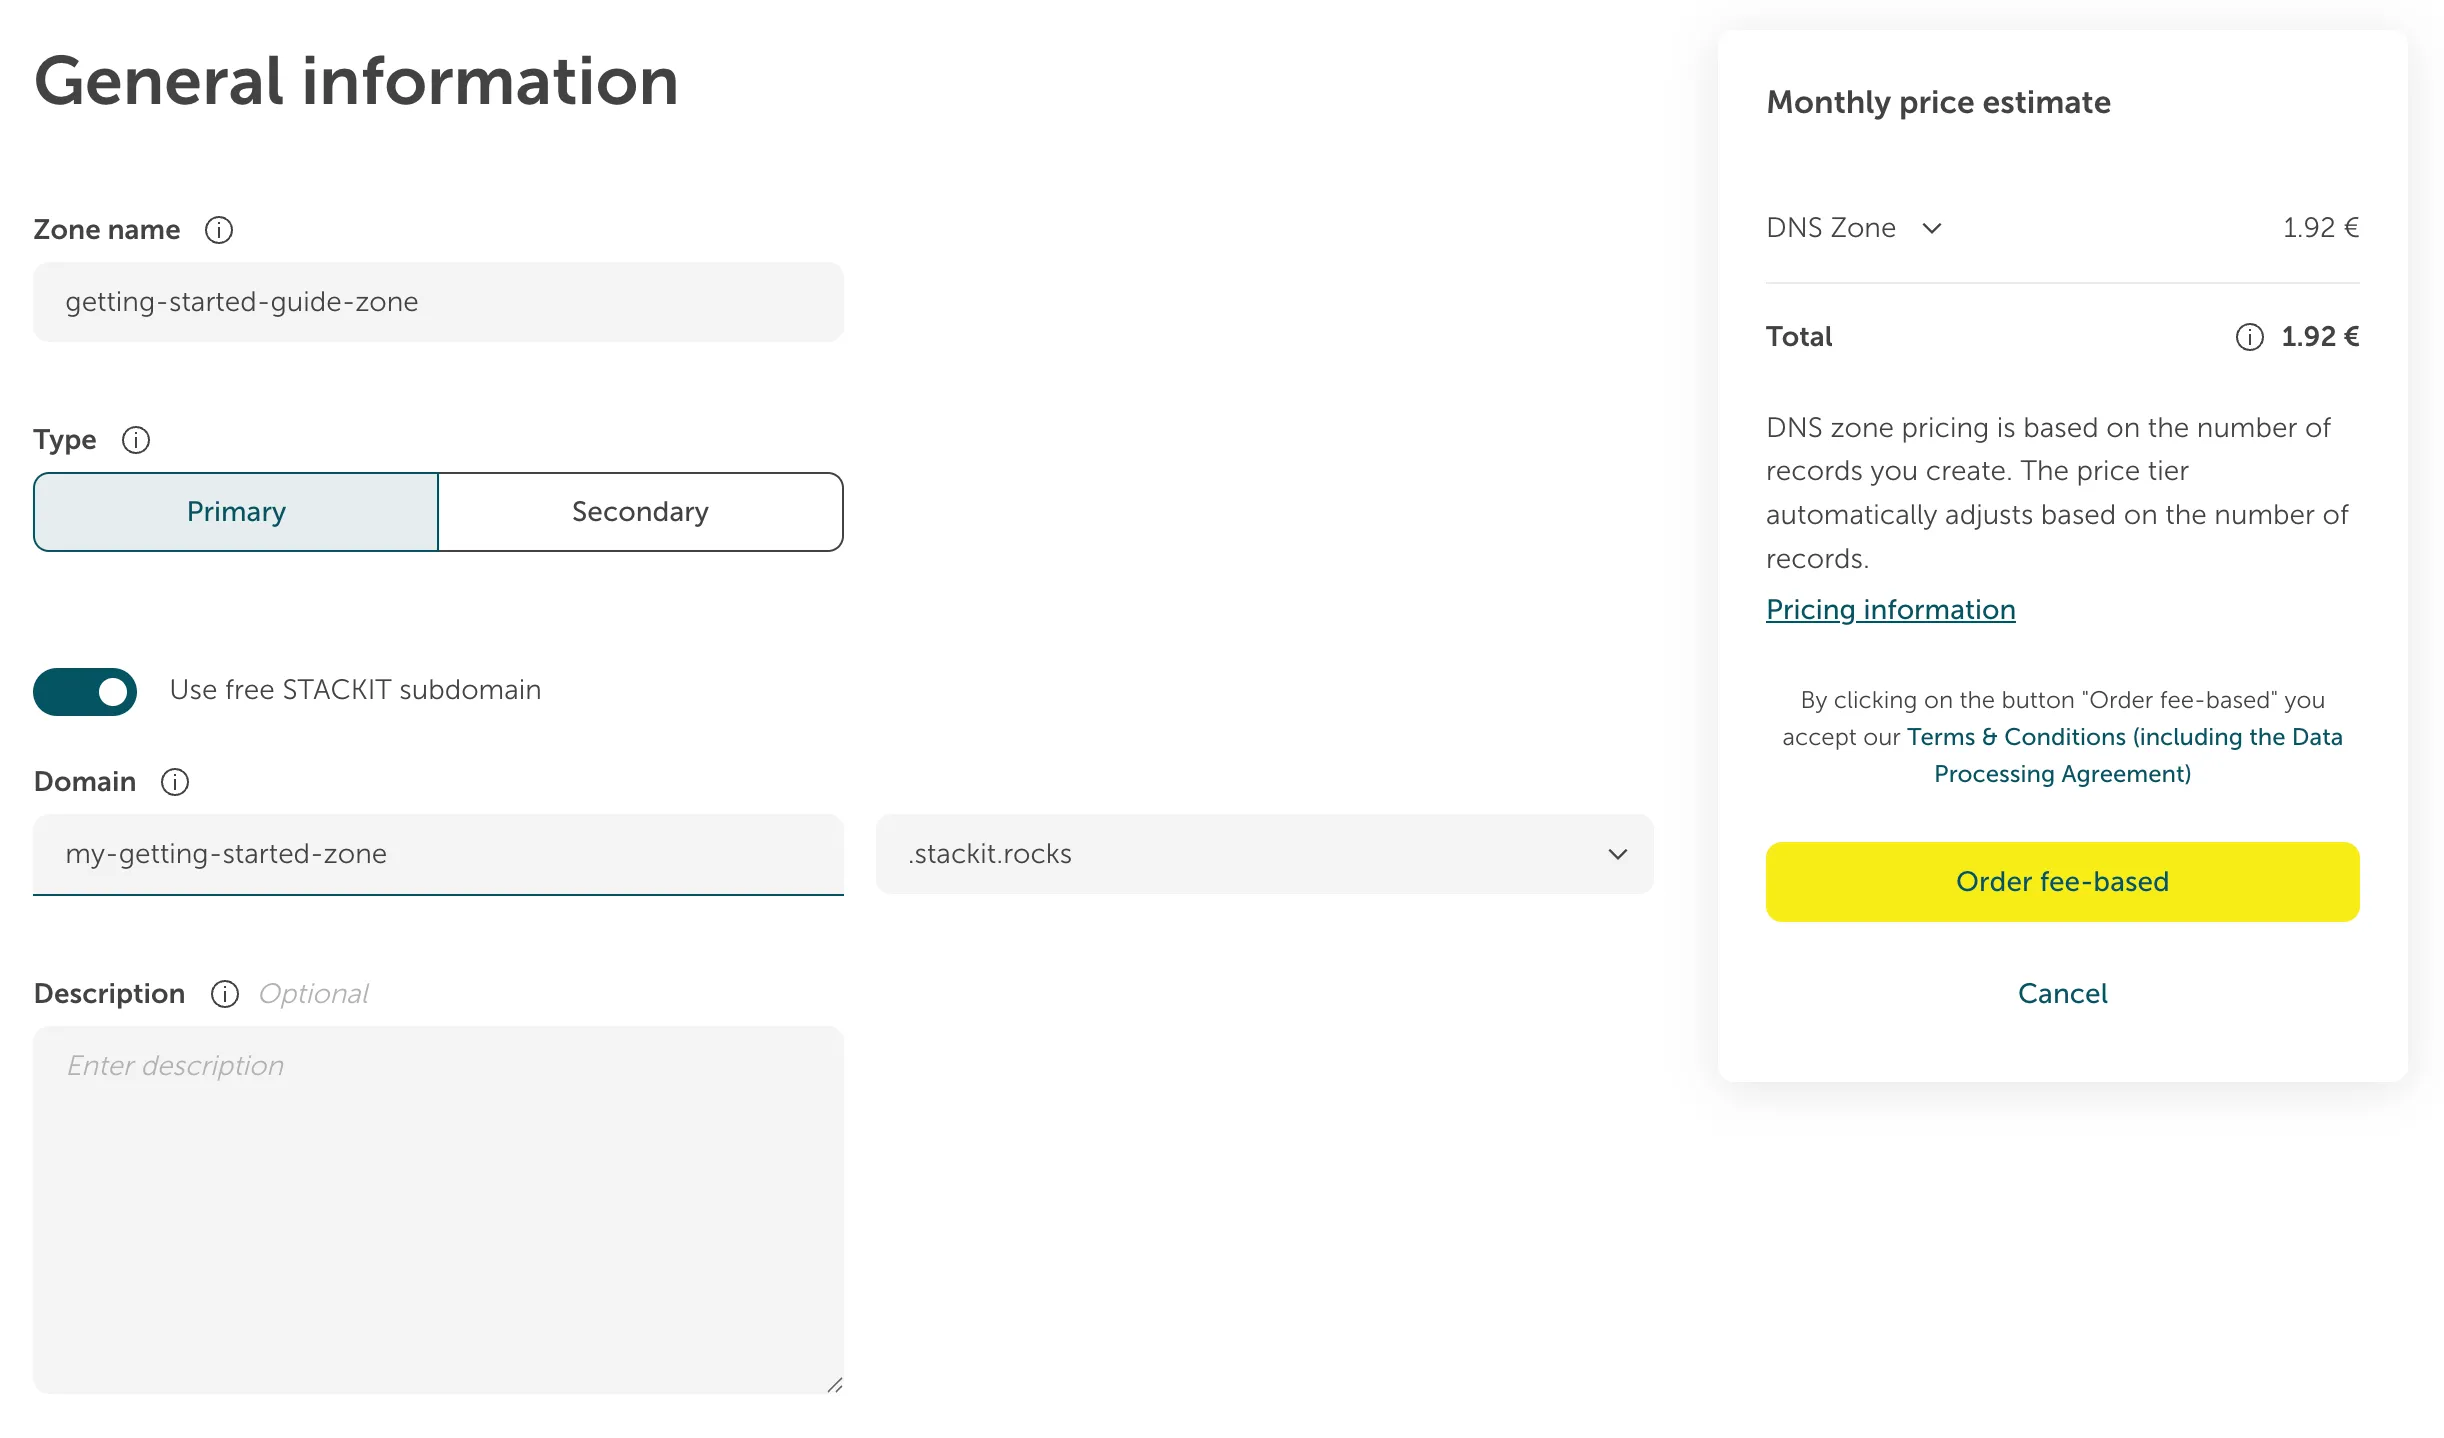
-
- Click on Order fee-based.
Add DNS records
Section titled “Add DNS records”To make your DNS zone useful, you need to add DNS records. In this guide, we’ll create some common record types that you’ll typically need.
Open your zone and create a record
Section titled “Open your zone and create a record”In this guide we will create a TXT-record to allow Google mail servers to send mails for our newly created domain. This is among other things done with an SPF-entry.
- On the sidebar click on DNS.
- Click on your newly created zone.
- You will see the zone overview.
- On the left pane click on Resource records.
- On the top bar click on Create resource record.
- On the new pane enter all needed information:
- Name: Leave the name-field blank.
- Description: Optionally enter a Description.
- TTL: Change the TTL to
600. - Type: Select
TXT. - Record data: Paste
v=spf1 include:_spf.google.com ~all.
- On the bottom of the pane, click on Create.
OPTIONAL: Update your domain registrar
Section titled “OPTIONAL: Update your domain registrar”Before you can test your DNS zone, you need to update the nameservers at your domain registrar to use STACKIT DNS.
- Log in to your domain registrar’s control panel.
- Find the nameserver configuration for your domain.
- Replace the existing nameservers with the STACKIT nameservers you noted down in the previous step.
- Save the changes.
Test your DNS zone from your local machine
Section titled “Test your DNS zone from your local machine”Once you’ve configured your DNS records and updated the nameservers at your registrar, you can test the DNS resolution from your local machine.
Query the TXT record
Section titled “Query the TXT record”To verify that your TXT record is working correctly, follow these steps:
Replace my-getting-started-zone.stackit.rocks with the name of your zone.
-
Open a PowerShell.
-
Execute the following command:
Terminal window nslookup -type=TXT my-getting-started-zone.stackit.rocks. -
Verify the result: Look for a line that starts with
;; ANSWER SECTION:Non-authoritative answer:my-getting-started-zone.stackit.rocks text ="v=spf1 include:_spf.google.com ~all"If you can find it and if you see a line with your SPF-record, than your creation was successful.
Replace my-getting-started-zone.stackit.rocks with the name of your zone.
-
Open a terminal.
-
Execute the following command:
Terminal window dig TXT my-getting-started-zone.stackit.rocks -
Verify the result: Look for a line that starts with
;; ANSWER SECTION:;; ANSWER SECTION:my-getting-started-zone.stackit.rocks. 600 IN TXT "v=spf1 include:_spf.google.com ~all"If you can find it and if you see a line with your SPF-record, than your creation was successful.
Now your DNS zone is set up and ready to serve DNS queries for your domain. You can manage and update your DNS records at any time through the STACKIT Portal or with the other options described in this chapter.
Next steps
Section titled “Next steps”From here you can explore more advanced DNS features: